Appetizers · Part 2 of 3: Instructions
Crispy Turkish Fan-Fried Eggplant with Garlic Yogurt Step-by-step instructions
- Prep
- Cook
- Total
- Serves
- 4
Before you start
Before you begin, heat the oven to 425°F (220°C) and line a baking sheet with parchment paper. Have the eggplants pierced and ready to roast. Meanwhile, measure out the flour, oil, and seasonings. Prepare the garlic yogurt by mixing the yogurt, garlic, and salt in a small bowl; set aside.
For the red pepper butter, have the butter, paprika, and red pepper flakes measured and ready in a small saucepan. The oil should be in a large skillet, ready to heat once the eggplants are roasted.
Ingredients at a glance (10)
- 2 large eggplants
- 1 tsp kosher salt
- 1/2 cup all-purpose flour
- 1 cup vegetable oil, for frying
- 1 cup thick Greek yogurt
- 2 cloves garlic, minced
- 1/4 tsp salt
- 3 tbsp unsalted butter
- 1 tsp sweet paprika
- 1/2 tsp red pepper flakes
Instructions
Phase 1: Roast and Press
- Roast the EggplantsHeat the oven to 425°F (220°C). Pierce the eggplants several times with a fork to allow steam to escape. Place them on a baking sheet and roast for 25-30 minutes, turning once, until the skin is wrinkled and the flesh feels very soft when pressed. Let cool just enough to handle, then peel off the skin while keeping the green stem intact.Look for The skin should be blistered and the flesh extremely tender.Tip Piercing prevents the eggplants from bursting in the oven.
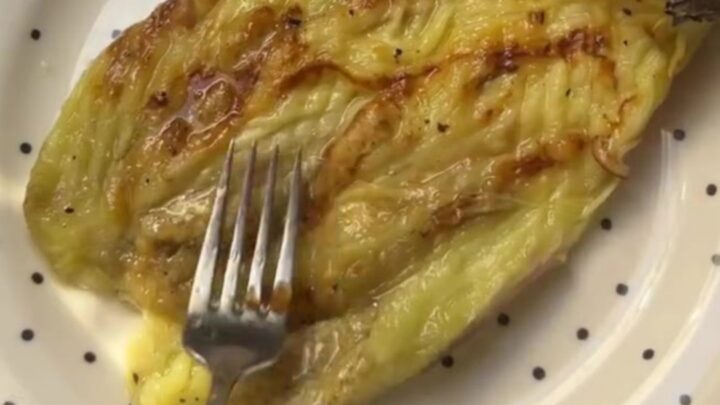
- Press into FansPlace each peeled eggplant on a cutting board. Using a fork, gently press down lengthwise to flatten into a wide accordion fan shape. The flesh should spread into ridges. Sprinkle with kosher salt and let sit for 5 minutes to draw out excess moisture.Look for The eggplant should hold its fan shape without breaking apart.Tip Press gently—the flesh is delicate and can tear.
After roasting, the eggplants should be collapsed, with wrinkled skin and a soft, steamy interior. Once peeled and pressed, they should resemble wide accordion fans, with the green stem intact.
The flesh will be tender and slightly shiny. Sprinkle with salt and let them rest for a few minutes; this draws out moisture and helps the flour adhere better.
Phase 2: Coat and Fry
- Coat with FlourSpread the all-purpose flour on a plate. Dredge each eggplant fan in the flour, pressing lightly so the flour adheres to all the ridges and crevices. Shake off any excess flour.Look for The eggplant should be evenly coated with a thin layer of flour.Tip This helps create a crispy crust when frying.
- Fry Until GoldenHeat the vegetable oil in a large skillet over medium-high heat until shimmering (about 350°F / 175°C). Carefully lay the floured eggplant fans into the hot oil, working in batches to avoid crowding. Fry for about 3 minutes per side, flipping once, until both sides are blistered, amber, and crisp.Look for The eggplant should be deep golden-brown and sound crunchy when tapped.Tip Maintain the oil temperature; adjust heat as needed.
- Drain on Paper TowelsUsing tongs, transfer the fried eggplant fans to a plate lined with paper towels to drain excess oil. Sprinkle lightly with a pinch of salt while still hot.Look for The paper towels should absorb excess oil, leaving the crust crisp.Tip Do not stack—this keeps them crispy.
The flour-coated fans should be dry to the touch, with a thin, even coating. When they hit the hot oil, they should sizzle immediately and vigorously. After three minutes per side, they should be amber-blistered and crisp, with a satisfying crunch when tapped. Drain on paper towels to remove excess oil; they should remain crisp, not greasy.
Phase 3: Sauce and Serve
- Make Garlic YogurtIn a small bowl, combine the thick Greek yogurt, minced garlic, and salt. Stir until smooth and well blended. Set aside.Look for The yogurt should be thick and creamy with a noticeable garlic aroma.Tip Use full-fat yogurt for the best texture.
- Make Red Pepper ButterIn a small saucepan, melt the butter over medium heat. Add the sweet paprika and red pepper flakes, stirring for 30 seconds until fragrant and sizzling. Remove from heat.Look for The butter should be bubbling and deeply red from the paprika.Tip Do not let the butter burn—just until aromatic.
- Assemble and ServeSpread a generous layer of garlic yogurt on a serving platter. Arrange the crispy eggplant fans on top. Drizzle with the hot red pepper butter, letting it sizzle over the yogurt. Serve immediately while the eggplant is still crisp.Look for The butter should sizzle as it hits the yogurt and eggplant.Tip Serve right away to enjoy the crunch.
The garlic yogurt should be thick, creamy, and aromatic, with a balanced garlic flavor. The red pepper butter should be melted, deeply red, and fragrant with paprika and chili. When drizzled over the eggplant and yogurt, it should sizzle and pool around the fans. The dish should look vibrant and inviting, ready to be devoured.
Common mistakes
One common mistake is not roasting the eggplants long enough. They must be very soft, otherwise the flesh will be tough and not form a proper fan. Another is overcrowding the skillet during frying, which lowers the oil temperature and results in soggy, greasy eggplant.
Always fry in batches and allow the oil to return to temperature between batches. Finally, be gentle when pressing the eggplant into fans—too much pressure can tear the flesh.
How to tell it’s done
The eggplants are done when the skin is deeply wrinkled and the flesh yields easily to gentle pressure. After frying, the fans should be deep golden brown with a blistered, crunchy exterior.
The yogurt should be thick and smooth, and the butter should be fragrant and sizzling. The dish is best served immediately, while the eggplant is still crisp and the butter is warm.
Up next · Part 3 of 3
4 variations · storage & make-ahead · 5 answers · printable card
Tips, FAQ & printable recipe (Part 3)← Back to the ingredients (Part 1)