Appetizers · Part 2 of 3: Instructions
Crispy Turkish Cigar Pastries with Spiced Beef Step-by-step instructions
- Prep
- Cook
- Total
- Serves
- 4
Before you start
Before starting, gather all ingredients and equipment. If using phyllo dough instead of yufka, thaw it according to the package directions and keep it covered with a damp towel to prevent drying.
Set up a work station with a clean surface, a small bowl of water for sealing, and a plate for the finished cigars.
Prepare the filling first, as it needs to cool slightly before assembling. Have the oil and skillet ready for frying, and line a plate with paper towels for draining. This organization makes the process smooth and enjoyable.
Ingredients at a glance (7)
- 1 packet triangular Turkish yufka sheets (or phyllo dough)
- 1 lb ground beef
- 1 medium onion, finely diced
- 1/2 tsp black pepper
- 1 tsp pul biber (Turkish red pepper flakes)
- 1/4 cup fresh parsley, chopped
- 1 cup vegetable oil, for frying
Instructions
Prepare the Filling and Roll the Cigars
- Prepare the FillingHeat a large skillet over medium-high heat. Add the ground beef and cook, breaking it up with a spatula, until browned and crumbly. Add the diced onion and continue cooking until the onion is soft and translucent, about 3 minutes. Season with black pepper and pul biber. Stir in the chopped parsley and remove from heat. Allow the filling to cool slightly before assembling.Look for The beef is browned and the onions are soft; the mixture is fragrant with pepper and parsley.Safe temperature 160°F (71°C) internal temperature (ground meat)Tip Cooling the filling prevents the phyllo from becoming soggy and helps the cigars hold their shape.
- Assemble the CigarsLay one triangular yufka sheet on a clean work surface with the wide base facing you. Place a line of the beef filling along the wide edge, leaving a small border on each side. Fold the sides inward over the filling, then roll the pastry tightly away from you into a slender cigar shape. Dip your finger in water and moisten the pointed tip to seal the roll.Look for The roll is tight and even, with the tip sealed securely.Tip Keep the filling line about 1/2 inch thick for even cooking and easy rolling.
- Repeat with Remaining FillingContinue with the remaining yufka sheets and filling until all are used. Arrange the finished cigars on a plate or tray in a single layer, not touching, so they don't stick together.Look for All cigars are neatly rolled and sealed.Tip If the yufka sheets are very dry, lightly brush with water to soften before rolling.
The filling should be browned, aromatic, and cooled slightly. The cigars are rolled tightly, with the tips sealed. They should look neat and uniform, ready for frying. If any have loose edges, press them to seal.
Fry Until Golden and Crisp
- Heat the OilPour the vegetable oil into a large skillet to a depth of about 1/2 inch. Heat over medium heat until the oil shimmers and a small piece of phyllo sizzles immediately when added.Look for The oil is hot but not smoking; a test piece bubbles vigorously.Tip Maintaining medium heat ensures the pastries cook through without burning.
- Fry the CigarsCarefully place a few cigars into the hot oil, seam side down, without overcrowding. Fry for about 2 minutes, then turn and fry for another 2 minutes, until all sides are blistered, golden amber, and rigid. Adjust the heat as needed to keep the oil at a steady sizzle.Look for The cigars are evenly golden brown and crisp to the touch.Tip Fry in batches to avoid lowering the oil temperature.
- Drain the PastriesRemove the fried cigars with a slotted spoon and transfer to a plate lined with paper towels to drain excess oil. Repeat with the remaining cigars.Look for The paper towels absorb the oil, and the cigars remain crispy.Tip Do not stack the hot cigars; keep them in a single layer to preserve crispness.
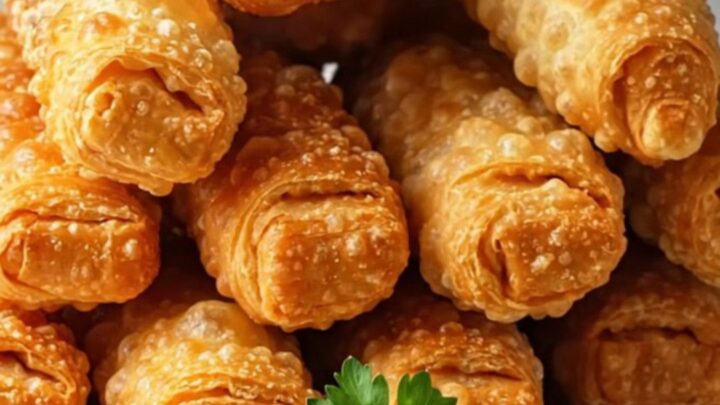
The oil is shimmering and the cigars are frying gently. They should be turning golden brown with blistered surfaces. The kitchen fills with the savory aroma of beef and fried pastry. The cigars feel rigid and sound crackly when tapped.
Drain and Serve Hot
- Serve HotArrange the crispy cigar pastries on a serving platter. Serve immediately while hot and crackling. They are perfect as an appetizer or snack, and can be enjoyed on their own or with your favorite dipping sauce.Look for The cigars are golden, blistered, and emit a tempting aroma.Tip For the best experience, serve within 10 minutes of frying.
The fried cigars are draining on paper towels, still sizzling slightly. They are deeply golden and crisp. When broken, they emit a loud crunch, revealing the juicy, spiced beef filling. Serve immediately for the best texture.
Common mistakes
One common mistake is overfilling the pastries, which makes them difficult to roll and can cause them to burst open during frying. Another is using oil that is not hot enough, resulting in greasy, soggy pastries. Conversely, oil that is too hot will brown the outside before the inside is cooked.
Avoid crowding the pan, as this lowers the oil temperature and leads to uneven cooking. Also, be sure to seal the edges thoroughly with water; otherwise, the cigars may unroll. Finally, don't skip cooling the filling, as hot filling can make the phyllo tear.
How to tell it’s done
The pastries are done when they are deep golden brown, blistered, and rigid to the touch. The filling should be piping hot throughout, and the internal temperature of the beef should reach 160°F (71°C) to ensure safety.
You can test one by cutting it in half; the crust should shatter audibly, and the filling should be moist and fragrant. If the cigars brown too quickly, reduce the heat slightly and fry for a longer time to ensure the inside is heated through without burning the exterior.
- Ground meat: 160°F (71°C) in the thickest part
Up next · Part 3 of 3
4 variations · storage & make-ahead · 5 answers · printable card
Tips, FAQ & printable recipe (Part 3)← Back to the ingredients (Part 1)