Dinner · Part 2 of 3: Instructions
Crispy Turkish Adana Kebab Wrap with Charred Peppers Step-by-step instructions
- Prep
- Cook
- Total
- Serves
- 4
Before you start
Before you start, make sure the charcoal grill is ready and the meat mixture is well chilled. Prepare the sumac onions by tossing sliced red onions with ground sumac and a pinch of salt; set aside.
Roast the green peppers and tomatoes in a hot oven or over the grill until charred, then slice. Have all your ingredients and equipment within reach, as the cooking process moves quickly once the kebabs hit the grill.
Ingredients at a glance (11)
- 500 g (about 1 lb) minced lamb and beef
- 1/2 cup minced red bell pepper
- 1/4 cup finely chopped lamb tail fat
- 3 cloves garlic, minced
- 2 tsp paprika
- 1 1/2 tsp sea salt
- 4 large lavash flatbreads
- 1 cup sliced red onions tossed with sumac
- 2 roasted green peppers, sliced
- 2 roasted tomatoes, sliced
- 1/2 cup fresh parsley leaves
Instructions
Prepare and Skewer
- Prepare the Adana Kebab MixtureIn a large bowl, combine the minced lamb and beef, minced red bell pepper, chopped tail fat, garlic, paprika, and sea salt. Knead the mixture with your hands for about 5 minutes until it becomes tacky and well combined. Cover and refrigerate while you prepare the grill.Look for The mixture should feel sticky and hold together when pressed.Tip Keep the meat cold; it shapes more easily and stays juicy.
- Skewer the Kebab MixtureDivide the meat mixture into 4 equal portions. Press each portion onto a wide flat iron skewer, shaping it into a long, flat ribbon about 1 inch thick. Make sure the meat is firmly attached and evenly distributed.Look for The meat should be about 1 inch thick and smooth on the surface.Tip Wet your hands slightly to prevent sticking.
- Preheat the Charcoal GrillLight the charcoal and wait until it is covered with a fine gray ash and glowing red. Arrange the coals in a single layer for direct heat. Place the grill grate over the coals and let it heat for 5 minutes.Look for The coals should be glowing with a light ash coating.Tip The grill is ready when you can hold your hand 5 inches above the grate for only 3 seconds.
The meat mixture should be tacky and hold together when pressed. The skewers should be evenly coated with a 1-inch thick layer of meat.
The grill should be preheated with glowing coals. The mixture should feel cold and firm, making it easy to shape. The aroma is fresh and spiced.
Grill and Warm
- Grill the KebabsPlace the skewers on the hot grill. Cook for 4-5 minutes per side, turning once, until the meat is charred at the edges and cooked through to 160°F (71°C). Use tongs to turn the skewers carefully.Look for The outside should be deeply charred and caramelized.Safe temperature 160°F (71°C) internal temperature (ground meat)Tip Avoid pressing down on the meat; it releases juices.
- Warm the Lavash Over the KebabsWhile the kebabs are still on the grill, lay the lavash flatbreads directly over the skewers. Press gently so the bread absorbs the spiced meat juices. Warm for 30-60 seconds per side, until pliable and lightly toasted.Look for The bread should be soft, warm, and fragrant with meat juices.Tip Warming the lavash makes it easier to roll without cracking.
- Slide the Kebab Off the SkewerUsing a fork or tongs, slide the cooked kebab off the skewer onto a cutting board. Repeat with the remaining skewers. Let the meat rest for 3 minutes before assembling the wraps.Look for The meat should be juicy and hold together when sliced.Safe temperature 160°F (71°C) internal temperature (ground meat)Tip Resting allows the juices to redistribute.
The kebabs should be charred on the outside and cooked through to 160°F (71°C). The lavash should be warm, pliable, and lightly toasted, absorbing the meat juices. The kitchen should smell smoky and savory. Check that the meat is not pink in the center before proceeding.
Assemble and Toast
- Assemble the WrapsPlace a warm lavash on a work surface. Lay a portion of kebab meat in the center, then top with sumac onions, roasted green peppers, roasted tomatoes, and fresh parsley. Fold the sides over the filling and roll tightly into a cylinder.Look for The wrap should be snug and full but not bursting.Tip Tuck the filling as you roll for a tight wrap.
- Toast the Wraps on the GrillPlace the assembled wraps on the grill over medium heat. Toast for 1-2 minutes per side, until the bread is golden and crispy. Press lightly with a spatula to ensure even crisping.Look for The wrap should be golden brown and crisp to the touch.Tip Don't leave them unattended; they can burn quickly.
- Slice and ServeRemove the wraps from the grill and let them cool for 1 minute. Slice each wrap in half diagonally and serve immediately, with extra sumac onions on the side if desired.Look for The cut reveals juicy meat and colorful vegetables.Tip Serve with a squeeze of lemon if you like extra brightness.
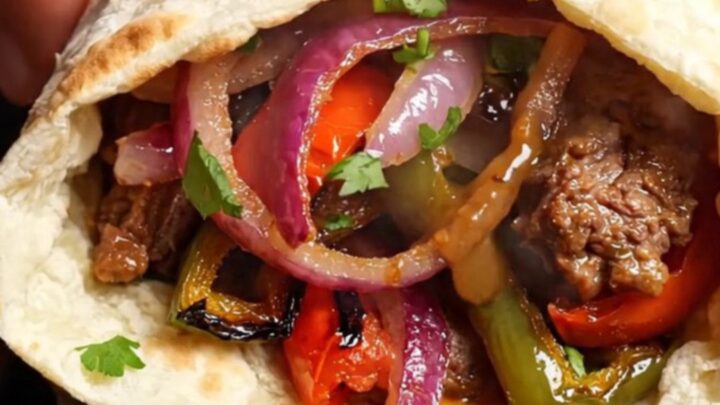
The wraps should be tightly rolled and filled with a colorful array of kebab, onions, peppers, tomatoes, and parsley. After toasting, they should be golden brown and crisp to the touch. The cut wrap reveals juicy meat and vibrant vegetables, with a satisfying crunch.
Common mistakes
One common mistake is overworking the meat mixture, which can make the kebabs dense. Knead just until tacky. Another is using lean meat with no fat, resulting in dry kebabs; the tail fat is essential.
Avoid pressing down on the skewers while grilling, as this releases juices. When toasting the wraps, keep a close eye to prevent burning, as the sugars in the bread can char quickly.
How to tell it’s done
The kebabs are done when they reach an internal temperature of 160°F (71°C) on an instant-read thermometer. The outside should be deeply charred and caramelized, while the inside remains juicy and cooked through.
The lavash should be golden brown and crispy when toasted. If the wraps are not yet crispy, continue grilling for another minute per side.
- Ground meat: 160°F (71°C) in the thickest part
- Steaks, chops and roasts: 145°F (63°C) in the thickest part, then a 3-minute rest
Up next · Part 3 of 3
4 variations · storage & make-ahead · 5 answers · printable card
Tips, FAQ & printable recipe (Part 3)← Back to the ingredients (Part 1)