Appetizers · Part 2 of 3: Instructions
Crispy Tornado Spiral Street Potatoes Step-by-step instructions
- Prep
- Cook
- Total
- Serves
- 1
Before you start
Before beginning, ensure all ingredients are measured and the workstation is organized. Set up the spiral cutter on a stable surface and fill the deep fryer with enough oil to fully submerge the potato.
Have a wire rack or paper towels ready for draining the potato once it is removed from the fryer. Ensure the honey-butter seasoning and sriracha mayo are within reach for immediate application after cooking.
Ingredients at a glance (6)
- 250 g Russet potato
- 1 35cm bamboo stick
- 30 g cornstarch-tempura batter
- 1 quart vegetable oil, for frying
- 15 g honey-butter cheddar seasoning
- 1 tbsp spicy sriracha mayo
Instructions
Spiral cutting and preparation
- Prepare the potatoSecure the Russet potato onto a 35cm bamboo stick. Use a manual spiral potato cutter to rotate the blade from the top to the bottom, creating a continuous thin ribbon. Carefully fan the potato ribbon out along the length of the skewer to ensure even cooking.Look for The potato should form a uniform, stretched-out spiral that remains intact on the skewer.Tip Keep the potato in a bowl of cold water until ready to use to prevent browning.
The potato should be securely mounted on the bamboo skewer and cut into a single, continuous, and even spiral. Once cut, the potato ribbon must be carefully stretched out along the skewer, creating uniform gaps between the spirals to allow for proper oil circulation and even crisping during the frying stage.
Frying to perfection
- Coat and fryDip the spiral-cut potato into the prepared cornstarch-tempura batter, ensuring all surfaces are lightly coated. Heat the vegetable oil in a deep fryer or pot to 365°F (185°C). Carefully lower the potato into the hot oil and fry for 4 minutes, or until the exterior is rigid and turns a deep amber-gold color.Look for The potato is done when it is bubbling vigorously, golden brown, and feels rigid when tapped with tongs.Tip Use a thermometer to ensure the oil stays at the target temperature for the best results.
The potato should be fully submerged in the 365°F (185°C) oil. Watch for the batter to puff up and turn a deep, consistent amber-gold color. The bubbles around the potato should be loud and vigorous, indicating that the moisture is being released and the exterior is becoming appropriately crisp and rigid.
Final seasoning and assembly
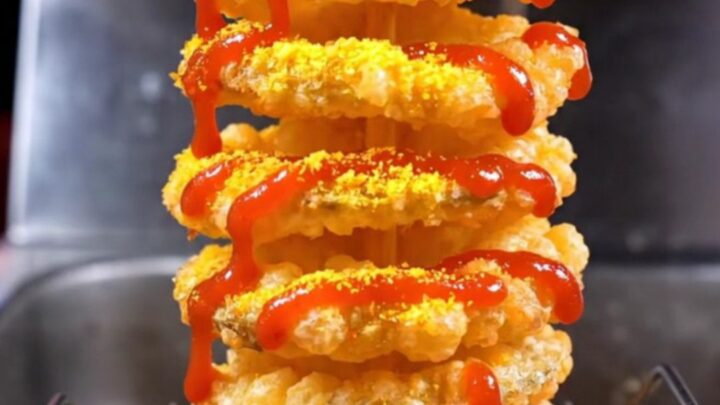
- Season and serveRemove the fried potato from the oil and let it drain briefly on a wire rack. While still hot, sprinkle the honey-butter cheddar seasoning evenly over the entire surface. Finish by drizzling a generous amount of spicy sriracha mayo over the top before serving immediately while hot and crispy.Look for The seasoning should adhere well to the hot, freshly fried surface of the potato.Tip Serve immediately to maintain the signature hollow crispy texture.
Once removed from the fryer, the potato should be briefly drained to remove excess oil. While still steaming hot, the seasoning must be applied immediately so it adheres to the crispy surface.
The final drizzle of sriracha mayo should be applied just before serving to maintain the textural integrity of the potato.
Common mistakes
A common mistake is failing to stretch the potato spiral wide enough on the skewer, which prevents the oil from circulating and leads to uneven cooking.
Another frequent error is overcrowding the fryer or letting the oil temperature drop too low, which results in a greasy and limp potato. Finally, avoid using a batter that is too thick, as it will mask the delicate crunch of the spiral.
How to tell it’s done
The tornado potato is finished cooking when the exterior is deep amber-gold and firm to the touch. When tapped with metal tongs, the spiral should sound hollow and feel rigid rather than soft.
The internal texture should be tender and fluffy, providing a sharp contrast to the crunchy, battered exterior that has been cooked at 365°F (185°C).
Up next · Part 3 of 3
2 variations · storage & make-ahead · 3 answers · printable card
Tips, FAQ & printable recipe (Part 3)← Back to the ingredients (Part 1)