Appetizers · Part 1 of 3: Ingredients
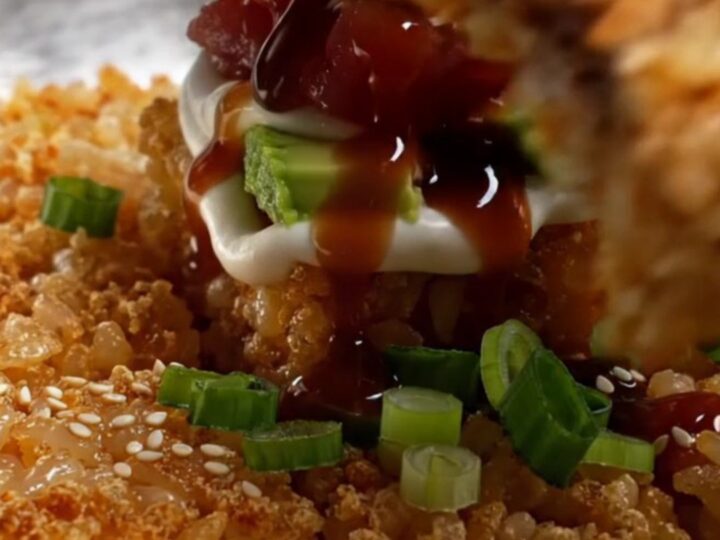
Crispy Rice Tuna Tartare Bites with Avocado & Sweet Soy
- Prep
- Cook
- Total
- Serves
- 8
These crispy rice tuna tartare bites deliver the ultimate restaurant luxury at home—warm crunchy rice against silky cold spicy tuna, creamy avocado, and a sweet soy drizzle.
Each bite is a perfect balance of textures and flavors: the golden, crackling rice gives way to a rich, spicy tuna topping that melts on the tongue. With simple ingredients and a few clever techniques, these elegant appetizers come together quickly and are guaranteed to impress guests or elevate a weeknight dinner.
Crispy rice tuna tartare bites have become a viral sensation for good reason: they are visually stunning, bursting with umami, and incredibly satisfying to eat. The base is sushi rice, seasoned with rice vinegar and sugar, pressed into a slab, frozen, and then pan-fried until every side is golden and crackling.
On top goes a layer of lime-kissed avocado, a mound of spicy tuna tartare tossed with Kewpie mayo and sriracha, and a final drizzle of sweet soy glaze. The result is a bite-sized appetizer that feels both playful and refined, perfect for parties, game-day spreads, or a special treat.
Ingredients
- 2 cups cooked sushi rice, seasoned with rice vinegar and sugar
- 2 tbsp rice vinegar
- 1 tsp sugar
Spicy Tuna Tartare
- 8 oz sushi-grade tuna, finely diced
- 3 tbsp Kewpie mayonnaise
- 1 1/2 tbsp sriracha
- 1 tsp toasted sesame oil
- 2 tbsp sliced green onions
Topping
- 1 ripe avocado, mashed with lime juice
- 1 tbsp fresh lime juice
Drizzle
- 3 tbsp sweet soy glaze
Garnish
- 1 tbsp toasted sesame seeds
For Frying
- 1/2 cup neutral oil, such as canola or vegetable, for frying
Why this recipe works
The key to getting that dramatic crispy exterior is to press the seasoned sushi rice firmly into a dish and freeze it until completely firm. This step allows the rice to hold its shape when cut and fried, so each piece develops a deep golden crust without falling apart. The freezing also ensures the interior stays tender and slightly chewy, creating a wonderful textural contrast with the crunchy exterior.
Pan-frying the rice in a generous amount of hot oil is what gives it that all-around crackling crust. Frying each side for about 3 minutes ensures even browning and a satisfying crunch.
The high heat quickly caramelizes the surface, while the inside remains moist and cohesive. This method is similar to making arancini or fried rice cakes, but with a lighter, more delicate texture that pairs perfectly with the fresh tuna.
Notes and substitutions
Sushi rice is essential here because it is short-grain and sticky, which makes it easy to press and fry without falling apart. If you can't find sushi rice, use another short-grain rice like Calrose or Arborio. Season the rice while it is still warm so the vinegar and sugar absorb evenly. The rice should be slightly firm and not overly wet—if it is too sticky, let it cool a bit before pressing.
For the tuna, always buy sushi-grade or sashimi-grade from a trusted fishmonger. Keep it very cold until the moment you dice it, and use a sharp knife to make clean cuts.
Kewpie mayonnaise is richer and more tangy than regular mayo, but you can substitute with regular mayo and a touch of rice vinegar. The sweet soy glaze is available in Asian markets, or you can make your own by simmering soy sauce, honey, and rice vinegar until syrupy.
- Kewpie mayonnaise: Regular mayonnaise (use 2 tbsp regular mayo plus 1 tsp rice vinegar for tang)
- Sushi-grade tuna: Fresh salmon or hamachi (sushi-grade), or use cooked shrimp for a safer option
- Sweet soy glaze: Mix 2 tbsp soy sauce, 1 tbsp honey, and 1 tsp rice vinegar; simmer until syrupy
- Sushi rice: Short-grain white rice or brown sushi rice, seasoned with vinegar and sugar
Equipment
- 8x8-inch baking dish
- Plastic wrap or parchment paper
- Sharp chef's knife
- Large skillet
- Tongs
- Mixing bowls
- Small offset spatula
- Paper towels
Up next · Part 2 of 3
7 steps · 10 min of cooking · what to look for at each stage
Step-by-step instructions (Part 2)