Desserts · Part 2 of 3: Instructions
Crispy Pistachio Rolled Baklava Fingers with Lemon Syrup Step-by-step instructions
- Prep
- Cook
- Total
- Serves
- 8
Before you start
Before starting, make the syrup and let it cool completely. This can be done up to a day ahead. Set out the phyllo dough to thaw if frozen, following package instructions.
Clarify the butter if making it from scratch, and have all tools ready: a thin wooden rod (or a thin rolling pin), a pastry brush, a sharp knife, and a 9x13-inch baking pan. Preheat the oven to 340°F (170°C). Keep the phyllo covered with a damp towel while assembling.
Ingredients at a glance (6)
- 20 sheets paper-thin baklava phyllo dough
- 1 cup clarified butter (sade yağ), melted
- 200 g ground pistachios (preferably Antep)
- 1 cup water
- 1 cup granulated sugar
- 1 tbsp fresh lemon juice
Instructions
Roll and Crinkle
- Prepare the Syrup and FillingIn a small saucepan, combine the water and sugar. Bring to a boil over medium heat, stirring until the sugar dissolves. Reduce the heat and simmer for 5 minutes. Remove from the heat and stir in the lemon juice. Let the syrup cool completely while you prepare the baklava.Look for The syrup should be slightly thickened and completely cool before using.Tip Cooling the syrup is crucial: hot syrup on hot baklava makes it soggy.
- Set Up the Phyllo StationLay one sheet of phyllo on a clean work surface. Keep the remaining sheets covered with a damp towel to prevent drying. Brush the entire sheet with melted clarified butter, using a pastry brush to coat evenly.Look for The phyllo should be lightly but evenly coated with butter.Tip Work quickly; phyllo dries out fast. Keep unused sheets covered.
- Add the Pistachio FillingSprinkle a generous, dense layer of ground pistachios over the buttered phyllo, covering the entire surface. Press the pistachios gently so they adhere to the butter.Look for The pistachios should form a thick, even blanket over the phyllo.Tip Use enough pistachios to fully cover the sheet, but not so much that rolling becomes difficult.
- Roll and Crinkle the PhylloPlace a thin wooden rod along one edge of the phyllo and roll the dough tightly around the rod to form a long cylinder. Gently push both ends of the cylinder toward the center to create accordion crinkles. Slide the crinkled roll off the rod and place it in a buttered baking pan.Look for The roll should have tight crinkles, resembling a ruffled cigar.Tip Push the ends gently to avoid tearing the phyllo; the crinkles create the signature texture.
By the end of this phase, you should have a tray of neatly rolled and crinkled phyllo cylinders, ready to be sliced. The phyllo should be evenly buttered and the pistachios well distributed.
The rolls should hold their shape without unraveling. If any tear, don’t worry—just press them together; the butter and syrup will seal them during baking.
Bake to Golden
- Slice the Rolls into FingersUsing a sharp knife, slice the rolled cylinders into 3-inch (7.5 cm) fingers. Arrange the fingers in a single layer in the buttered baking pan, cut-side up.Look for Each finger should be uniform in size, about 3 inches long.Tip Use a serrated knife and a gentle sawing motion to avoid crushing the delicate layers.
- Drench with Butter and BakePour the remaining melted clarified butter over the sliced baklava fingers, making sure each piece is well coated. Bake in a preheated oven at 340°F (170°C) for 40 minutes, until the pastry is golden amber and crackling.Look for The baklava should be deeply golden, with the butter bubbling and sizzling.Tip Rotate the pan halfway through baking for even browning.
After baking, the baklava should be deeply golden, with the butter bubbling and the pastry visibly crisp. The kitchen will smell of toasted butter and nuts. The fingers should feel firm when lightly pressed. If the edges are browning too fast, cover loosely with foil. The baking time may vary slightly, so check at the 35-minute mark.
Syrup Soak and Finish
- Soak with Cooled SyrupRemove the baklava from the oven and immediately ladle the cooled lemon syrup over the hot pastry. The sizzle you hear is the sound of perfection. Let the baklava absorb the syrup for at least 30 minutes before serving.Look for The syrup should be fully absorbed, leaving the pastry glossy and crisp.Tip Pour the syrup evenly over all pieces; the contrast of cold syrup on hot pastry ensures crispness.
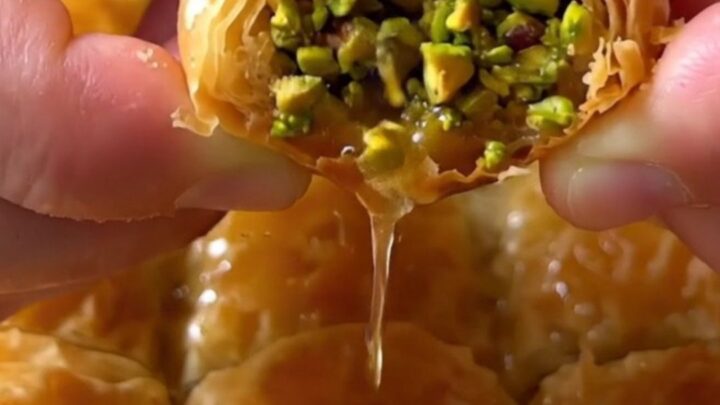
- Serve and EnjoyOnce the baklava has absorbed the syrup and cooled slightly, transfer to a serving platter. Optionally, garnish with a few extra ground pistachios. Serve at room temperature for the best crunch.Look for The fingers should be glossy, crisp, and fragrant with pistachio and butter.Tip Store leftovers in an airtight container to maintain crispness for several days.
When you pour the cool syrup over the hot baklava, you should hear a loud crackle and see the syrup bubble as it’s absorbed. The baklava will look glossy and smell intensely of pistachio and lemon. After 30 minutes, the syrup should be fully absorbed, and the fingers should be crisp yet tender. Let them cool to room temperature before serving.
Common mistakes
One common mistake is using warm syrup, which makes the baklava soggy. Always cool the syrup completely. Another is overfilling with pistachios, which can make rolling difficult and cause the pastry to split.
Use a generous but manageable layer. Also, avoid over-baking: the baklava should be golden, not dark brown. Finally, don’t skip the crinkling step—this creates the signature texture and helps the syrup penetrate evenly.
How to tell it’s done
The baklava is done when the pastry is deep golden amber and the butter is bubbling around the edges. The fingers should feel firm and crisp to the touch. After the syrup is poured, the baklava should absorb it within 30 minutes, leaving a glossy surface.
To test, pick up a finger—it should be crisp and shatter when bitten, not soggy. If it seems too soft, let it sit longer or return to a low oven for a few minutes to crisp up.
Up next · Part 3 of 3
4 variations · storage & make-ahead · 5 answers · printable card
Tips, FAQ & printable recipe (Part 3)← Back to the ingredients (Part 1)