Desserts · Part 2 of 3: Instructions
Crispy Pistachio Dubai Chocolate Bar with Toasted Kataifi Step-by-step instructions
- Prep
- Cook
- Total
- Serves
- 8
Before you start
Before you start, make sure the kataifi pastry is fully thawed if it was frozen. Chop the pistachios and measure all ingredients.
Line an 8-inch square baking pan with parchment paper, leaving overhang on two opposite sides to make lifting easy. Grate the chocolate just before you need it, as shavings can melt if left at room temperature for too long.
Have a large plate or bowl ready to catch the shavings. The filling can be mixed ahead of time and stored in the refrigerator for up to a day, but the chocolate base should be assembled just before chilling to prevent the shavings from clumping.
Ingredients at a glance (4)
- 1 1/2 cups whole green pistachios, shelled
- 1 cup kataifi pastry (shredded phyllo), thawed
- 1/2 cup pistachio paste (or pistachio butter)
- 12 oz Belgian milk chocolate, finely chopped
Instructions
Prepare the Filling
- Chop the PistachiosPlace the whole green pistachios on a cutting board. Using a sharp chef's knife, chop them rhythmically across the nuts until you have coarse pieces. Aim for a mix of larger chunks and smaller bits for texture. Set aside.Look for The pistachios should be coarsely chopped with some pieces about 1/4 inch.Tip Keep the knife blade parallel to the board and use a rocking motion for even chopping.
- Toast the KataifiHeat a dry skillet over medium heat. Add the kataifi pastry and toast, stirring constantly, until golden brown and crispy, about 3-5 minutes. Transfer to a bowl and let cool completely.Look for The kataifi will turn golden and crisp, with a nutty aroma.Tip Stir frequently to prevent burning. The pastry should be dry and crunchy, not chewy.
- Mix the FillingIn a medium bowl, combine the chopped pistachios, toasted kataifi, and pistachio paste. Stir with a spatula until the mixture is well combined and holds together slightly. Set aside.Look for The filling should be thick, vibrant green, and slightly sticky.Tip If the mixture seems too dry, add a teaspoon of pistachio paste at a time.
At the end of this phase, you should have a bowl of coarsely chopped pistachios, a skillet of golden toasted kataifi, and a thick, vibrant green filling that holds together when pressed. The aroma should be intensely nutty and slightly sweet. The filling should be cohesive but still have visible pieces of pistachio and strands of kataifi for texture.
Assemble the Bar
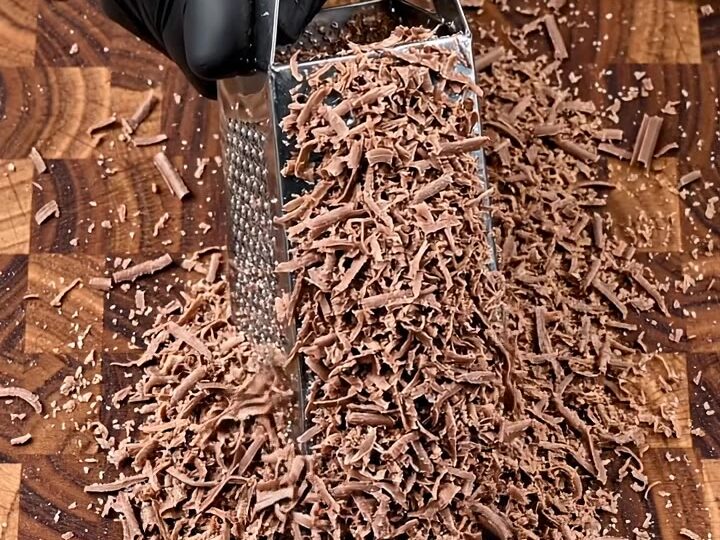
- Grate the ChocolateUsing a box grater, grate the solid block of Belgian milk chocolate into a fresh pile of chocolate shavings. Work over a large plate or bowl to catch all the shavings.Look for You should have a fluffy pile of chocolate shavings.Tip Chill the chocolate for 10 minutes before grating to make it easier to handle.
- Press the BaseLine an 8-inch square baking pan with parchment paper, leaving overhang on two sides. Press the grated chocolate into the bottom of the pan in an even layer, using the back of a spoon to compact it.Look for The chocolate layer should be about 1/4 inch thick and firmly packed.Tip Pressing firmly helps the chocolate hold together when unmolding.
- Add the FillingSpoon the pistachio-kataifi mixture over the grated chocolate base. Spread it evenly with a spatula, pressing gently to create a smooth, thick layer.Look for The filling should completely cover the chocolate base.Tip Use the back of a spoon to smooth the top for a neat finish.
The pan should have an even layer of grated chocolate at the bottom, topped with the pistachio-kataifi filling spread to the edges, and a top layer of chocolate shavings. The layers should be distinct, with the filling completely hidden. The chocolate shavings should look fluffy and not melted. Press gently to ensure the layers adhere.
Chill and Finish
- Top with ChocolateGrate the remaining chocolate (or use extra chocolate shavings) and sprinkle it over the filling, pressing gently to form a top layer. Smooth the surface with a spatula.Look for The top should be fully covered with chocolate shavings.Tip If you run out of shavings, melt a little extra chocolate and drizzle it over.
- Chill and SetPlace the pan in the refrigerator and chill for at least 1 hour, or until the chocolate is firm and set.Look for The bar should be firm to the touch and hold its shape when lifted.Tip Chilling fully ensures clean cuts and a crisp snap.
- Unmold and ServeLift the bar out of the pan using the parchment overhang. Place on a cutting board and break into pieces with your hands or cut with a sharp knife. Serve immediately.Look for The bar should break with a clean snap, revealing the green filling.Tip For clean cuts, use a warm knife and wipe it between slices.
After chilling, the bar should be firm and easy to lift out of the pan. The top should be smooth and glossy, with no cracks. When you break it, you should hear a clean snap, and the green filling should be visible in contrast to the chocolate. The texture should be crunchy and creamy at the same time.
Common mistakes
One common mistake is over-chopping the pistachios into a fine powder, which makes the filling pasty instead of crunchy. Aim for coarse pieces. Another issue is not toasting the kataifi long enough; it should be deeply golden and crisp, not pale and soft.
When pressing the chocolate base, make sure it's compact or the bar may fall apart when unmolded. Also, avoid using chocolate chips, as they don't grate well and may contain additives that affect the texture. Finally, don't skip the chilling time—rushing this step will result in a messy, melty bar.
How to tell it’s done
The chocolate bar is done when it is completely firm to the touch and holds its shape when lifted from the pan. After chilling for at least 1 hour, the bar should feel solid and not bend when you press on the top.
When you break it, it should snap cleanly rather than crumble. The filling should be thick and slightly sticky, with a vibrant green color. If the chocolate seems soft or the filling oozes out, return the bar to the refrigerator for another 30 minutes before serving.
Up next · Part 3 of 3
4 variations · storage & make-ahead · 5 answers · printable card
Tips, FAQ & printable recipe (Part 3)← Back to the ingredients (Part 1)