Appetizers · Part 2 of 3: Instructions
Crispy Panko Calamari Steak Strips with Lemon Caper Aioli Step-by-step instructions
- Prep
- Cook
- Total
- Serves
- 4
Before you start
Before you start, make sure the calamari steaks are completely thawed if frozen. Pat them dry thoroughly with paper towels. Set up your breading station with three shallow dishes: one for flour, one for beaten eggs, and one for panko.
Line a plate with paper towels for the fried strips. Have a deep-fry thermometer and a spider skimmer ready. The oil should be heated to 350°F (175°C) before you begin frying. Prepare the lemon caper aioli first and refrigerate it while you work.
Ingredients at a glance (11)
- 400 g tenderized calamari steaks
- 1/2 cup all-purpose flour
- 2 large eggs, beaten
- 2 cups Japanese panko breadcrumbs
- 1 tsp kosher salt
- 1/2 tsp black pepper
- 2 cups vegetable oil, for frying
- 1/2 cup mayonnaise
- 1 lemon, zested and juiced
- 2 tbsp capers, drained and chopped
- 1 clove garlic, minced
Instructions
Prep and Bread
- Prep the Calamari and AioliPat the calamari steaks completely dry with paper towels. Score the surface in a light crosshatch pattern, then cut into 1/2-inch-thick strips. Season with salt and pepper. In a small bowl, whisk together mayonnaise, lemon zest and juice, capers, and garlic. Cover and refrigerate until serving.Look for The calamari is dry and evenly scored, and the aioli is thick and creamy.Tip Scoring helps the strips curl slightly and creates more surface for the breading to cling to.
- Set Up the Breading StationPlace the flour in a shallow dish. Beat the eggs in a second dish. Put the panko in a third dish. Working with a few strips at a time, dredge the calamari in flour, shaking off any excess. Dip into the beaten egg, letting the excess drip off, then press firmly into the panko, coating all sides. Transfer to a plate and repeat with the remaining strips.Look for Each strip is evenly coated with no bare spots.Tip Press the panko firmly so it adheres well and creates a craggy, crispy crust.
The calamari strips are dry, scored, and seasoned. The breading station is set up with flour, beaten eggs, and panko. Each strip is evenly coated with no bare spots, and the aioli is chilling in the refrigerator. The workspace is tidy, and the oil is heating to the proper temperature.
Flash Fry
- Heat the OilPour the vegetable oil into a large heavy-bottomed pot, leaving at least 2 inches of space from the top. Heat over medium-high until a deep-fry thermometer registers 350°F (175°C). Adjust the heat to maintain the temperature while frying.Look for The oil shimmers and a breadcrumb dropped in sizzles immediately.Tip Use a thermometer for accuracy; oil that is too hot burns the crust, too cool makes it greasy.
- Fry the CalamariCarefully add the breaded calamari strips to the hot oil in small batches, without crowding. Fry for 90 seconds, turning occasionally, until golden amber and buoyant. The internal temperature of the squid should reach 145°F (63°C). Use a spider skimmer to transfer the fried strips to a paper towel-lined plate. Repeat with the remaining strips.Look for The crust is deep golden and crisp, and the strips float to the surface.Safe temperature 160°F (71°C) internal temperature (egg dishes)Tip Fry in small batches to keep the oil temperature steady; overcrowding lowers the heat and makes the coating soggy.
The oil is at 350°F (175°C), and the first batch of calamari strips is sizzling gently. After 90 seconds, they are golden amber and floating.
The kitchen smells of toasted panko and seafood. The strips are transferred to paper towels to drain, and the remaining batches are fried in the same manner.
Serve and Enjoy
- Drain and ServeLet the fried calamari strips drain briefly on paper towels. Serve immediately with the lemon caper aioli on the side for dipping. Enjoy while hot and crisp.Look for The strips are crisp and golden, and the aioli is chilled and zesty.Tip Serve right away—the crust stays crisp for only a short time.
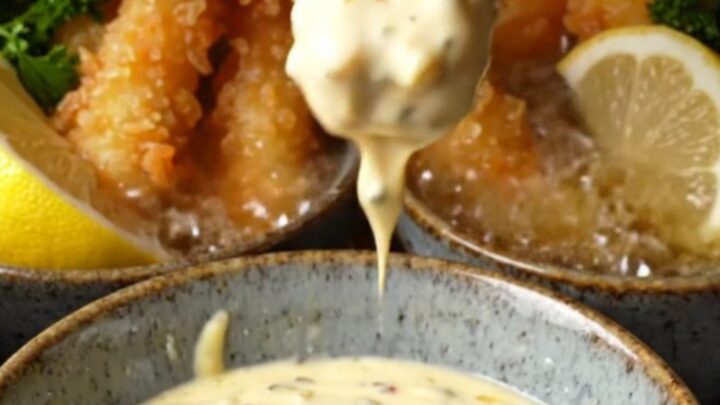
All the calamari strips are fried, drained, and piled on a serving platter. The lemon caper aioli is in a small bowl for dipping. The crust is crisp and golden, and the squid is tender. Serve immediately while hot to enjoy the full crunch.
Common mistakes
One common mistake is not drying the calamari well before breading, which causes the coating to steam and fall off. Another is overcrowding the pan, which lowers the oil temperature and results in greasy, soggy strips. Frying at too low a temperature also makes the coating absorb excess oil.
Conversely, if the oil is too hot, the crust will brown before the squid cooks through. Finally, don't skip the scoring—it helps the breading adhere and prevents curling. Use a thermometer and fry in small batches for consistent results.
How to tell it’s done
The calamari strips are done when they are deep golden amber and float to the surface of the oil. The crust should be shatteringly crisp, and the squid inside should be just cooked through—opaque and tender, not rubbery.
The safe internal temperature for squid is 145°F (63°C), which is reached quickly during the 90-second fry. To test, cut into one strip: the interior should be white and opaque, not translucent. Overcooking will make the squid tough, so trust the timing and the visual cues.
- Shellfish: 145°F (63°C) in the thickest part
- Egg dishes: 160°F (71°C) in the thickest part
- Steaks, chops and roasts: 145°F (63°C) in the thickest part, then a 3-minute rest
Up next · Part 3 of 3
4 variations · storage & make-ahead · 5 answers · printable card
Tips, FAQ & printable recipe (Part 3)← Back to the ingredients (Part 1)