Appetizers · Part 2 of 3: Instructions
Crispy Overnight Rosemary Focaccia with Sea Salt Step-by-step instructions
- Prep
- Cook
- Total
- Serves
- 8
Before you start
Before you begin, ensure your cold-proofed dough has been brought out of the refrigerator and allowed to sit at room temperature for at least thirty minutes. This step is crucial because it relaxes the gluten, making the dough much easier to stretch and dimple without it snapping back.
Prepare your baking vessel by lightly oiling it, even if you are using parchment paper, to guarantee a golden, non-stick bottom crust. Have your rosemary and salt ready to go so you can move quickly once the dough is ready for the oven.
Ingredients at a glance (4)
- 600 g cold-proofed focaccia dough
- 4 tbsp extra-virgin olive oil
- 2 tbsp fresh rosemary needles
- 1 tsp flaky Maldon sea salt
Instructions
Dimpling
- Dimpling the doughPlace the cold-proofed dough onto a prepared baking sheet or into a cast-iron pan. Using your fingers, press deep into the dough to create signature dimples and encourage the formation of large air bubbles throughout the loaf.Look for The dough should be covered in deep indentations.Tip Ensure your fingers are lightly oiled to prevent sticking to the dough.
The dough should fill the pan and show signs of aeration. As you press your fingers into the dough, you should feel the air bubbles resisting slightly, which is a sign of a well-fermented dough. The surface should be smooth and supple, showing no signs of tearing or dryness. If the dough feels too tight, let it rest for another ten minutes before attempting to dimple again to ensure you get those beautiful, deep indentations required for the final texture.
Seasoning
- Seasoning and proofingDrizzle the extra-virgin olive oil evenly over the surface of the dimpled dough. Sprinkle the fresh rosemary needles across the top, ensuring they settle into the oil and the dimples for maximum flavor penetration during the bake.Look for The oil should pool in the dimples.Tip Use a high-quality olive oil for the best aroma and flavor profile.
The surface of the dough should be glistening with the extra-virgin olive oil, which should settle into the dimples you created. The rosemary needles should be distributed evenly, ideally resting inside the pools of oil, which prevents them from burning too quickly in the high heat.
Check that the oil has coated the entire surface, including the edges, to ensure the bread fries slightly as it bakes, contributing to the ultimate crispy texture that defines a perfect focaccia.
Baking
- Baking to perfectionPreheat your oven to 450 degrees Fahrenheit. Bake the focaccia for twenty-two minutes until the crust is deeply bronzed and golden. Remove from the oven and immediately sprinkle with the flaky Maldon sea salt while the bread is still sizzling hot.Look for The crust should be golden brown and crisp.Tip Listen for the audible crackle as the salt hits the hot, oily crust.
The bread should be puffed and golden brown, with a crust that sounds hollow when tapped. The aroma of toasted rosemary and baked bread should fill the kitchen, indicating the bread has finished cooking.
The salt should be clearly visible on top, having adhered to the oily surface. If the top is browning too quickly, you can tent it with foil, but at 450 degrees Fahrenheit, the twenty-two-minute bake time is usually sufficient for achieving that deep, professional bronze color.
Common mistakes
One common mistake is not dimpling the dough deeply enough. You want to push your fingers all the way down to the bottom of the pan to create the air pockets that hold the oil and salt. Another error is rushing the preheating of the oven; ensure the oven is fully at 450 degrees Fahrenheit before inserting the dough, as a cold oven will lead to a dense, flat loaf. Finally, avoid skimping on the olive oil, as it is necessary for the proper browning and crust development.
How to tell it’s done
The focaccia is done when the top is deeply bronzed and the edges are crisp and pulling slightly away from the sides of the pan. You should see a uniform golden-brown color across the entire surface, and the rosemary should be slightly toasted but not burnt.
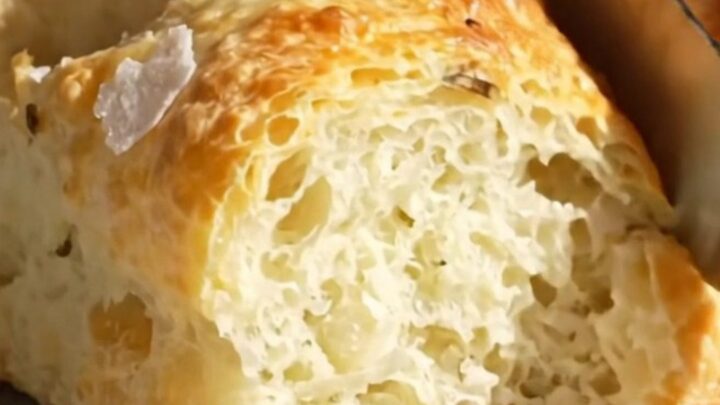
When you lift a corner, the bottom should be firm and golden. The internal texture should be soft and airy, with large, irregular holes throughout the crumb, providing the classic, cloud-like structure that characterizes well-made focaccia.
Up next · Part 3 of 3
2 variations · storage & make-ahead · 3 answers · printable card
Tips, FAQ & printable recipe (Part 3)← Back to the ingredients (Part 1)