Dinner · Part 2 of 3: Instructions
Nashville Hot Chicken Sliders with Honey Butter Drip Step-by-step instructions
- Prep
- Cook
- Total
- Serves
- 4
Before you start
Before you start, set up your workstation: whisk together the buttermilk brine, cut the chicken into bite-sized pieces, and let them soak in the fridge for at least 30 minutes. Meanwhile, mix the dry coating, make the dill slaw, and have the glaze ingredients measured out.
Heat the oil in a heavy-bottomed skillet and attach a deep-fry thermometer to monitor the temperature. Toast the brioche buns and set them aside with the pickles. Having everything ready ensures the frying and glazing process goes smoothly, keeping the chicken crispy and hot.
Ingredients at a glance (18)
- 1 lb boneless skinless chicken breasts, cut into 1-inch pieces
- 1 cup buttermilk
- 2 tbsp hot sauce
- 1 cup all-purpose flour
- 1/4 cup cornstarch
- 1 tsp smoked paprika
- 1 tsp garlic powder
- 1 tsp kosher salt
- 2 cups vegetable oil, for frying
- 1/3 cup hot frying oil (from the skillet)
- 2 tbsp cayenne pepper
- 1 tbsp brown sugar
- 1 tsp garlic powder
- 2 tbsp honey
- 1 cup shredded cabbage
- 1/4 cup dill ranch dressing
- 4 mini brioche buns, split and toasted
- 1/2 cup crinkle-cut pickles
Instructions
Prep and Brine
- Brine the ChickenIn a medium bowl, whisk together the buttermilk and hot sauce. Add the chicken pieces and stir to coat. Cover and refrigerate for at least 30 minutes, or up to 4 hours.Look for The chicken is fully submerged in the buttermilk mixture.Tip For extra tang, add a pinch of salt to the brine.
- Make the SlawIn a small bowl, toss the shredded cabbage with the dill ranch dressing until well coated. Set aside in the refrigerator.Look for The cabbage is evenly coated with the dressing.Tip The slaw can be made up to a day ahead.
At the end of this phase, the chicken should be submerged in the buttermilk mixture, and the slaw should be coated and chilling. The coating mixture should be ready in a shallow dish. The oil should be heating up, and the buns should be toasted. The kitchen should smell of warm spices and buttermilk. Before moving on, ensure the chicken has brined for at least 30 minutes to tenderize.
Fry and Glaze
- Prepare the CoatingIn a shallow dish, whisk together the flour, cornstarch, smoked paprika, garlic powder, and kosher salt.Look for The dry ingredients are well combined.Tip The cornstarch helps create an extra crispy crust.
- Heat the OilIn a large heavy-bottomed skillet or Dutch oven, heat the vegetable oil over medium-high heat until it reaches 360°F (182°C) on a deep-fry thermometer.Look for The oil shimmers and a small piece of bread sizzles immediately.Tip Do not overcrowd the pan; fry in batches if needed.
- Coat the ChickenRemove the chicken from the buttermilk brine, letting any excess drip off. Dredge each piece in the flour mixture, pressing to adhere. Shake off any excess.Look for Each piece is fully coated with a dry, powdery layer.Tip For a double crust, dip back into the buttermilk and coat again.
- Fry the ChickenCarefully add the coated chicken pieces to the hot oil in a single layer. Fry for about 4 minutes, turning occasionally, until golden brown and cooked through. The internal temperature should reach 165°F (74°C).Look for The chicken is deep golden brown and floats to the surface.Safe temperature 165°F (74°C) internal temperature (poultry)Tip Use a thermometer to check the oil stays around 360°F (182°C).
- Make the GlazeIn a medium bowl, whisk together 1/3 cup of the hot frying oil, cayenne pepper, brown sugar, garlic powder, and honey until the sugar dissolves.Look for The mixture is smooth and glossy.Tip Be careful when handling hot oil – use a heatproof bowl.
The oil should be shimmering at 360°F (182°C). The coated chicken pieces should sizzle immediately when added. After 4 minutes, they should be golden brown and floating.
The glaze should be whisked until smooth, and the fried chicken should be tossed in it immediately, turning each piece to coat. The glaze will cling and create a shiny, spicy coating. The kitchen will be filled with the aroma of cayenne and honey.
Assemble and Serve
- Toss in the GlazeImmediately after frying, transfer the chicken pieces to the bowl with the glaze and toss well to coat every piece evenly.Look for Each piece is coated with a shiny, spicy red glaze.Tip Work quickly to keep the chicken crispy.
- Assemble the SlidersPlace a few glazed chicken pieces on the bottom half of each toasted brioche bun. Top with a spoonful of dill slaw and a few crinkle-cut pickles. Cover with the top bun.Look for The sliders are stacked and ready to serve.Tip Serve immediately to enjoy the crispy texture.
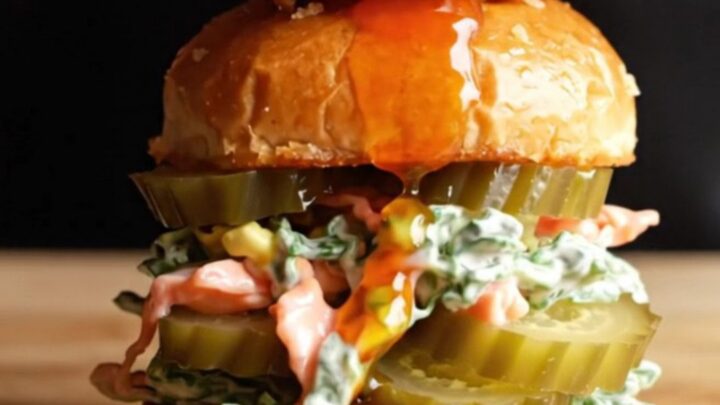
The glazed chicken should be piled onto the toasted brioche bottoms, topped with a spoonful of dill slaw and a few pickles. The sliders should be stacked high, with the juices and glaze starting to soak into the buns. The colors – red glaze, green slaw, golden buns – should be vibrant. Serve immediately while the chicken is still crispy and the buns are warm.
Common mistakes
One common mistake is overcrowding the skillet, which lowers the oil temperature and makes the chicken greasy instead of crispy. Fry in batches, keeping the oil at 360°F (182°C). Another is not letting the excess buttermilk drip off before coating, which leads to a clumpy, uneven crust.
Shake off the excess flour after dredging to avoid a powdery coating. Also, don't skip tossing the fried chicken in the glaze immediately – if the chicken cools, the glaze won't adhere as well.
How to tell it’s done
The chicken is done when it reaches an internal temperature of 165°F (74°C) on an instant-read thermometer. The coating should be deep golden brown and crispy, and the juices should run clear. Because the pieces are small, they cook quickly – about 4 minutes per batch.
If you're unsure, cut one piece in half: the center should be opaque and moist, not pink. The glaze should be glossy and cling to the chicken, and the buns should be toasted enough to hold up to the saucy filling.
- Poultry: 165°F (74°C) in the thickest part
Up next · Part 3 of 3
4 variations · storage & make-ahead · 5 answers · printable card
Tips, FAQ & printable recipe (Part 3)← Back to the ingredients (Part 1)