Dinner · Part 1 of 3: Ingredients
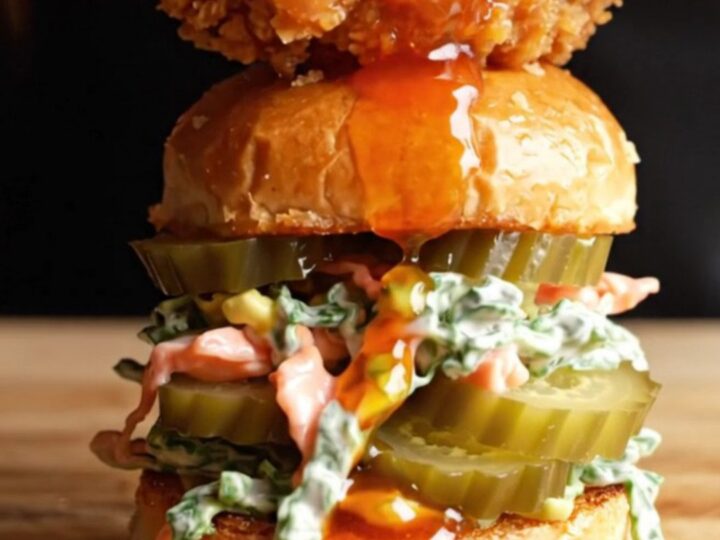
Nashville Hot Chicken Sliders with Honey Butter Drip
- Prep
- Cook
- Total
- Serves
- 4
These Nashville hot chicken sliders bring the heat and the crunch in every bite. Tender buttermilk-brined chicken gets a double-crunchy coating, fried until golden, then dunked in a fiery cayenne-honey glaze that clings to every craggy edge.
Piled onto toasted brioche with creamy dill slaw and crinkle pickles, they're the ultimate game-day or weeknight indulgence. The glaze is the star – a spoonful of hot frying oil whisked with cayenne, brown sugar, and honey creates a glossy, spicy-sweet sauce that's impossible to resist.
Nashville hot chicken is all about contrast: crackling crust, juicy meat, and a glaze that hits sweet, spicy, and tangy all at once. These sliders capture that magic in a hand-held form. The chicken is brined in buttermilk to keep it moist, then coated in a seasoned flour blend and fried at 360°F for a deep, crunchy exterior.
The hot honey oil glaze – made with cayenne, brown sugar, garlic, and honey – transforms each piece into a sticky, fiery bite. Topped with a cool, creamy dill slaw and briny pickles, every slider balances heat with refreshment. Ready in about 30 minutes, they're perfect for feeding a crowd or treating yourself.
Ingredients
- 1 lb boneless skinless chicken breasts, cut into 1-inch pieces
Buttermilk Brine
- 1 cup buttermilk
- 2 tbsp hot sauce
Coating
- 1 cup all-purpose flour
- 1/4 cup cornstarch
- 1 tsp smoked paprika
- 1 tsp garlic powder
- 1 tsp kosher salt
Frying
- 2 cups vegetable oil, for frying
Nashville Hot Glaze
- 1/3 cup hot frying oil (from the skillet)
- 2 tbsp cayenne pepper
- 1 tbsp brown sugar
- 1 tsp garlic powder
- 2 tbsp honey
Dill Slaw
- 1 cup shredded cabbage
- 1/4 cup dill ranch dressing
For Serving
- 4 mini brioche buns, split and toasted
- 1/2 cup crinkle-cut pickles
Why this recipe works
The buttermilk brine does double duty: it tenderizes the chicken and helps the flour coating cling better, creating a craggy, crunchy crust that stays put. The acidity in the buttermilk also adds a subtle tang that complements the spicy glaze. Frying at 360°F ensures the chicken cooks through in about 4 minutes without burning the coating, giving you a golden-brown exterior and juicy interior every time.
The Nashville hot glaze is a simple emulsion of hot frying oil, cayenne, brown sugar, garlic, and honey. Using the same oil you fried the chicken in adds a layer of savory depth, while the honey and brown sugar balance the heat with sweetness.
Tossing the fried chicken in the glaze while it's still hot allows the coating to absorb the sauce, so every bite is infused with flavor, not just coated on the surface.
Notes and substitutions
For the best crunch, use a combination of all-purpose flour and cornstarch in the coating. Cornstarch creates a lighter, crispier crust that holds up well to the glaze. If you prefer a thicker coating, dip the chicken back into the buttermilk after the first dredge and coat again. The double-dredge method yields an extra-craggy texture that's perfect for soaking up the spicy honey oil.
The dill ranch dressing adds a cool, herby note to the slaw. If you can't find dill ranch, mix regular ranch with a teaspoon of chopped fresh dill. For the pickles, crinkle-cut are classic, but any dill pickle chip works.
Toast the brioche buns lightly to give them structure so they don't get soggy from the slaw and glaze. If you don't have brioche, potato rolls or slider buns are great alternatives.
- dill ranch dressing: plain ranch dressing mixed with 1 teaspoon chopped fresh dill
- mini brioche buns: slider rolls or potato rolls
- crinkle-cut pickles: dill pickle chips or sliced cornichons
- buttermilk: 1 cup whole milk mixed with 1 tablespoon lemon juice, let stand 5 minutes
Equipment
- Large heavy-bottomed skillet or Dutch oven
- Deep-fry thermometer
- Whisk
- Mixing bowls
- Tongs
- Wire rack set over a baking sheet
- Measuring cups and spoons
- Paper towels
Up next · Part 2 of 3
9 steps · 10 min of cooking · what to look for at each stage
Step-by-step instructions (Part 2)