Dinner · Part 2 of 3: Instructions
Crispy Nashville Hot Chicken Mac & Cheese Waffle Cone Step-by-step instructions
- Prep
- Cook
- Total
- Serves
- 2
Before you start
Before starting, cut the chicken into bite-sized chunks and set up the breading station. Have the waffle cones and mac and cheese ready.
Heat the oil for frying and ensure a deep-fry thermometer is within reach. Prepare a wire rack for draining the fried chicken.
Ingredients at a glance (11)
- 2 large waffle ice cream cones
- 300 g boneless chicken thigh, cut into chunks
- 80 g all-purpose flour
- 1 large egg, beaten
- 80 g panko breadcrumbs
- 2 tbsp cayenne pepper
- 1 tbsp brown sugar
- 1 tsp smoked paprika
- 4 tbsp hot frying oil (from frying the chicken)
- 200 g creamy cheddar mac and cheese, warmed
- Sliced pickles, for serving
Instructions
Bread and Fry
- Prepare the ChickenCut the chicken thigh into bite-sized chunks. Set up a breading station: place the flour in one shallow dish, the beaten egg in another, and the panko in a third. Dredge each chicken piece in flour, then egg, then panko, pressing gently to adhere. Place the breaded pieces on a wire rack.Look for The chicken pieces are evenly coated with a thick, craggy crust.Tip Let the breaded chicken rest for 5 minutes so the coating sets and adheres better during frying.
- Heat the OilPour about 2 inches of oil into a heavy pot and heat over medium-high until a deep-fry thermometer registers 350°F (175°C). Adjust the heat to maintain the temperature.Look for The oil shimmers and a small piece of bread sizzles immediately when dropped in.Tip Use a thermometer to keep the oil steady; too hot and the crust burns, too cool and the chicken greases.
- Fry the ChickenWorking in batches, carefully add the breaded chicken to the hot oil. Fry for about 5 minutes, turning occasionally, until golden brown and cooked through. The internal temperature should read 165°F (74°C) on an instant-read thermometer. Transfer to a wire rack to drain.Look for The crust is deep golden and crisp; the chicken is no longer pink inside.Safe temperature 165°F (74°C) internal temperature (poultry)Tip Do not overcrowd the pot—fry in batches to keep the oil temperature steady.
At the end of this phase, the chicken pieces should be golden brown and crispy, with an internal temperature of 165°F (74°C).
The oil should be at a steady 350°F (175°C), and the chicken should drain on a wire rack, releasing excess oil.
Spice and Sauce
- Make the Nashville Hot OilIn a heatproof bowl, whisk together the cayenne, brown sugar, and smoked paprika. Carefully measure 4 tablespoons of the hot frying oil from the pot and whisk it into the spice mixture until smooth and fragrant.Look for The oil turns a deep crimson and smells spicy-sweet.Tip Work quickly but carefully—the oil is very hot. Use a heatproof bowl and a sturdy whisk.
- Coat the ChickenAdd the fried chicken pieces to the bowl with the Nashville hot oil and toss gently until every piece is coated in the glossy, spicy oil.Look for The chicken is fully coated in a shiny, crimson glaze.Tip Use a spoon or tongs to toss, but be careful not to break the crispy crust.
- Warm the Mac and CheeseIf the mac and cheese is not already warm, gently heat it in a saucepan over low heat, stirring occasionally, until hot and creamy.Look for The mac and cheese is hot, smooth, and pourable.Tip Stir in a splash of milk if it seems too thick.
The Nashville hot oil should be a vibrant crimson, fragrant with cayenne and brown sugar. The chicken should be evenly coated and glistening. The mac and cheese should be warm and smooth, ready for piping.
Assemble and Serve
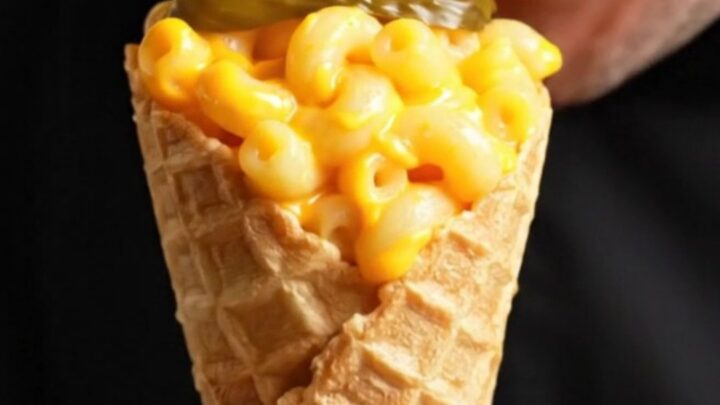
- Fill the Waffle ConesTransfer the warm mac and cheese to a piping bag or a zip-top bag with the corner snipped. Pipe the mac and cheese into the waffle cones, filling them completely and letting it mound slightly above the rim.Look for The cones are packed to the brim with creamy mac and cheese.Tip Hold the cone upright and press the filling gently to avoid air pockets.
- Top and ServeGenerously pile the Nashville hot chicken pieces on top of the mac and cheese. Skewer a few pickle slices on a toothpick and place on top. Serve immediately while hot and crispy.Look for The cone is overflowing with creamy mac, fiery chicken, and bright pickles.Tip Serve right away so the cone stays crisp and the mac stays warm.
The cones should be filled to the brim with mac and cheese, with the chicken piled generously on top. The pickles add a final bright, tangy note. Serve immediately to enjoy the full crunch and warmth.
Common mistakes
One common mistake is overcrowding the frying pot, which drops the oil temperature and results in greasy, soggy chicken.
Another is not measuring the hot oil carefully when making the Nashville hot oil—too much oil makes the coating too runny. Also, avoid filling the cones too early, as the mac and cheese can soften the cone if it sits too long.
How to tell it’s done
The chicken is done when it reaches an internal temperature of 165°F (74°C) and the crust is deep golden brown.
The mac and cheese should be hot and flowing, and the cones should be crisp and intact. The final dish is ready when the chicken is coated in the spicy oil and the cones are filled and topped.
- Poultry: 165°F (74°C) in the thickest part
- Egg dishes: 160°F (71°C) in the thickest part
Up next · Part 3 of 3
4 variations · storage & make-ahead · 5 answers · printable card
Tips, FAQ & printable recipe (Part 3)← Back to the ingredients (Part 1)