Dinner · Part 2 of 3: Instructions
Crispy Korean Honey Garlic Fried Chicken Wings Step-by-step instructions
- Prep
- Cook
- Total
- Serves
- 4
Before you start
Before starting, set up your frying station: a large pot, a deep-fry thermometer, a wire rack over a baking sheet, and tongs. Pat the chicken wings dry with paper towels to ensure the marinade adheres well. Grate the ginger, mince the garlic, and slice the scallions.
Measure out all ingredients and have them within reach. Heat the oil to 170°C (340°F) while you season and coat the wings. The entire process moves quickly once frying begins, so having everything prepped and organized is key to success.
Ingredients at a glance (11)
- 1 kg chicken wings, split into drumettes and flats
- 2 tbsp soy sauce
- 1 tbsp fresh ginger, grated
- 1 cup potato starch
- vegetable oil, for frying, to taste
- 1/2 cup honey
- 3 tbsp soy sauce
- 2 tbsp brown sugar, packed
- 5 cloves garlic, minced
- 1 tbsp sesame seeds
- 2 tbsp scallions, thinly sliced
Instructions
Coat and Fry the Wings
- Season and Coat the WingsIn a large bowl, toss the chicken wings with 2 tablespoons soy sauce and the grated ginger. Let them sit for 10 minutes while you heat the oil. Place the potato starch in a shallow dish. Working in batches, dredge each wing in the starch, pressing gently to adhere, then shake off excess. The wings should look heavily coated with craggy flakes.Look for The wings are evenly coated with a thick, powdery layer of starch that clings to every surface.Tip For an extra-craggy crust, let the coated wings rest on a wire rack for 5 minutes before frying.
- First Fry at 170°CHeat about 2 inches of vegetable oil in a large pot to 170°C (340°F). Carefully lower the coated wings into the oil in batches, without crowding. Fry for 6 minutes, turning occasionally, until the coating is set and the wings are cooked through but not deeply browned. Transfer to a wire rack set over a baking sheet.Look for The wings are pale golden and the coating is firm and dry to the touch.Tip Maintain the oil temperature between batches; let it come back to 170°C before adding more wings.
- Second Fry at 190°CIncrease the oil temperature to 190°C (375°F). Return the first-batch wings to the hot oil in batches and fry for 90 seconds, until deep golden brown and shatteringly crisp. Drain on a fresh wire rack. Repeat with all wings. The internal temperature of the chicken should reach 165°F (74°C).Look for The wings are deeply golden, with a hard, crackling shell that sounds crisp when tapped.Safe temperature 165°F (74°C) internal temperature (poultry)Tip Do not skip the second fry—this creates the signature ultra-crunchy texture that lasts even after glazing.
At the end of this phase, the wings are double-fried to a deep golden brown, with a hard, crackling crust that sounds crisp when tapped. The internal temperature should read 165°F (74°C). The wings are dry and crunchy, with no excess oil pooling on the rack. They are ready to be tossed with the glaze.
Make the Glaze and Coat
- Simmer the Honey Garlic GlazeIn a small saucepan, combine the honey, 3 tablespoons soy sauce, brown sugar, and minced garlic. Bring to a simmer over medium heat, stirring frequently. Cook for 3 to 4 minutes, until the mixture thickens to a syrupy consistency and bubbles with frothy foam. Remove from heat.Look for The glaze is thick enough to coat the back of a spoon, with a deep amber color and fragrant garlic aroma.Tip Watch closely—the glaze will thicken more as it cools; do not over-reduce or it will become too sticky.
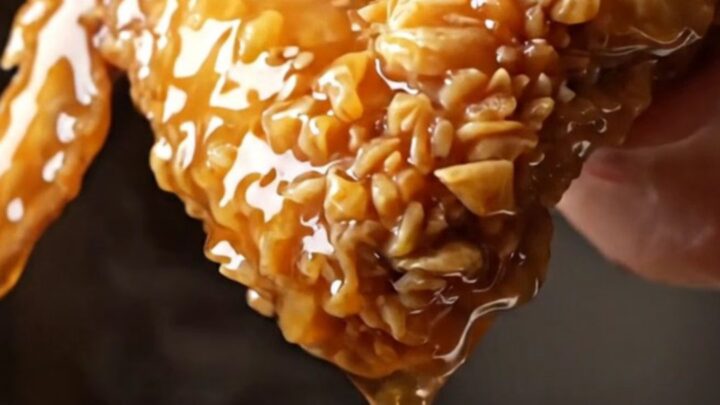
- Toss Wings in the GlazePlace the double-fried wings in a large mixing bowl. Pour the hot glaze over the wings and toss quickly with tongs to coat every crevice evenly. The glaze should cling to the crispy surface without making it soggy.Look for Each wing is glossy and coated with a sticky, translucent glaze that glistens under light.Tip Work quickly while the glaze is still hot for the best adhesion; if it stiffens, warm it gently.
The glaze is thick, syrupy, and fragrant with garlic, with a deep amber color and frothy bubbles. When tossed with the wings, it clings to every crevice, creating a glossy, sticky coating. The wings remain crisp despite the moisture, and the glaze is evenly distributed without pooling.
Garnish and Serve
- Garnish and ServeTransfer the glazed wings to a serving platter. Sprinkle with sesame seeds and sliced scallions. Serve immediately while the wings are still hot and crunchy.Look for The wings are beautifully garnished with white sesame and green scallions, with a sticky sheen.Tip For the best texture, serve right away; the glaze may soften the crust if left too long.
The finished wings are shiny with glaze, sprinkled with sesame seeds and green scallions. They look irresistible, with a sticky sheen and a crunchy bite. Serve immediately while they are still hot and crisp—the contrast of crunchy exterior and sticky-sweet glaze is the ultimate payoff.
Common mistakes
Avoid overcrowding the pot during frying, as this lowers the oil temperature and results in greasy, less crispy wings. Fry in small batches and allow the oil to return to the target temperature between batches.
Another common mistake is over-saucing: add just enough glaze to coat the wings, leaving some dry spots for contrast.
If the glaze is too thin, simmer it a bit longer; if too thick, thin with a splash of water. Finally, do not let the coated wings sit too long before frying, as the starch can become gummy.
How to tell it’s done
The wings are done when they are deep golden brown and the internal temperature reaches 165°F (74°C) in the thickest part, measured with an instant-read thermometer. The second fry should produce a hard, crackling crust that sounds crunchy when tapped.
The glaze is ready when it coats the back of a spoon and bubbles with a frothy foam. Toss the wings in the glaze while both are hot; the wings should be glossy and sticky but not dripping. Serve immediately for the best texture.
- Poultry: 165°F (74°C) in the thickest part
Up next · Part 3 of 3
4 variations · storage & make-ahead · 5 answers · printable card
Tips, FAQ & printable recipe (Part 3)← Back to the ingredients (Part 1)