Dinner · Part 2 of 3: Instructions
Crispy Honey Garlic Chicken Thighs in One Pan Step-by-step instructions
- Prep
- Cook
- Total
- Serves
- 6
Before you start
Before heating the skillet, take the chicken thighs out of the refrigerator about 15 to 20 minutes prior to cooking to take the chill off, ensuring even cooking. Pat them completely dry on all sides with paper towels.
Measure out the honey and soy sauce into small bowls so they are ready to pour. Mince the garlic finely and chop the fresh parsley. Having these ingredients prepped and ready by the stovetop prevents any risk of burning the garlic or overcooking the chicken.
Ingredients at a glance (5)
- 6 skin-on, bone-in chicken thighs
- 4 cloves garlic, minced
- 1/3 cup honey
- 2 tbsp soy sauce
- fresh parsley, chopped, for serving
Instructions
Searing the Chicken
- Dry the ChickenPat the skin-on, bone-in chicken thighs completely dry with paper towels. Removing excess surface moisture is the most critical step to ensure the skin becomes exceptionally crispy during cooking.Look for The chicken skin should feel completely dry to the touch.Tip Never skip this step, as moisture creates steam and prevents proper browning.
- Sear the SkinPlace the chicken thighs skin-side down in a large heavy skillet over medium-high heat. Cook undisturbed for 8 to 10 minutes, allowing the natural fat to render out and the skin to turn deeply golden brown and crispy.Look for The skin should release easily from the pan when fully seared.Tip Do not crowd the skillet; leave space between thighs to ensure even heat distribution.
At the end of this first phase, the chicken thighs should have a beautifully deep golden-brown, crispy skin that easily releases from the bottom of the skillet.
You will hear a loud, steady sizzle, and the kitchen will fill with the rich aroma of seared poultry as the natural fats render down into the pan.
Building the Aromatics
- Flip and CookFlip the chicken thighs over using tongs. Cook the underside for an additional 6 to 8 minutes. Carefully pour off any excess rendered chicken fat from the skillet, leaving just a thin coating in the pan.Look for The chicken meat will begin to firm up as it cooks through.Tip Use a spoon to carefully skim off the hot grease into a heatproof bowl.
- Sauté the GarlicReduce the heat to medium. Add the minced garlic to the skillet in the spaces between the chicken thighs. Sauté the garlic for about 1 minute, stirring constantly to prevent it from burning, until it becomes highly fragrant.Look for The garlic should turn pale golden but not dark brown.Tip Keep the garlic moving constantly so it does not develop a bitter taste.
By the end of this phase, the chicken thighs are flipped and mostly cooked through, and the minced garlic is gently sautéed in the rendered chicken fat. The garlic should be fragrant, soft, and pale golden, without any dark browning, filling the air with a warm, savory scent.
Glazing and Finishing
- Glaze and BastePour the honey and soy sauce directly into the skillet around the chicken. Stir to combine with the garlic and bring to a simmer. Spoon the bubbling glaze repeatedly over the chicken thighs, basting continuously for 3 to 4 minutes until the sauce thickens and the chicken reaches an internal temperature of 165°F (74°C).Look for The glaze will bubble furiously and cling to the chicken.Safe temperature 165°F (74°C) internal temperature (poultry)Tip Basting coats the chicken and keeps the meat incredibly moist.
- Garnish and RestRemove the skillet from the heat source. Scatter the chopped fresh parsley over the sticky, glazed chicken thighs. Allow the dish to rest for 5 minutes in the pan before serving, letting the juices redistribute and the glaze set.Look for The glaze will thicken slightly more as it cools.Tip Serve the remaining pan glaze spooned over the chicken at the table.
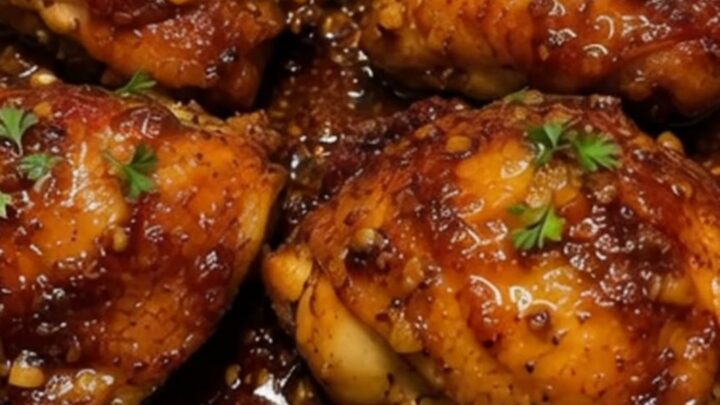
At the final checkpoint, the honey and soy sauce have simmered down into a thick, glossy, and bubbling glaze that clings tightly to the chicken. The chicken thighs are fully cooked, glistening with the sticky sauce, and garnished with bright green parsley, ready to rest.
Common mistakes
The most common mistake when making this dish is moving the chicken thighs too early during the initial sear. To get a truly crispy skin, the chicken must remain undisturbed in the hot skillet so the fat can render properly; moving it too soon will tear the skin and cause it to steam rather than fry.
Another frequent error is letting the garlic burn. Garlic cooks very quickly, so be sure to lower the heat and add the liquid glaze ingredients promptly to stop the garlic from browning further.
How to tell it’s done
To ensure the chicken thighs are perfectly cooked and safe to eat, insert an instant-read meat thermometer into the thickest part of the thigh, making sure not to touch the bone. The internal temperature must reach at least 165°F (74°C).
Because chicken thighs contain more connective tissue than chicken breasts, they actually benefit from cooking to around 170°F to 175°F, which makes the meat incredibly tender and juicy while remaining completely safe.
- Poultry: 165°F (74°C) in the thickest part
Up next · Part 3 of 3
2 variations · storage & make-ahead · 3 answers · printable card
Tips, FAQ & printable recipe (Part 3)← Back to the ingredients (Part 1)