Dinner · Part 2 of 3: Instructions
Crispy Homemade Cane’s Chicken Fingers with Copycat Sauce Step-by-step instructions
- Prep
- Cook
- Total
- Serves
- 6
Before you start
Start by measuring all ingredients and placing them near the stove. Whisk the marinade and submerge the chicken in a large bowl; cover and refrigerate for at least 2 hours.
While the chicken marinates, mix the flour coating and the Cane's sauce. Set up a wire rack for draining the fried tenders and line a plate with paper towels. Pour oil into the pot and attach a deep-fry thermometer before heating.
Ingredients at a glance (14)
- 2 lb chicken breast tenders
- 2 cups buttermilk
- 2 tbsp garlic powder
- 1 tbsp black pepper
- 1 tbsp smoked paprika
- 1 tbsp salt
- 2 cups all-purpose flour
- 3 tbsp cornstarch
- 1 tbsp garlic powder
- 1 tbsp paprika
- 1 cup mayonnaise
- 4 tbsp ketchup
- 2 tsp Worcestershire sauce
- 1/2 tsp black pepper
Instructions
Marinate and Prep
- Marinate the ChickenIn a large bowl, whisk together the buttermilk, garlic powder, black pepper, smoked paprika, and salt. Add the chicken tenders and turn to coat completely. Cover and refrigerate for at least 2 hours, or up to 8 hours.Look for The chicken is fully submerged in the seasoned buttermilk.Tip For extra flavor, massage the marinade into the chicken briefly before refrigerating.
- Mix the CoatingIn a shallow dish, whisk together the flour, cornstarch, garlic powder, and paprika. Set aside.Look for The coating is evenly blended and free of lumps.Tip Use a fork to break up any clumps of flour or cornstarch.
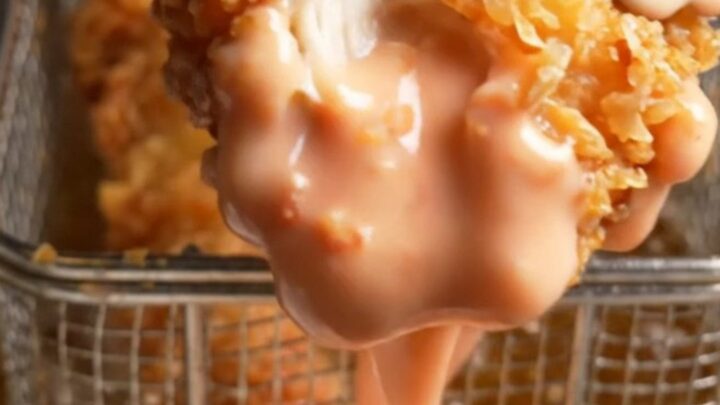
- Make the Cane's SauceIn a small bowl, combine the mayonnaise, ketchup, Worcestershire sauce, and black pepper. Whisk until smooth. Cover and refrigerate until serving.Look for The sauce is pink, creamy, and well combined.Tip Chill the sauce for at least 30 minutes to let the flavors meld.
The chicken should be fully coated in a creamy, spiced buttermilk, and the flour mixture should be well blended with no lumps. The sauce should be smooth and pink, with a balanced tang. Everything is ready for the hot oil.
Fry to Crisp
- Heat the OilPour 2 inches of vegetable oil into a heavy-bottomed pot and heat over medium-high until a deep-fry thermometer reads 350°F (175°C).Look for The oil shimmers and a small piece of flour sizzles immediately.Tip Use a thermometer for accuracy; the temperature will drop when adding chicken.
- Dredge the ChickenWorking with a few pieces at a time, lift a tender from the marinade, letting excess drip off. Dredge in the flour mixture, pressing firmly to coat all sides. Shake off excess and place on a wire rack.Look for Each tender is evenly coated with a thick, craggy layer.Tip Let the coated tenders sit for 5 minutes so the coating adheres better.
- Fry in BatchesCarefully place a few coated tenders into the hot oil without crowding. Fry for 8 minutes, turning occasionally, until deep golden brown and cooked through. The internal temperature should reach 165°F (74°C).Look for The coating is dark golden, blistered, and shatters when tapped.Safe temperature 165°F (74°C) internal temperature (poultry)Tip Keep the oil at 350°F (175°C) between batches; adjust heat as needed.
- Drain and RestRemove the fried tenders with tongs and drain on paper towels. Let rest for 2 minutes before serving.Look for The tenders are crisp and juicy, with no excess oil pooling.Tip Do not cover the tenders; covering traps steam and softens the crust.
The tenders should be floating in bubbling oil, turning a deep golden brown. The coating will blister and craggle as it fries. When you tap a tender with tongs, it should sound hollow and crisp. The oil temperature stays steady at 350°F (175°C).
Serve and Dip
- Serve with SauceArrange the hot chicken fingers on a platter with the chilled Cane's sauce on the side for dipping.Look for The sauce is thick and spoonable, with a tangy aroma.Tip For maximum crunch, serve immediately after frying.
The fried tenders are drained on paper towels, releasing a cloud of steam. The sauce is chilled and thick, ready for dipping. Each bite offers a loud crunch followed by juicy, seasoned chicken. Serve immediately to enjoy the full texture contrast.
Common mistakes
One common mistake is overcrowding the pot, which drops the oil temperature and leads to greasy, soggy chicken. Fry in small batches, leaving space between tenders.
Another is skipping the rest after dredging—allowing the coating to set for a few minutes prevents it from falling off in the oil.
Also, don't skip the thermometer; guessing the oil temperature is the surest way to undercook or burn the crust.
How to tell it’s done
The chicken is done when the coating is deep golden brown and the internal temperature reaches 165°F (74°C) on an instant-read thermometer inserted into the thickest part.
The crust should feel firm and shatter when bitten, and the juices should run clear. If the coating browns too quickly, lower the oil temperature slightly and fry for a few more minutes.
- Poultry: 165°F (74°C) in the thickest part
Up next · Part 3 of 3
4 variations · storage & make-ahead · 5 answers · printable card
Tips, FAQ & printable recipe (Part 3)← Back to the ingredients (Part 1)