Dinner · Part 2 of 3: Instructions
Crispy Grilled Garlic Butter Potatoes Step-by-step instructions
- Prep
- Cook
- Total
- Serves
- 4
Before you start
Before you begin cooking, ensure your grill is properly preheated to medium-high heat, which is roughly 400°F (204°C). Clean the grates thoroughly with a wire brush and wipe them down with an oiled paper towel. Wash and scrub the potatoes to remove any dirt, then pat them completely dry with a clean kitchen towel.
Slice the potatoes into even half-inch medallions. Melt the butter and mince the garlic so everything is ready to be combined in your mixing bowl. Having all ingredients prepared beforehand ensures a smooth, stress-free grilling experience.
Ingredients at a glance (5)
- 2 lb Yukon Gold potatoes, sliced into 1/2-inch thick medallions
- 1/2 cup unsalted butter, melted
- 4 cloves garlic, minced
- 1 tsp smoked paprika
- 2 tbsp finely chopped fresh herbs
Instructions
Slicing and Seasoning the Potato Medallions
- Slice and SeasonPreheat the grill to medium-high heat, around 400°F (204°C). Wash the potatoes thoroughly and slice them into even 1/2-inch thick medallions. In a large mixing bowl, combine the melted butter, minced garlic, and smoked paprika. Add the sliced potato medallions to the bowl and toss them thoroughly until every slice is evenly coated in the fragrant, smoky butter mixture.Look for The potatoes are completely coated.Tip Keep the slices uniform so they cook at the same rate.
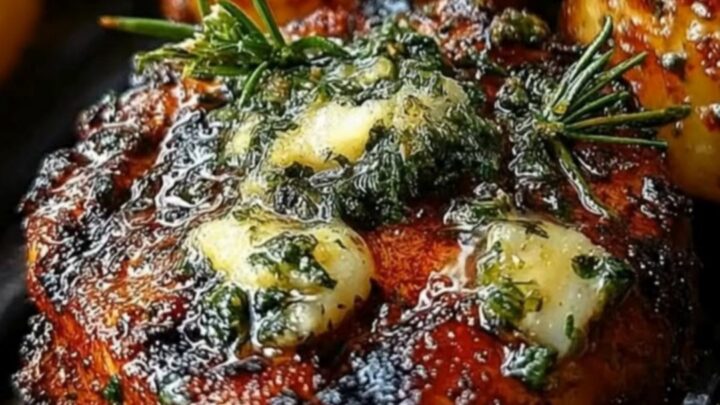
At the end of this initial preparation phase, the potato medallions should be completely and evenly coated in the rich, golden garlic butter mixture. You should see flecks of minced garlic and vibrant red smoked paprika clinging to every surface of the potato slices. The mixture should smell intensely fragrant, with the savory aroma of raw garlic and smoky paprika dominating. There should be no dry spots on any of the potatoes, ensuring they are fully prepared for the hot grill.
Grilling to Crispy, Charred Perfection
- Grill the MedallionsClean and oil the grill grates to prevent sticking. Place the seasoned potato medallions in a single layer directly onto the hot grates. Grill the potatoes with the lid closed for about 8 to 10 minutes, or until the undersides are beautifully charred and develop deep grill marks. Flip each medallion carefully using grill tongs.Look for Deep grill marks and bubbling edges appear.Tip If the garlic starts to burn, move the potatoes to a slightly cooler zone on the grill.
- Finish GrillingContinue to grill the potatoes on the second side with the lid closed for another 8 to 10 minutes. The potatoes should become tender in the center, which you can test by piercing a medallion with a fork. Look for crispy, sizzling edges and a rich golden-brown color on both sides before removing them from the heat.Look for The centers are fork-tender and the edges are crispy.Tip Keep an eye out for flare-ups from the melting butter.
By the end of the grilling phase, the potato medallions will have transformed dramatically. They should feature deep, dark grill marks on both sides, with the edges appearing crispy, slightly bubbled, and deeply golden-brown.
You will hear a loud, active sizzle as the butter drips onto the grates, and a rich, smoky aroma of roasted garlic and charred potato will fill the air. When pierced with a fork, the center of the largest medallion should slide off easily, indicating they are fully tender.
Garnishing and Serving Hot
- Garnish and ServeTransfer the hot, grilled potato medallions to a serving platter. Immediately sprinkle the finely chopped fresh herbs over the warm potatoes, allowing the residual heat to release their vibrant aroma. Serve immediately while the garlic butter is still warm and sizzling.Look for The herbs turn vibrant green and fragrant.Tip Serve these alongside your favorite grilled proteins.
In this final phase, the hot grilled potatoes are arranged beautifully on a serving platter and crowned with fresh herbs. The residual heat from the potatoes will gently wilt the freshly chopped herbs, releasing a bright, clean, herbaceous aroma that perfectly cuts through the rich, buttery garlic scent. The potatoes should look glistening, vibrant, and incredibly appetizing, ready to be served immediately while they are at their peak texture and temperature.
Common mistakes
One common mistake is slicing the potatoes too thin or too thick. Slices that are too thin will cook too quickly and burn before the centers soften, while overly thick slices will remain raw and chalky in the middle while the exteriors char.
Another frequent error is grilling on grates that are not hot enough or not oiled. This causes the starch in the potatoes to stick to the metal, tearing off the delicious crispy skin when you try to flip them. Always ensure your grill is fully preheated and the grates are well-lubricated before adding the potatoes.
How to tell it’s done
You can easily determine the doneness of the grilled potatoes by performing a simple fork test. Insert a fork or a sharp paring knife into the center of several potato medallions. The utensil should slide in and out with absolutely no resistance, indicating that the starches have fully broken down and the interior is creamy and tender.
Visually, the potatoes should have a deep golden-brown color with charred edges and distinct grill marks. If they are still firm, keep them on the grill for a few more minutes, moving them to a cooler zone if the exteriors are browning too fast.
Up next · Part 3 of 3
2 variations · storage & make-ahead · 3 answers · printable card
Tips, FAQ & printable recipe (Part 3)← Back to the ingredients (Part 1)