Dinner · Part 2 of 3: Instructions
Crispy Grilled Garlic Butter Potatoes Step-by-step instructions
- Prep
- Cook
- Total
- Serves
- 4
Before you start
Before beginning, ensure all ingredients are measured and ready. Scrub the potatoes thoroughly under cold running water to remove any debris, then pat them dry with a clean kitchen towel. Slice the potatoes into even 1/2-inch rounds using a sharp chef's knife; uniform thickness is crucial for consistent cooking.
Mince the garlic finely to ensure it distributes evenly in the butter. Prepare the grill pan by ensuring it is clean and lightly oiled if necessary, then preheat it over medium-high heat until it begins to shimmer slightly.
Ingredients at a glance (3)
- 1 1/2 lbs yukon gold potatoes, sliced into 1/2-inch rounds
- 3 tbsp unsalted butter, melted
- 2 cloves garlic, minced
Instructions
Flavor Preparation
- Prepare the Garlic ButterIn a small bowl, combine the melted unsalted butter and minced garlic. Stir the mixture thoroughly to ensure the garlic is evenly distributed throughout the butter, creating a flavorful base for the potatoes.Look for The mixture should be fragrant and well-combined.Tip Use high-quality butter for a richer flavor profile.
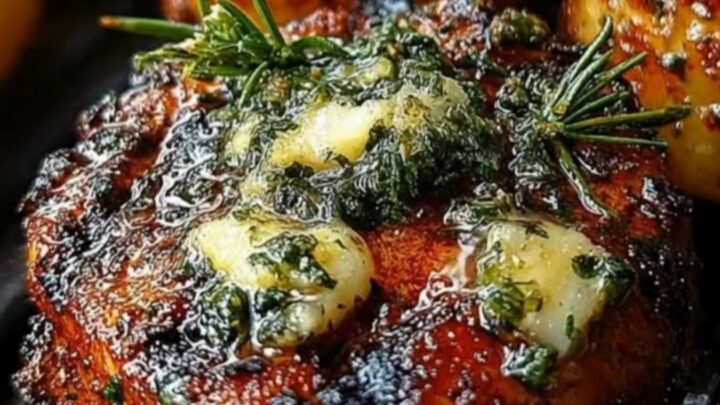
The garlic butter is ready when the butter is completely melted and the garlic is well-incorporated. The mixture should smell intensely aromatic and savory. Keep this mixture at room temperature until it is ready for use, as this helps in applying it smoothly to the hot potatoes during the final assembly stage.
Searing and Charring
- Sear the PotatoesHeat a cast-iron grill pan over medium-high heat. Brush the potato rounds with a portion of the garlic butter and place them onto the hot surface. Cook until deep char marks appear and the edges become crispy, then flip and repeat on the other side.Look for The potatoes should have distinct grill marks and a crispy texture on the outside.Tip Avoid overcrowding the pan to ensure proper searing and crisping.
The potatoes are finished with this phase when they exhibit deep, dark grill marks and a visibly crisp exterior. The edges should be golden brown and slightly curled, indicating that the starch has caramelized perfectly.
The potatoes should release easily from the grill pan when turned with tongs; if they stick, give them an extra minute of cooking time.
Final Assembly
- Finish and ServeTransfer the cooked potatoes to a plate. Drizzle the remaining garlic butter over the hot potato rounds. Serve immediately while the potatoes are still steaming and the butter is melted.Look for The potatoes should be steaming and tender when pierced with a fork.Tip Serving immediately ensures the potatoes retain their crispy texture.
The final phase is complete when the potatoes are glistening with the melted garlic butter and are hot to the touch. The potatoes are ready to serve immediately, with the garlic aroma filling the kitchen and the texture being perfectly balanced between crispy and tender.
Common mistakes
A common mistake is slicing the potatoes too thick, which prevents the center from cooking through before the exterior burns. Another frequent error is overcrowding the grill pan, which causes the potatoes to steam rather than sear, resulting in a soft, mushy texture instead of a crispy one.
Ensure the pan is hot enough before adding the potatoes; if the pan is cold, the potatoes will stick and fail to develop that essential charred crust. Finally, do not add the garlic butter too early, as it will burn.
How to tell it’s done
The potatoes are done when they are deeply browned and charred on both sides, with a crispy outer crust that yields easily to a fork. When pierced, the center should be soft, fluffy, and tender without any resistance.
The butter should be fully melted and absorbed into the potato surface, and the garlic should be fragrant and golden. Because the potatoes are sliced thinly, they cook quickly, so monitor the heat carefully to avoid burning the edges before the center is fully cooked through.
Up next · Part 3 of 3
2 variations · storage & make-ahead · 3 answers · printable card
Tips, FAQ & printable recipe (Part 3)← Back to the ingredients (Part 1)