Dinner · Part 2 of 3: Instructions
Crispy Garlic Cheese Chicken Shawarma Wrap Step-by-step instructions
- Prep
- Cook
- Total
- Serves
- 4
Before you start
Before starting, slice the chicken thighs into thin strips and mince the garlic. Measure out all the spices and combine the marinade ingredients in a bowl. If using a panini press, preheat it while the chicken marinates.
Set up a work station with the pita, garlic sauce, pickles, and mozzarella so assembly goes quickly. Have the butter softened for brushing. The marinade needs at least 30 minutes in the refrigerator, so plan accordingly. You can also marinate the chicken up to overnight for deeper flavor.
Ingredients at a glance (16)
- 2 lb boneless, skinless chicken thighs, sliced
- 1/2 cup Greek yogurt
- 3 tbsp olive oil, divided
- 4 cloves garlic, minced
- 2 tsp ground cumin
- 1 tsp ground coriander
- 1 tsp smoked paprika
- 1/2 tsp ground cardamom
- 1/2 tsp ground turmeric
- 1 tsp salt
- 2 tbsp lemon juice
- 1/2 cup garlic toum sauce
- 4 large pita or flatbread
- 1 cup pickled cucumbers, sliced
- 1 1/2 cups shredded mozzarella
- 2 tbsp butter, softened
Instructions
Marinate and Sear
- Marinate the ChickenIn a large bowl, combine the Greek yogurt, 2 tablespoons of olive oil, minced garlic, cumin, coriander, smoked paprika, cardamom, turmeric, salt, and lemon juice. Add the sliced chicken thighs and toss until every piece is coated. Cover and refrigerate for at least 30 minutes, or up to overnight.Look for The chicken is evenly coated in a thick, spiced yogurt marinade.Tip For deeper flavor, marinate overnight. Slicing the thighs thin helps them cook quickly and absorb the marinade.
- Sear the ChickenHeat the remaining 1 tablespoon of olive oil in a large skillet over high heat until shimmering. Add the marinated chicken in a single layer, working in batches if needed. Cook without stirring for 3 to 4 minutes, then flip and cook for another 3 to 4 minutes, until the edges are charred and the chicken is cooked through.Look for The chicken is deeply browned with crispy, caramelized edges.Safe temperature 165°F (74°C) internal temperature (poultry)Tip Avoid crowding the pan to get a good sear. Let the chicken rest briefly before assembling the wraps.
After marinating, the chicken should be coated in a thick, spiced paste. When seared, the chicken will develop deep brown edges and a fragrant aroma of toasted spices.
The pan should be hot enough that the chicken sizzles immediately. The chicken is ready when it’s cooked through and has a slight char. Taste a piece to check for seasoning; adjust with salt if needed.
Assemble and Toast
- Assemble the WrapsLay a pita or flatbread on a clean work surface. Spread a generous layer of garlic toum sauce over the center. Add a portion of the hot cooked chicken, followed by pickled cucumbers and a sprinkle of shredded mozzarella. Fold in the sides and roll tightly, like a burrito.Look for The wrap is snug and secure, with filling visible at the ends.Tip Warm the pita briefly in a dry skillet to make it pliable and prevent tearing.
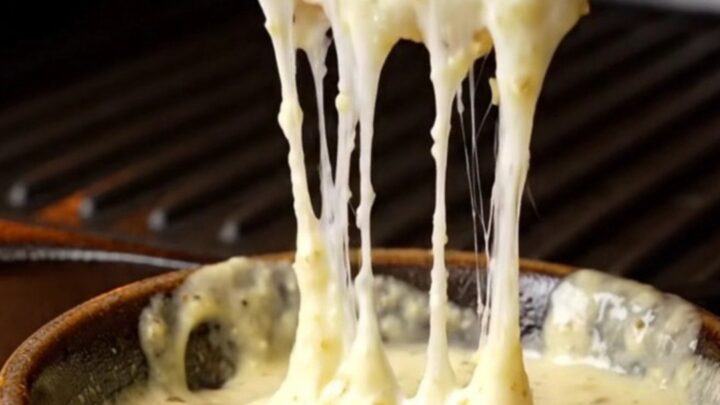
- Toast the WrapsBrush the outside of each wrap with softened butter. Heat a panini press or a large grill pan over medium heat. Place the wraps seam-side down and press gently. Cook for 2 to 3 minutes per side, until golden brown and crispy, and the cheese is melted.Look for The wrap is golden and crisp, with melted cheese oozing at the seams.Tip If using a grill pan, press with a spatula to get even browning. Don't overcrowd the pan.
The wraps should be tightly rolled, with the filling secure inside. When toasted, the exterior turns golden brown with darker spots from the pan. You’ll hear a satisfying sizzle as the buttered bread hits the hot surface. The cheese should be visibly melted when you peek inside. The wraps should feel firm and crisp to the touch, not soft or doughy.
Cut and Serve
- Cut and ServeTransfer the toasted wraps to a cutting board and let them rest for 2 minutes. Slice each wrap diagonally in half. Serve immediately with extra garlic toum sauce on the side for dipping.Look for The cut wraps reveal a cross-section of chicken, pickles, and melted cheese.Tip Use a sharp knife to cut cleanly without squishing the filling.
After resting, the wraps hold their shape when sliced. The cut ends show distinct layers: crispy bread, garlic sauce, chicken, pickles, and melted cheese. The cheese should be stretchy, not runny. Serve immediately with extra garlic sauce on the side. The wraps are best eaten fresh, while the exterior is still crunchy.
Common mistakes
One common mistake is overcrowding the skillet when searing the chicken, which causes it to steam instead of brown. Work in batches to get a proper sear. Another issue is overfilling the wraps, making them hard to roll and prone to tearing.
Use about 3/4 cup of filling per wrap. Skipping the butter on the outside can result in uneven browning; brush the wraps evenly. Also, don’t skip the resting time after toasting—it helps the cheese set slightly and makes slicing cleaner.
How to tell it’s done
The chicken is done when it reaches an internal temperature of 165°F (74°C) and the edges are charred and crispy. The wraps are done when the flatbread is golden brown and crisp on both sides, and the cheese is fully melted and slightly oozing.
Cut one wrap open to check that the filling is hot throughout. If the bread browns too quickly, lower the heat to prevent burning.
- Poultry: 165°F (74°C) in the thickest part
Up next · Part 3 of 3
4 variations · storage & make-ahead · 5 answers · printable card
Tips, FAQ & printable recipe (Part 3)← Back to the ingredients (Part 1)