Appetizers · Part 3 of 3: Tips & recipe card
Crispy Garlic Butter Bacon Cheeseburger Rollups Tips, FAQ & printable recipe

- Prep
- Cook
- Total
- Serves
- 6
Tips for success
For a slightly spicy kick, consider adding a pinch of crushed red pepper flakes or a dash of hot sauce to the beef mixture while it browns.
This pairs exceptionally well with the salty bacon and creamy cheddar, adding another layer of flavor that complements the savory profile of the dish without overpowering the core ingredients.
If you notice the ends of the tortillas are browning too quickly in the oven, you can cover the baking sheet loosely with aluminum foil for the first five minutes of baking.
This allows the center to heat through properly while keeping the edges from becoming too dark or brittle before the rest of the rollup is finished.
Variations
- Spicy Jalapeno Version: Add two tablespoons of finely diced pickled jalapenos to the beef mixture before rolling to introduce a bright, spicy contrast to the rich cheese and bacon.
- BBQ Bacon Rollups: Stir two tablespoons of your favorite barbecue sauce into the beef and bacon mixture for a tangy sweetness that pairs beautifully with the melted cheddar.
Storage and make-ahead
- Fridge
- Keep in an airtight container in the refrigerator for up to 2 days.
- Freezer
- Not recommended for freezing as the texture of the tortilla will degrade.
- Reheat
- Reheat in a preheated oven at 350°F until warmed through and crisp.
Store any leftovers in an airtight container to keep them from drying out. They are best when consumed within two days, as the moisture from the cheese and meat can soften the crispy exterior over time.
Always ensure they have cooled to room temperature for no more than two hours before placing them in the refrigerator to maintain their freshness and safety.
You can prepare the meat and bacon filling up to one day in advance and store it in the refrigerator. When you are ready to serve, simply assemble the rollups, brush with the garlic butter, and bake as directed.
This makes the preparation process much faster if you are hosting guests or planning a quick meal during a busy weekday evening.
Serving ideas
Serve these rollups warm, directly from the oven for the best texture and flavor. They are excellent when paired with a side of dipping sauce, such as a mild salsa, ranch dressing, or even a simple barbecue sauce, which complements the savory bacon and beef perfectly. Arrange them on a platter for easy access.
These rollups also work well as part of a larger spread. Because they are handheld and easy to eat, they are ideal for casual gatherings. Provide plenty of napkins, as the cheesy filling can be quite gooey. They are best enjoyed while the cheese is still warm and stretchy, so serve them promptly after they finish baking.
Frequently asked questions
Can these be made ahead of time?
What is the best way to keep the rollups from unrolling?
Why is the garlic butter applied at the end?
Crispy Garlic Butter Bacon Cheeseburger Rollups

Ingredients
- 1 lb ground beef
- 6 slices bacon, cooked and crumbled
- 1 1/2 cups cheddar cheese, shredded
- 6 large flour tortillas
- 3 tbsp butter, melted
- 1 tsp garlic powder
Instructions
- Brown the ground beef in a large skillet over medium-high heat until fully cooked. Drain any excess fat. Add the crumbled bacon and half of the cheddar cheese to the pan, stirring until the cheese just begins to soften and combine with the meat mixture.
- Lay out the flour tortillas on a clean surface. Spoon the beef and bacon mixture evenly onto each tortilla. Top with the remaining shredded cheddar cheese. Roll each tortilla tightly into a cylinder shape, ensuring the ends are tucked in to keep the filling secure.
- Whisk the melted butter and garlic powder together in a small bowl. Place the rollups on a baking sheet and brush the tops generously with the garlic butter. Bake at 375°F (190°C) for 10 to 12 minutes until the tortillas are golden brown and crispy.
Estimated nutrition per serving
- Calories
- 380
- Protein
- 18 g
- Carbohydrates
- 22 g
- Fat
- 24 g
- Fiber
- 1.5 g
- Sugar
- 1 g
- Sodium
- 650 mg
Next recipe
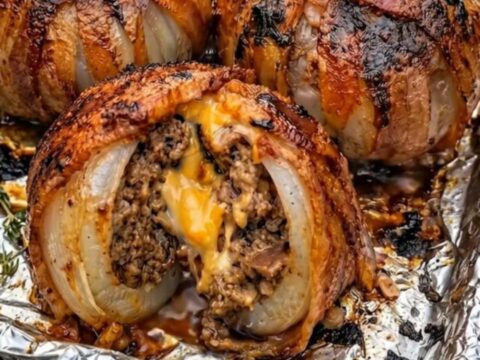
Crispy Bacon-Wrapped Stuffed Onion Bombs
See the recipe → →This recipe is based on a short cooking video and is published under the pen name Clara Weller. It was checked before publication, but errors can slip through. Nutrition, when shown, is an estimate. Read more in our editorial policy and on our food safety page.
More recipes to try

Garlic Parmesan Cheeseburger Bombs
Total time: 40 min
Crispy Carnivore Cheese Balls for a Simple Snack
Total time: 22 min
Cheesy Baked Shrimp and Crab Dip for Easy Entertaining
Total time: 40 min
Crispy Ham and Cheese Wraps
Total time: 15 min
Crispy Cheesy Chili Tortilla Cups for a Quick Snack
Total time: 25 min