Dinner · Part 2 of 3: Instructions
Crispy Flame-Kissed Peri-Peri Chicken Wings Step-by-step instructions
- Prep
- Cook
- Total
- Serves
- 4
Before you start
Before beginning, ensure all ingredients are measured and ready for the blender. Pat the chicken wings completely dry with paper towels; moisture on the skin is the enemy of crispness. Preheat the air fryer to 400°F (204°C) and the cast-iron grill pan on the stove.
Having your basting brush and tongs within reach will help you move efficiently through the final searing phase, ensuring the glaze is applied evenly and the wings do not overcook while developing their signature charred exterior.
Ingredients at a glance (7)
- 2 lb chicken wings
- 6 roasted red bird's eye chilies
- 4 garlic cloves
- 1/3 cup olive oil
- 2 lemons, juiced
- 1 tbsp smoked paprika
- 1 tbsp fresh oregano
Instructions
Blending the Glaze
- Prepare the Peri-Peri GlazePlace the roasted red bird's eye chilies, garlic cloves, olive oil, lemon juice, smoked paprika, and fresh oregano into a blender. Process the mixture until it reaches a smooth, consistent texture. Reserve the sauce in a small bowl for later use during the grilling stage. Ensure all ingredients are well combined to allow the flavors to meld properly before applying to the poultry.Look for The sauce should be vibrant red and emulsified.Tip Roasting the chilies ahead of time brings out a deeper, smoky sweetness that complements the acidity of the lemon juice perfectly.
The glaze should be a vibrant, smooth red sauce. It should smell intensely of roasted chilies and fresh lemon. Ensure the consistency is thick enough to coat the back of a spoon, which indicates it will adhere perfectly to the wings during the final sear. If the sauce appears too thin, add a few more chilies or a touch more paprika to adjust the body and flavor intensity before proceeding to the air-frying stage.
Air Frying the Wings
- Air Fry the WingsArrange the chicken wings in a single layer inside your air fryer basket. Cook the wings at 400°F (204°C) for 20 minutes, flipping them halfway through to ensure even browning. The goal is to render the fat and achieve a crispy skin before the final sear. Check that the internal temperature of the thickest part of the wing reaches 165°F (74°C) to ensure safety.Look for The wings should look golden brown and crispy.Safe temperature 165°F (74°C) internal temperature (poultry)Tip Do not overcrowd the air fryer basket, as this prevents the air from circulating effectively, which is essential for achieving that desirable crispy skin texture.
At this stage, the wings should be golden brown and feel firm to the touch. The skin should be rendered and crisp. The wings must reach an internal temperature of 165°F (74°C) to ensure they are safe to eat. They should sound hollow when tapped with tongs. If they still feel soft or show pockets of fat beneath the skin, continue air frying for an additional two to three minutes to ensure the desired texture is achieved.
Final Searing and Basting
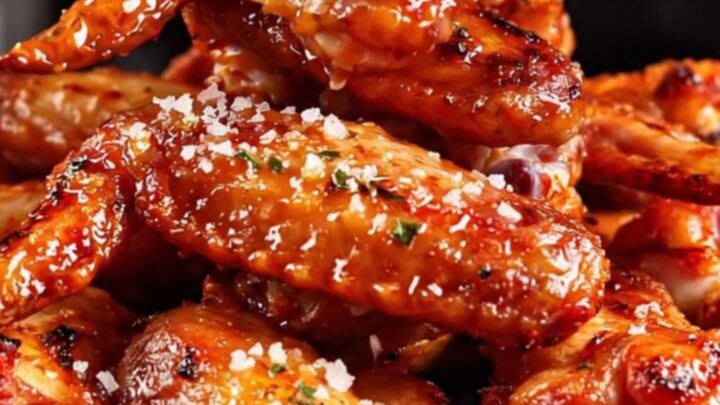
- Sear and BastePreheat a cast-iron grill pan to 450°F (232°C). Place the air-fried wings on the hot surface and sear them for a few minutes while generously basting with the reserved Peri-Peri glaze using a brush. Allow the sauce to caramelize slightly on the wings from the direct heat. Let the wings rest for at least 3 minutes before serving to ensure the juices redistribute throughout the meat for the best texture.Look for The glaze should be bubbling and slightly charred on the wings.Safe temperature 165°F (74°C) internal temperature (poultry)Tip Keep a close eye on the wings while basting, as the sugars in the glaze can burn quickly when exposed to the high heat of the grill pan.
The wings should emerge from the grill pan with beautiful char marks and a glistening, sticky coating. The smell should be smoky and zesty, indicating the glaze has properly caramelized. The wings should be hot and fragrant.
Before serving, verify that the glaze is evenly distributed and the charring is consistent across all pieces. Let the wings rest for at least 3 minutes to allow the flavors to settle, resulting in a perfectly balanced and succulent final dish.
Common mistakes
A common mistake is overcrowding the air fryer, which traps steam and results in soggy skin rather than a crispy finish. Always work in batches if necessary. Another error is adding the sauce too early; the Peri-Peri glaze contains sugars that will burn if exposed to high heat for too long.
Only apply the glaze during the final searing phase in the grill pan. Finally, skipping the resting period can lead to a loss of natural juices, impacting the overall tenderness of the chicken.
How to tell it’s done
The wings are considered done when the skin is crispy, the glaze is slightly charred, and the internal temperature reaches 165°F (74°C). Use a digital meat thermometer inserted into the thickest part of the wing, avoiding the bone, to confirm the temperature.
The meat should pull away easily from the bone, and the sauce should have a thick, sticky consistency that clings well to the skin, providing a balance of heat and citrus notes.
- Poultry: 165°F (74°C) in the thickest part
Up next · Part 3 of 3
2 variations · storage & make-ahead · 3 answers · printable card
Tips, FAQ & printable recipe (Part 3)← Back to the ingredients (Part 1)