Appetizers · Part 1 of 3: Ingredients
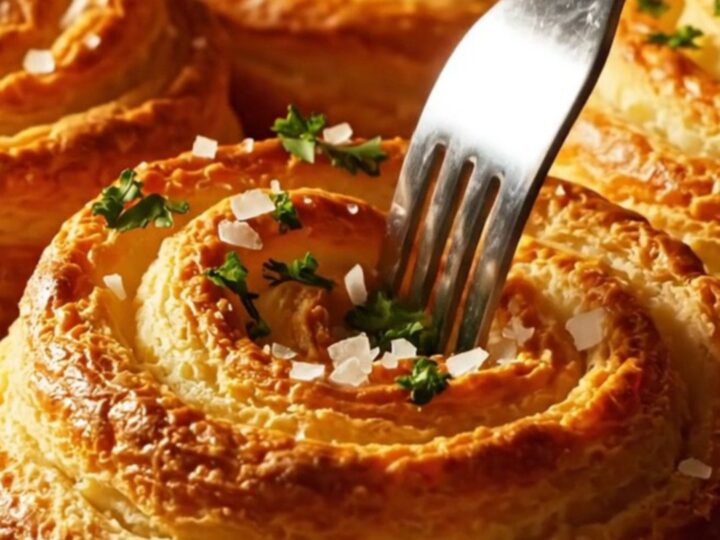
Crispy Duchess Potato Swirls with Parmesan
- Prep
- Cook
- Total
- Serves
- 4
Elevate your potato game with these elegant, restaurant-quality Duchess potato swirls. By combining fluffy riced potatoes with rich egg yolks and savory Parmesan, you create a side dish that is visually stunning and texturally perfect.
The high-heat baking technique ensures the delicate ridges crisp into a golden crust, while the inside remains impossibly light and velvety. These swirls are the perfect way to impress guests or add a touch of refinement to any meal, all while using simple, high-quality pantry ingredients.
Duchess potatoes are a classic French preparation that transforms humble mashed potatoes into an artistic, sophisticated side dish. By piping the mixture into rosettes, you increase the surface area that crisps up during baking, resulting in a dual-texture experience that is hard to beat.
The addition of Parmesan and egg yolks provides a deep, savory richness and structure, allowing the potatoes to hold their beautiful, star-tipped shape. This recipe focuses on precise technique, ensuring you achieve that perfect balance of a crunchy, golden exterior and a smooth, airy center every single time.
Ingredients
- 700 g Russet potatoes, peeled and boiled
- 60 g melted butter
- 50 ml heavy cream
- 3 large egg yolks
- 50 g finely grated Parmigiano-Reggiano
- 1/4 tsp ground nutmeg
- 2 tbsp clarified butter, for brushing
Garnish
- for serving micro-parsley
- for serving flaky salt
Why this recipe works
The secret to the perfect Duchess potato lies in the texture of the base. Using a potato ricer is non-negotiable; it aerates the potatoes and removes all lumps, which is essential for smooth piping. The egg yolks act as a binder, providing structure so the rosettes do not collapse in the oven. By beating the butter and cream into the riced potatoes while they are still warm, you ensure that the fats are fully emulsified, creating a velvety consistency that pipes easily and holds its shape.
High-heat baking is the final piece of the puzzle. Setting the oven to 425°F (220°C) allows the exterior of the piped rosettes to dehydrate and brown rapidly, creating that signature mahogany-gold crust. Meanwhile, the interior stays protected, steaming slightly to maintain a cloud-like, fluffy texture.
Brushing the swirls with clarified butter before they enter the oven further enhances this browning process, ensuring that every ridge becomes perfectly crispy and flavorful. This method produces a professional-looking result that is as delicious as it is beautiful.
Notes and substitutions
Choosing the right potato is critical for success. Russet potatoes are ideal because of their high starch content, which results in the fluffiest, lightest mash. Avoid waxy potatoes like red-skinned varieties, as they contain too much moisture and will not hold their shape when piped. Ensure the butter is melted but not boiling when added, and use room temperature eggs to prevent the potato mixture from cooling too quickly, which can make it harder to pipe smoothly through the star tip.
Regarding equipment, a sturdy star-tipped piping bag is essential for creating the characteristic ridges. If you do not have a piping bag, a heavy-duty gallon-sized plastic bag with the corner cut off can work in a pinch, though the definition of the ridges will be less pronounced.
Always use high-quality parchment paper to prevent sticking. For the cheese, freshly grating your Parmigiano-Reggiano is highly recommended over pre-grated versions, as it melts more evenly and provides a superior, more robust flavor profile to the finished potato swirls.
- Russet potatoes: Yukon Gold potatoes can be used for a slightly creamier, though less fluffy, texture.
- Clarified butter: Ghee or a high-smoke point oil can be substituted if clarified butter is unavailable.
Equipment
- potato ricer
- large mixing bowl
- star-tipped piping bag
- baking sheet
- parchment paper
- pastry brush
Up next · Part 2 of 3
3 steps · 22 min of cooking · what to look for at each stage
Step-by-step instructions (Part 2)