Dinner · Part 3 of 3: Tips & recipe card
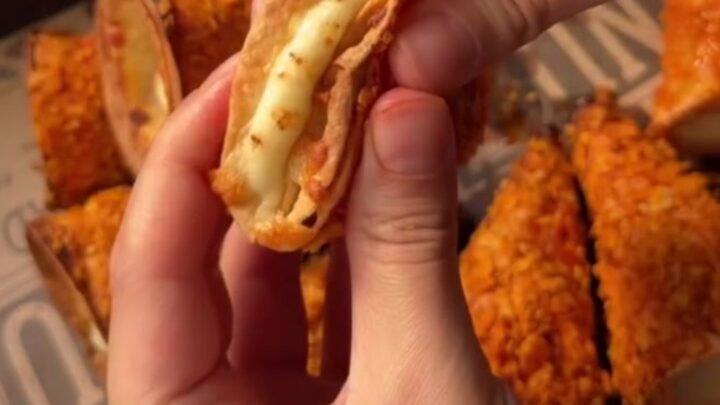
Crispy Doritos-Crusted Beef Cones Tips, FAQ & printable recipe
- Prep
- Cook
- Total
- Serves
- 4
Tips for success
For the crispiest cones, make sure the crushed chips are fine and uniform. Large chunks may fall off during baking.
Press the crumbs onto the ketchup generously, covering every part of the tortilla. You can also lightly spray the coated cones with cooking oil before baking to enhance browning and crunch.
If you have leftover filling, use it for tacos or nachos. To keep the cones warm before serving, place them on a wire rack in a low oven (200°F) for up to 20 minutes.
This helps maintain crispness. If you're making a big batch, bake in batches to avoid overcrowding the oven, which can reduce airflow and make the cones soggy.
Variations
- Chicken Cones: Swap the ground beef for ground chicken or turkey. Cook thoroughly to 165°F (74°C). Season with taco seasoning for extra flavor. The rest of the recipe stays the same.
- Veggie Cones: Replace the beef with a mixture of black beans, corn, and sautéed peppers and onions. Add cheese and bake as directed. This is a hearty vegetarian option that still delivers crunch.
- Spicy Cones: Add diced jalapeños or a few dashes of hot sauce to the beef mixture before filling. Use pepper jack cheese for an extra kick. Top with fresh cilantro after baking.
- Breakfast Cones: Fill the baked cones with scrambled eggs, cooked sausage, and cheese. Bake until the cheese melts. Serve with salsa for a fun breakfast or brunch.
Storage and make-ahead
- Fridge
- Store leftover cones in an airtight container in the refrigerator for up to 3 days. Reheat in the oven to restore crispness.
- Freezer
- Freeze unbaked, filled cones on a baking sheet until solid, then transfer to a zip-top bag for up to 2 months. Bake from frozen, adding 5-8 minutes.
- Reheat
- Reheat frozen or refrigerated cones in a 350°F (175°C) oven for 8-10 minutes, or until heated through and crisp.
Store leftover cones in an airtight container in the refrigerator for up to 3 days.
To reheat, place them on a baking sheet and warm in a 350°F (175°C) oven for 5-7 minutes, until the cheese is melted and the exterior is crisp again. Avoid microwaving, as it will make the coating soggy.
You can prepare the empty cones up to a day ahead. Bake and cool them completely, then store in an airtight container at room temperature.
When ready to serve, fill and bake as directed, adding a few extra minutes to the final bake since the shells will be cool. The beef can also be cooked and refrigerated for up to 2 days; reheat before filling.
Serving ideas
Serve the beef cones hot, straight from the oven, with extra crushed chips on the side for sprinkling. They’re perfect as a fun dinner with a simple salad or roasted vegetables. The cones are also great for parties—arrange them upright in a tall glass or a cone holder for easy grabbing.
For a dipping sauce, offer salsa, guacamole, or sour cream, though the cones are delicious on their own. The cheese pull is the star, so encourage everyone to pull the cones apart before eating. Pair with a cold beer or a citrusy soda to balance the richness.
Frequently asked questions
Can the cones be made ahead of time?
Why do the cones get soggy?
Can these be frozen?
What other chips can be used for the coating?
How do the cones stay upright during baking?
Crispy Doritos-Crusted Beef Cones

Ingredients
- 4 large flour tortillas (10-inch)
- 1/4 cup ketchup
- 3 cups crushed nacho cheese corn chips
- 1 lb ground beef
- 2 cups shredded cheddar or Mexican blend cheese
Instructions
- Preheat the oven to 350°F (175°C). Fold each flour tortilla in half, then roll it into a cone shape, overlapping the edges. Secure the seam with toothpicks. Brush the outside of each cone with ketchup, then press the crushed nacho cheese chips onto the ketchup to coat evenly. Place the coated cones upright in a baking dish or on a baking sheet.
- Bake the cones at 350°F (175°C) for 10-12 minutes, until the tortillas are rigid and the coating is lightly toasted. Remove from the oven and let cool slightly while preparing the filling.
- In a skillet over medium-high heat, cook the ground beef, breaking it up with a spoon, until browned and cooked through, about 5-7 minutes. Season with salt and pepper if desired. Drain any excess fat.
- Stuff each baked cone with a layer of shredded cheese, then the cooked ground beef, and top with more shredded cheese. Press the filling gently to pack it in.
- Place the filled cones upright in a baking dish. Bake at 350°F (175°C) for 8-10 minutes, until the cheese is melted and bubbly, and the edges of the cones are deep golden brown.
- Remove the cones from the oven and let them cool for 2-3 minutes. Carefully remove the toothpicks. Serve hot, pulling the cones apart to show the cheese pull.
Estimated nutrition per serving
- Calories
- 650
- Protein
- 32 g
- Carbohydrates
- 45 g
- Fat
- 38 g
Next recipe
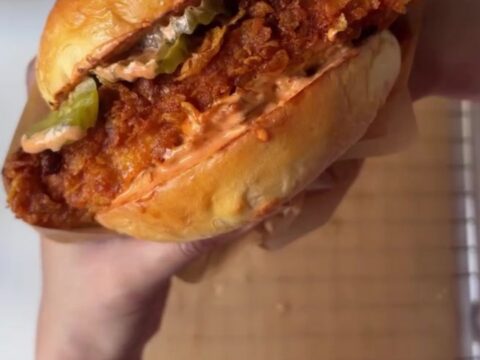
Crispy Fried Chicken Sandwich with Spicy Mayo
See the recipe → →This recipe is based on a short cooking video and is published under the pen name Clara Weller. It was checked before publication, but errors can slip through. Nutrition, when shown, is an estimate. Read more in our editorial policy and on our food safety page.
More recipes to try

Crispy Potato Veggie Patties with Spicy Kewpie Sauce
Total time: 32 min
Stuffed Round Zucchini with Beef and Chickpeas
Total time: 1 h 10 min
Honeycomb Turkish Manti Dumplings with Garlic Yogurt and Sizzling Paprika Butter
Total time: 1 h 5 min
Roasted Vegetable Pipe Rigate Pasta with Melted Cheese
Total time: 45 min
Stuffed Ring Pizza with Golden Crust
Total time: 1 h 52 min