Dinner · Part 2 of 3: Instructions
Crispy Doritos-Crusted Beef Cones Step-by-step instructions
- Prep
- Cook
- Total
- Serves
- 4
Before you start
Preheat the oven to 350°F (175°C). Gather all ingredients: tortillas, ketchup, crushed chips, ground beef, and shredded cheese. Have toothpicks ready for securing the cones. Set up a work station with a baking sheet or dish that can hold the cones upright.
If using a baking sheet, you can prop the cones against each other or use crumpled foil to keep them standing. Crush the chips in a zip-top bag with a rolling pin or in a food processor until they are fine crumbs but not powder.
Ingredients at a glance (5)
- 4 large flour tortillas (10-inch)
- 1/4 cup ketchup
- 3 cups crushed nacho cheese corn chips
- 1 lb ground beef
- 2 cups shredded cheddar or Mexican blend cheese
Instructions
Phase 1: Shape and Bake the Shells
- Shape and Coat the ConesPreheat the oven to 350°F (175°C). Fold each flour tortilla in half, then roll it into a cone shape, overlapping the edges. Secure the seam with toothpicks. Brush the outside of each cone with ketchup, then press the crushed nacho cheese chips onto the ketchup to coat evenly. Place the coated cones upright in a baking dish or on a baking sheet.Look for The cones hold their shape and are evenly coated with crunchy chip crumbs.Tip Use a small bowl or ramekin to help the cones stand upright while coating.
- Bake Until RigidBake the cones at 350°F (175°C) for 10-12 minutes, until the tortillas are rigid and the coating is lightly toasted. Remove from the oven and let cool slightly while preparing the filling.Look for The cones are firm to the touch and the chip coating is crisp.Tip If the cones are not rigid after 10 minutes, bake for 2-3 more minutes.
At the end of this phase, the cones should be rigid and hold their shape when picked up. The chip coating should be lightly toasted and fragrant, with a deep golden color.
The ketchup should have dried slightly, helping the crumbs adhere firmly. The cones should not feel soft or doughy; they should be crisp to the touch. If they bend easily, return them to the oven for a few more minutes.
Phase 2: Cook the Beef and Fill
- Cook the BeefIn a skillet over medium-high heat, cook the ground beef, breaking it up with a spoon, until browned and cooked through, about 5-7 minutes. Season with salt and pepper if desired. Drain any excess fat.Look for The beef is browned and crumbly, with no pink remaining.Safe temperature 160°F (71°C) internal temperature (ground meat)Tip For extra flavor, add taco seasoning or a pinch of chili powder.
- Fill the ConesStuff each baked cone with a layer of shredded cheese, then the cooked ground beef, and top with more shredded cheese. Press the filling gently to pack it in.Look for The cones are generously filled with cheese and beef.Tip Leave a little room at the top for the cheese to melt and bubble over.
The ground beef should be fully cooked, browned, and crumbly, with no pink remaining. The fat should be drained. When you stuff the cones, the filling should be packed gently but not overflowing. The cheese should be distributed evenly so it melts uniformly. The cones should remain upright and stable as you fill them.
Phase 3: Melt and Serve
- Bake Until Cheese MeltsPlace the filled cones upright in a baking dish. Bake at 350°F (175°C) for 8-10 minutes, until the cheese is melted and bubbly, and the edges of the cones are deep golden brown.Look for The cheese is fully melted and starting to bubble over the rim.Safe temperature 160°F (71°C) internal temperature (ground meat)Tip If the cones are browning too quickly, tent loosely with foil.
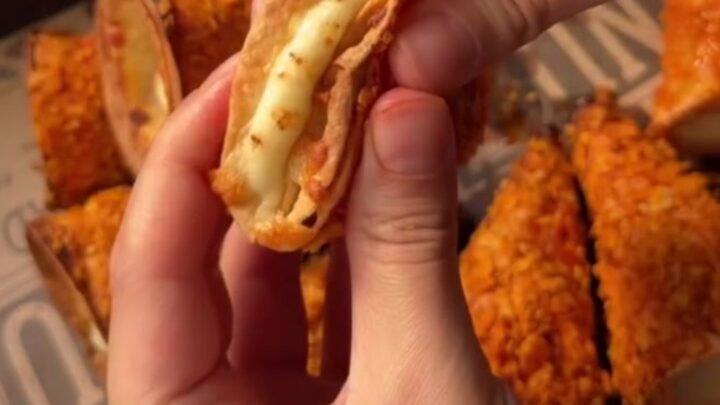
- Serve HotRemove the cones from the oven and let them cool for 2-3 minutes. Carefully remove the toothpicks. Serve hot, pulling the cones apart to show the cheese pull.Look for The cheese stretches as the cones are pulled apart.Tip Let cool slightly before handling to avoid burns from hot cheese.
The cheese should be completely melted and bubbly, with some golden spots on top. The edges of the cones may darken slightly. When you pull the cones apart, the cheese should stretch in long strands. The exterior should be very crisp and crackle when bitten. Let them cool for a couple of minutes before serving to avoid burning your mouth.
Common mistakes
A common mistake is overfilling the cones, which can cause them to burst open during baking. Leave a little room at the top. Another error is under-baking the empty cones; if they aren't rigid enough, they'll collapse when stuffed.
Bake until they hold their shape firmly. Also, avoid using pre-shredded cheese that contains anti-caking agents, as it may not melt as smoothly. Finally, don't skip the toothpicks—they are essential for keeping the cone shape intact during the first bake.
How to tell it’s done
The cones are done when the coating is deeply golden and crisp, and the cheese inside is fully melted and bubbly, with some cheese bubbling over the rim. The ground beef must reach an internal temperature of 160°F (71°C) to be safe.
Insert an instant-read thermometer into the center of the filling to check. The exterior should be firm and shatter when bitten, not chewy. Let the cones rest for 2-3 minutes before serving to allow the cheese to set slightly and prevent burns.
- Ground meat: 160°F (71°C) in the thickest part
Up next · Part 3 of 3
4 variations · storage & make-ahead · 5 answers · printable card
Tips, FAQ & printable recipe (Part 3)← Back to the ingredients (Part 1)