Dinner · Part 2 of 3: Instructions
Crispy Chicken Shawarma Wrap with Garlic Sauce Step-by-step instructions
- Prep
- Cook
- Total
- Serves
- 4
Before you start
Before starting, make sure the chicken thighs are trimmed and ready. Prepare the marinade and coat the chicken at least 1 hour ahead, or up to overnight. While the chicken marinates, make the sumac onions and the garlic sauce, then refrigerate.
Cook the seasoned fries according to package instructions and keep them warm. Have all your assembly ingredients ready: tortillas, pickles, tomato slices, and the cooked fries. Set up a clean workspace for rolling the wraps.
Ingredients at a glance (25)
- 2 lb boneless skinless chicken thighs
- 1/2 cup mayonnaise
- 4 cloves garlic, minced
- 2 tbsp olive oil
- 2 tsp smoked paprika
- 1 tsp garlic powder
- 1 tsp ground cumin
- 1 tsp ground coriander
- 1/2 tsp ground turmeric
- 1/2 tsp chili powder
- 2 tbsp fresh lemon juice
- 2 tbsp clarified butter
- 1 red onion, thinly sliced
- 1 tsp sumac
- 1/4 cup fresh parsley, chopped
- 1/2 cup mayonnaise
- 1/4 cup sour cream
- 2 tbsp buttermilk
- 1 tbsp ketchup
- 1 tsp hot sauce
- 1/2 tsp garlic powder
- 4 large flour tortillas or flatbreads
- 2 cups seasoned french fries, cooked
- 1/2 cup dill pickles, sliced
- 2 tomatoes, sliced
Instructions
Marinate and Prep
- Marinate the ChickenIn a large bowl, combine the mayonnaise, minced garlic, olive oil, smoked paprika, garlic powder, cumin, coriander, turmeric, chili powder, and lemon juice. Add the chicken thighs and toss to coat thoroughly. Cover the bowl and refrigerate for at least 1 hour.Look for The chicken is evenly coated with the reddish-orange marinade.Tip For deeper flavor, marinate overnight.
- Toss the Sumac OnionsIn a small bowl, combine the sliced red onion, sumac, and chopped parsley. Add a squeeze of lemon juice (about 1 tablespoon) and toss to combine. Set aside.Look for The onions are lightly coated and fragrant with sumac.Tip Let the onions sit while the chicken cooks to soften slightly.
- Make the Garlic SauceIn a small bowl, whisk together the mayonnaise, sour cream, buttermilk, ketchup, hot sauce, and garlic powder until smooth. Cover and refrigerate until ready to use.Look for The sauce is silky and pale pink from the ketchup.Tip Adjust the hot sauce to your preferred heat level.
At the end of this phase, the chicken is coated in a thick, aromatic marinade and resting in the refrigerator.
The sumac onions are bright pink and fragrant, and the garlic sauce is smooth and creamy. Everything is ready to go, so the cooking process will be quick and seamless.
Cook the Chicken
- Sear the ChickenHeat a large skillet over medium-high heat and add the clarified butter. When the butter is shimmering, add the marinated chicken thighs in a single layer. Cook for 5–7 minutes per side, until deeply charred and cooked through. The internal temperature should reach 165°F (74°C). Transfer to a cutting board and let rest for 5 minutes before slicing.Look for The chicken has a dark, charred crust and no pink in the center.Safe temperature 165°F (74°C) internal temperature (poultry)Tip Do not overcrowd the pan; cook in batches if needed.
- Slice the ChickenUsing a sharp knife, slice the rested chicken into thin strips against the grain. Set aside.Look for The slices are juicy and show a hint of pink inside, but fully cooked.Tip Slice just before assembling to keep the chicken moist.
The chicken should be deeply seared with a dark, charred crust and cooked through to 165°F (74°C). The kitchen smells of warm spices and sizzling butter. After resting, the chicken slices are juicy and tender, perfect for piling into the wraps.
Assemble and Toast
- Assemble the WrapsLay a tortilla on a clean surface. Spread a generous layer of garlic sauce down the center. Top with a handful of sliced chicken, sumac onions, seasoned fries, pickles, and tomato slices.Look for The fillings are piled in a neat line, leaving room at the edges.Tip Warm the tortillas briefly in a dry skillet to make them pliable.
- Roll TightlyFold the sides of the tortilla over the filling, then roll from the bottom up, tucking the filling in as you go. The wrap should be snug and secure.Look for The wrap is tight with no gaps, and the filling stays inside.Tip Use a piece of parchment paper to hold the wrap if needed.
- Toast the WrapsHeat a clean skillet over medium heat. Place the wraps seam-side down and cook for 2–3 minutes per side, until golden brown and crispy. Press gently with a spatula to ensure even browning.Look for The tortilla is golden and crisp, with a slight crunch when pressed.Tip Do not overcrowd the pan; toast in batches if necessary.
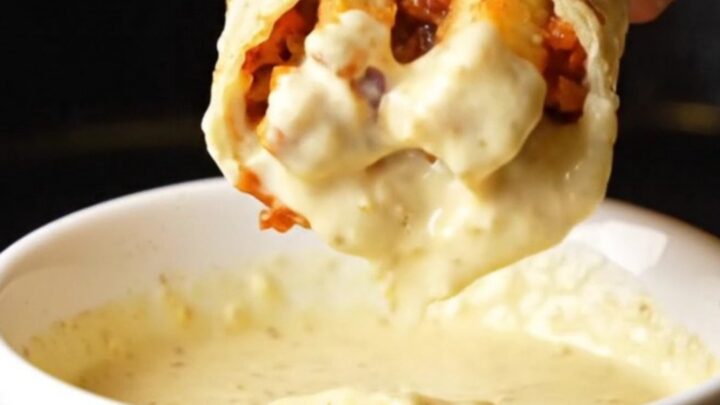
- Serve with Garlic SauceCut each wrap in half and serve immediately with extra garlic sauce on the side for dipping.Look for The wraps are warm, crispy, and oozing with sauce.Tip Serve with extra pickles on the side if desired.
The wraps are rolled tightly and toasted to a golden brown, with a satisfying crunch when pressed. The filling is hot and the cheese, if using, is melted. The wraps are ready to be sliced and served with extra garlic sauce.
Common mistakes
One common mistake is overcrowding the skillet when searing the chicken, which lowers the heat and causes the chicken to steam instead of char. Cook in batches if necessary. Another is overfilling the wraps, making them difficult to roll and prone to tearing.
Stick to a moderate amount of filling. Also, be sure to toast the wraps seam-side down first to help seal them. Finally, don't skip the resting time for the chicken—slicing too soon releases the juices and results in dry meat.
How to tell it’s done
The chicken is fully cooked when it reaches an internal temperature of 165°F (74°C) and the juices run clear. The exterior should be deeply browned and charred in spots.
The wraps are done toasting when the tortillas are golden brown and crisp on both sides, and the filling is hot throughout. If you press gently on the wrap, it should feel firm and crunchy. Let the chicken rest for 5 minutes before slicing to retain its juices.
- Poultry: 165°F (74°C) in the thickest part
Up next · Part 3 of 3
4 variations · storage & make-ahead · 5 answers · printable card
Tips, FAQ & printable recipe (Part 3)← Back to the ingredients (Part 1)