Dinner · Part 1 of 3: Ingredients
Crispy Chicken Chimichangas with Molten Pepper Jack
- Prep
- Cook
- Total
- Serves
- 6
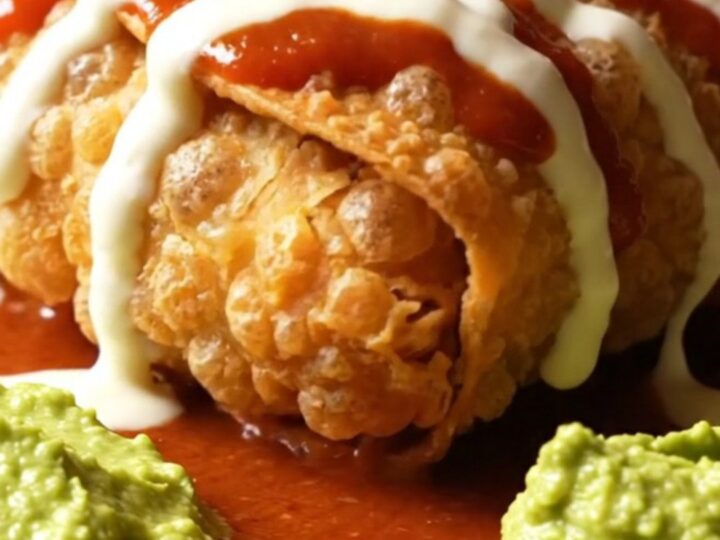
Crispy golden chimichangas with molten pepper jack inside. A creamy green-chile chicken filling gets folded into flour tortillas, fried for three minutes in 365°F oil until the shells puff into flaky blisters, then drizzled with warm queso blanco, red enchilada sauce and guacamole. Every bite cracks loudly, then melts.
A chimichanga is a burrito that went for a swim in hot oil, and it is one of the great Tex-Mex pleasures: a tortilla that puffs and blisters into a shattering crust around a hot, creamy center. This version leans on a rotisserie chicken shortcut. Shredded chicken is stirred with softened cream cheese, diced green chiles, cumin and a full cup of pepper jack, so the filling comes together in minutes and melts as the chimichangas fry.
The frying itself is brief and forgiving — three minutes at 365°F turns the tortilla flaky and golden while the cheese inside goes molten. A triple drizzle of warm queso blanco, red enchilada sauce and guacamole finishes the plate. From bowl to first crunchy bite, the whole thing takes well under an hour.
Ingredients
Filling
- 2 cups shredded rotisserie chicken
- 3 oz cream cheese, softened
- 2 tbsp diced green chiles
- 1 tsp ground cumin
- 1 cup shredded pepper jack cheese
- 6 large 10-inch flour tortillas
- 6 cups vegetable oil, for frying
For drizzling
- White queso blanco, warmed (store-bought or made ahead), for serving
- Red enchilada sauce (store-bought or made ahead), for serving
- Guacamole (store-bought or made ahead), for serving
Why this recipe works
The filling works because it is built on fat and moisture in balance. Cream cheese coats every strand of chicken, which keeps the shredded meat from drying out in the fryer, while the diced green chiles add little pockets of tang that cut through the richness.
Because the chicken is already fully cooked, the filling only needs to warm through during the fry — the three minutes the tortilla needs to blister is exactly the time the cheese needs to melt.
The frying method rewards precision. At 365°F, the water in the tortilla flashes to steam and lifts the shell into those flaky, blistered layers before the surface can soak up oil.
The temperature is high enough to set the crust quickly and low enough to brown it evenly across three minutes. Rolling tightly and sealing the seam keeps steam inside, so the chimichanga puffs instead of splitting, and draining on a wire rack keeps the crust crisp all the way to the table.
Notes and substitutions
Rotisserie chicken is the workhorse here — pull the meat while it is still slightly warm and shred it by hand for the best texture. Softened cream cheese blends far more smoothly than cold, so give it ten minutes on the counter.
Pepper jack brings both melt and gentle heat; if the filling tastes flat, it usually needs the chiles rather than more cheese. Flour tortillas labeled burrito-size, ten inches across, hold the filling without tearing.
For equipment, a heavy Dutch oven holds its temperature steadier than a thin pot, and a clip-on deep-fry thermometer is worth having — guessing oil temperature is the main way chimichangas go wrong. Fry in small batches and let the oil return to 365°F each time. The queso blanco, enchilada sauce and guacamole can be store-bought or made ahead; warm the sauces before drizzling so they do not steal heat from the crust.
- Rotisserie chicken: Any fully cooked shredded chicken, including leftover roasted or poached chicken breasts, works the same way.
- Pepper jack cheese: Monterey Jack or shredded Oaxaca cheese melts just as smoothly; add a pinch of cayenne for heat.
- Diced green chiles: Finely chopped roasted poblano or a spoonful of your favorite green salsa brings the same mild chile flavor.
- White queso blanco: Warm nacho cheese sauce or a simple melted Monterey Jack sauce drizzles similarly over the crisp shells.
Equipment
- Large mixing bowl
- Deep heavy pot or Dutch oven
- Deep-fry or candy thermometer
- Tongs
- Wire rack set over a sheet pan
- Paper towels
Up next · Part 2 of 3
9 steps · 20 min of cooking · what to look for at each stage
Step-by-step instructions (Part 2)