Dinner · Part 2 of 3: Instructions
Crispy Chicken Caesar Wraps: Golden, Crunchy, and Ready in Minutes Step-by-step instructions
- Prep
- Cook
- Total
- Serves
- 4
Before you start
Before starting, set up the breading station with three shallow dishes: one with flour, one with beaten eggs, and one with panko mixed with parsley. Have the seasoned chicken breasts ready.
Heat the avocado oil in a large skillet over medium-high heat until it reaches 350°F (175°C). Meanwhile, chop the romaine and mix the Caesar dressing with the Parmesan in a large bowl. Warm the tortillas in a dry skillet just before assembling.
Ingredients at a glance (15)
- 1 1/2 lb boneless, skinless chicken breasts
- 1 tsp garlic powder
- 1 tsp paprika
- 1/2 tsp black pepper
- 1/2 tsp salt
- 1/2 cup all-purpose flour
- 2 large eggs, beaten
- 1 1/2 cups panko breadcrumbs
- 1 tbsp dried parsley
- 2 cups avocado oil, for frying
- 4 cups chopped romaine lettuce
- 1/2 cup Caesar dressing
- 1/2 cup grated Parmesan cheese
- 4 large flour tortillas (10-inch)
- 1/4 cup garlic mayonnaise
Instructions
Coat and Fry the Chicken
- Prepare the ChickenSeason the chicken breasts with garlic powder, paprika, black pepper, and salt. Set up a breading station with three shallow dishes: one with flour, one with beaten eggs, and one with panko breadcrumbs mixed with dried parsley. Dredge each chicken breast in the flour, shaking off excess, then dip in the egg wash, and finally coat thoroughly with the panko mixture, pressing gently so the crumbs adhere.Look for The chicken is evenly coated with a thick, crunchy layer of panko; no bare spots remain.Tip Use one hand for dry ingredients and the other for wet to keep the coating from clumping.
- Fry the ChickenHeat the avocado oil in a large skillet over medium-high heat until it reaches 350°F (175°C). Carefully place the breaded chicken breasts into the hot oil, working in batches if needed to avoid crowding. Fry for 4–5 minutes per side, until golden brown and the internal temperature reaches 165°F (74°C). Transfer to a wire rack to drain.Look for The crust is deep golden and crispy; the chicken is cooked through with no pink in the center.Safe temperature 165°F (74°C) internal temperature (poultry)Tip Use a meat thermometer to check the thickest part of the breast; do not rely on color alone.
- Slice the ChickenLet the fried chicken rest for 2–3 minutes on the wire rack, then slice into thin strips. The slices should show a juicy interior and a crunchy coating.Look for The strips are crisp-edged and moist inside; the coating stays intact when cut.Tip Slicing against the grain helps keep the strips tender.
The chicken breasts are evenly coated with a thick layer of panko that clings well. As they fry, the oil sizzles and the crust turns a deep golden brown. The smell of fried chicken fills the kitchen. When you slice into a piece, the meat is white and juicy, and the coating shatters with a satisfying crunch. This is the foundation of the wrap.
Assemble the Wraps
- Make the Caesar SaladIn a large bowl, combine the chopped romaine lettuce, Caesar dressing, and grated Parmesan cheese. Toss until every leaf is evenly coated with the creamy dressing.Look for The lettuce glistens evenly with dressing; no dry spots or clumps remain.Tip Use chilled romaine for a crisper texture in the wrap.
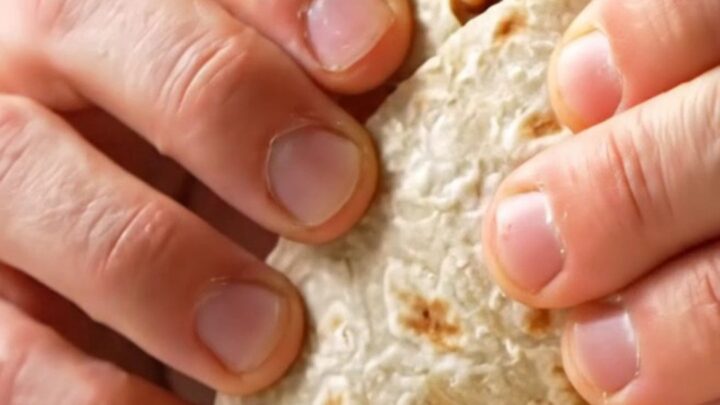
- Warm the TortillasHeat a dry skillet or griddle over medium heat. Warm each tortilla for 20–30 seconds per side, until pliable and lightly toasted. Keep them stacked and covered with a clean kitchen towel to stay warm.Look for The tortillas are soft and flexible, with light golden spots but not brittle.Tip Warming makes the tortillas easier to roll without cracking.
- Assemble the WrapsSpread a thin layer of garlic mayonnaise over each warm tortilla. Place a handful of the dressed Caesar salad in the center, then top with the crispy chicken strips. Fold in the sides and roll tightly into a snug cylinder, keeping the filling tucked in.Look for The wrap is compact and secure, with the filling visible at the ends but not spilling out.Tip Don't overfill; a modest amount makes rolling easier and prevents tearing.
The romaine is glistening with Caesar dressing and the Parmesan is evenly distributed. The warmed tortillas are pliable and soft.
As you spread the garlic mayo and layer the salad and chicken, the colors are vibrant: green lettuce, golden chicken, and creamy white sauce. The wraps roll up snugly, holding all the filling without spilling. The kitchen smells of toasted tortillas and garlic.
Toast and Serve
- Toast the WrapsHeat a clean skillet over medium heat. Place the assembled wraps seam-side down and toast for 1–2 minutes per side, until golden and crisp on the outside. This step seals the wrap and adds extra crunch.Look for The exterior is golden brown and crisp; the seam is sealed and doesn't open.Tip Press gently with a spatula while toasting for even browning.
- Slice and ServeTransfer the toasted wraps to a cutting board and slice diagonally in half to reveal the layered filling. Serve immediately while the chicken is still hot and the lettuce is crisp.Look for The cross-section shows distinct layers of crunchy chicken, dressed lettuce, and creamy sauce.Tip A sharp knife gives clean cuts without squashing the filling.
The wraps are toasted until golden brown on both sides, with a crisp exterior that gives slightly when pressed. When sliced diagonally, the cross-section reveals distinct layers: crunchy chicken, crisp lettuce, and creamy dressing. The first bite produces a loud crunch, followed by the cool, creamy salad. The wrap holds together perfectly, making it easy to eat with one hand.
Common mistakes
One common mistake is overcrowding the skillet, which lowers the oil temperature and makes the coating greasy instead of crisp. Another is not letting the chicken rest before slicing, which causes the juices to run out.
Overfilling the tortillas makes them difficult to roll and can cause tearing. Also, skip toasting the wraps if in a hurry, but this step is key for a sturdy, crispy exterior.
How to tell it’s done
The chicken is done when it reaches an internal temperature of 165°F (74°C) and the crust is deep golden brown. The coating should be crisp and shatter when bitten, while the meat inside is juicy and tender.
The wraps are ready when the tortillas are toasted and golden on both sides, and the filling is heated through. A quick check: the lettuce should still be crisp and the chicken hot.
- Poultry: 165°F (74°C) in the thickest part
- Egg dishes: 160°F (71°C) in the thickest part
Up next · Part 3 of 3
4 variations · storage & make-ahead · 5 answers · printable card
Tips, FAQ & printable recipe (Part 3)← Back to the ingredients (Part 1)