Dinner · Part 2 of 3: Instructions
Crispy Chicken Caesar Wrap with Chili Dressing Step-by-step instructions
- Prep
- Cook
- Total
- Serves
- 4
Before you start
Before you start, set up your breading station: three shallow dishes with flour, beaten eggs, and panko. Heat the oil in a large skillet while you pound and season the chicken.
Have the romaine washed and chopped, the parmesan shaved, and the tortillas ready to warm. Keep the dressing nearby so you can toss the salad right before assembling. This mise en place makes the process smooth and quick.
Ingredients at a glance (13)
- 1 lb boneless, skinless chicken breasts
- 1 tbsp garlic powder
- 1 tsp smoked paprika
- 1 tsp black pepper
- 1 tsp salt
- 1 cup all-purpose flour
- 2 large eggs, beaten
- 1 1/2 cups seasoned panko breadcrumbs
- Vegetable oil, for frying, to taste
- 3 cups chopped romaine lettuce
- Spicy Caesar dressing, to taste
- Shaved parmesan cheese, for serving
- 4 large flour tortillas
Instructions
Prep and Bread
- Pound and Season the ChickenPlace the chicken breasts between two sheets of plastic wrap and pound to an even 1/2-inch thickness. Season both sides with garlic powder, smoked paprika, black pepper, and salt.Look for The chicken is evenly thin and fully coated with spices.Tip Pounding ensures even cooking and a crispy exterior.
- Set Up the Breading StationPlace the flour in one shallow dish, the beaten eggs in a second, and the panko in a third. Dredge each chicken breast in flour, then dip in egg, then coat with panko, pressing gently to adhere.Look for The chicken is fully coated with panko, with no bare spots.Tip Use one hand for dry ingredients and the other for wet to avoid clumping.
The chicken is pounded thin, seasoned, and coated in flour, egg, and panko. The coating should be even and dry to the touch. The breading station is organized, and the oil is heating. Everything is ready for frying.
Fry and Slice
- Fry the Chicken CutletsHeat 1/2 inch of oil in a large skillet over medium-high heat until it reaches 360°F (182°C). Carefully lower the breaded cutlets into the hot oil and fry for 4 minutes per side, until deeply golden and cooked through.Look for The cutlets are deep golden brown and crispy.Safe temperature 165°F (74°C) internal temperature (poultry)Tip Maintain the oil temperature; adjust heat as needed.
- Drain and Slice the ChickenTransfer the fried cutlets to a wire rack or paper towels to drain. Let them rest for a few minutes, then slice into thick, juicy strips.Look for The strips are juicy and the coating stays crisp.Tip Slicing against the grain keeps the strips tender.
The cutlets are frying in oil at 360°F (182°C), turning golden brown after about 4 minutes per side. The kitchen smells like crispy fried chicken. Once cooked, the cutlets rest briefly, then are sliced into thick, juicy strips.
Assemble and Toast
- Toss the SaladIn a large bowl, combine the chopped romaine, shaved parmesan, and spicy Caesar dressing. Toss until the lettuce is evenly coated.Look for The romaine is lightly dressed but not soggy.Tip Add dressing gradually to control the amount.
- Assemble the WrapsLay a warm tortilla on a work surface. Place a portion of the dressed romaine in the center, top with the sliced chicken strips, and roll tightly, tucking in the sides as you go.Look for The wrap is snug and secure, with filling distributed evenly.Tip Warm tortillas are more pliable and less likely to tear.
- Toast the WrapsHeat a dry skillet or griddle over medium heat. Place the wraps seam-side down and toast for 2–3 minutes per side, until golden and crisp. Slice diagonally and serve.Look for The wraps are golden brown and crisp on both sides.Tip Toasting seals the seam and adds a crunchy texture.
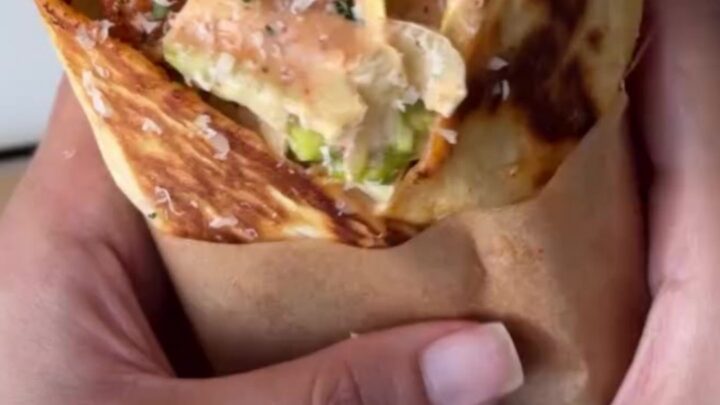
The romaine is tossed with the spicy Caesar dressing and parmesan. The wraps are assembled with the chicken and salad, then toasted seam-side down until golden and crisp.
The final wraps are sliced diagonally, showing the crunchy layers.
Common mistakes
A common mistake is overcrowding the skillet, which lowers the oil temperature and makes the coating greasy. Fry in batches and let the oil come back to temperature between batches.
Another pitfall is over-dressing the romaine, which makes the wrap soggy. Start with a small amount of dressing and add more only if needed. Also, don’t skip toasting the wrap—it’s what gives the exterior that satisfying crunch.
How to tell it’s done
The chicken is done when it reaches an internal temperature of 165°F (74°C) on an instant-read thermometer. The coating should be deeply golden brown and very crisp.
The wraps are done when the tortilla is toasted on both sides, golden and crackly to the touch. Let the cooked chicken rest for a few minutes before slicing to keep the juices in.
- Poultry: 165°F (74°C) in the thickest part
- Egg dishes: 160°F (71°C) in the thickest part
Up next · Part 3 of 3
4 variations · storage & make-ahead · 5 answers · printable card
Tips, FAQ & printable recipe (Part 3)← Back to the ingredients (Part 1)