Dinner · Part 2 of 3: Instructions
Crispy Cheesy Garlic Chicken Wraps Step-by-step instructions
- Prep
- Cook
- Total
- Serves
- 4
Before you start
Before you begin cooking, it is essential to have all your ingredients prepared and measured out. Start by cutting the chicken breasts into uniform, bite-sized cubes so they cook at the same rate.
Mince the fresh garlic cloves finely and have the cream cheese ready to help it melt quickly and evenly. Lay out your wraps and have your shredded cheese ready to go, as the assembly process moves very quickly once the chicken filling is cooked.
Ingredients at a glance (5)
- 1 1/2 lb chicken breast, cubed
- 4 cloves garlic, minced
- 4 oz cream cheese
- 1 1/2 cups shredded cheese
- 4 wraps
Instructions
Searing the Chicken
- Sear the chickenPlace the cubed chicken in a hot skillet over medium-high heat. Cook the chicken, stirring occasionally, until it is beautifully browned on all sides and reaches an internal temperature of 165°F (74°C), which takes about 6 to 8 minutes.Look for The chicken should be fully cooked through and have a golden-brown crust.Safe temperature 165°F (74°C) internal temperature (poultry)Tip Avoid overcrowding the skillet so the chicken sears rather than steams.
At the end of this phase, the chicken pieces should be fully cooked through, showing a beautiful golden-brown sear on all sides. The skillet should be sizzling, and the chicken should release easily from the pan.
Before proceeding, verify that the chicken has reached a safe internal temperature of 165°F (74°C) using a digital meat thermometer.
Creating the Creamy Garlic Filling
- Add garlic and cream cheeseReduce the skillet heat to medium. Stir in the minced garlic and cook for about 1 minute until fragrant, being careful not to let it burn. Add the cream cheese to the skillet, stirring constantly until the cheese melts completely and coats the chicken pieces in a thick, creamy garlic sauce.Look for The sauce should be smooth, thick, and cling to the chicken.Tip If the sauce is too thick, splash in a tablespoon of milk or water to loosen it.
By the end of this phase, the minced garlic should be fragrant and soft, and the cream cheese should be completely melted and smooth. The chicken pieces should be fully coated in a thick, velvety, garlic-infused sauce with no visible lumps of cream cheese remaining in the skillet.
Assembling and Toasting the Wraps
- Assemble the wrapsLay the wraps flat on a clean work surface. Distribute the creamy garlic chicken mixture evenly down the center of each wrap. Top the chicken filling with the shredded cheese. Fold the sides of each wrap inward, then roll them tightly from the bottom up to enclose the filling.Look for The wraps should be tightly rolled and secure so the filling does not leak.Tip Warming the wraps slightly in the microwave for 10 seconds makes them easier to fold without tearing.
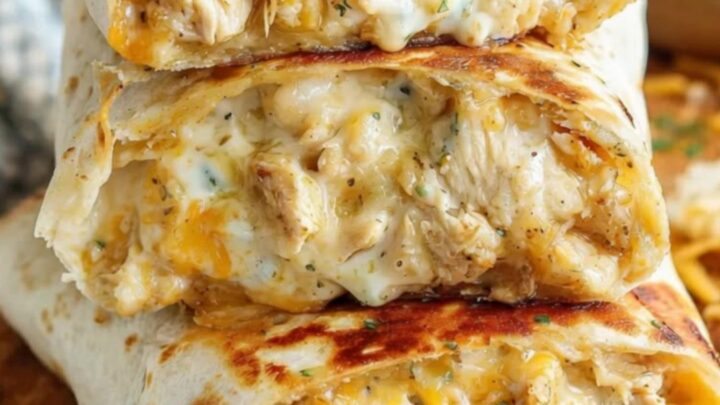
- Toast to golden perfectionPlace the assembled wraps seam-side down in a hot pan over medium heat. Toast for 2 to 3 minutes per side, turning carefully with a spatula, until the wraps are golden brown and crispy, and the cheese inside is completely melted.Look for The exterior should be deep golden-brown with a crisp texture.Tip Press down gently with a spatula while toasting to help seal the seams.
At the end of this final phase, the wraps should be tightly sealed and toasted to a beautiful deep golden-brown color. They should feel firm and crisp to the touch, and you should hear a distinct crunch when cutting through them. The cheese inside should be completely melted and gooey.
Common mistakes
One common mistake is overfilling the wraps, which makes them difficult to roll tightly and causes the filling to spill out into the skillet during the toasting process. Keep the filling concentrated in the center, leaving plenty of room at the borders to fold the edges securely.
Another mistake is toasting the wraps over heat that is too high; this burns the exterior of the wraps before the cheese inside has a chance to melt. Maintain a steady medium heat for the perfect golden, crispy finish.
How to tell it’s done
To ensure the chicken is perfectly cooked and safe to eat, it must reach an internal temperature of 165°F (74°C). You can verify this by inserting an instant-read thermometer into several of the larger chicken pieces.
The wraps themselves are done when they are crisp and golden-brown on both sides, and the shredded cheese in the center has melted into a gooey, stretchy consistency that binds the creamy chicken filling together.
- Poultry: 165°F (74°C) in the thickest part
Up next · Part 3 of 3
2 variations · storage & make-ahead · 3 answers · printable card
Tips, FAQ & printable recipe (Part 3)← Back to the ingredients (Part 1)