Appetizers · Part 2 of 3: Instructions
Crispy Cheesy Beef Cones Step-by-step instructions
- Prep
- Cook
- Total
- Serves
- 6
Before you start
Before starting, heat the oven to 400°F (200°C). Line a baking sheet with parchment paper. Have all ingredients measured and ready. Cut the tortillas in half and set them aside.
Finely chop the onion and dice the bell peppers. Mince the garlic. Shred the mozzarella if not already shredded. Prepare a small bowl for toothpicks.
Ingredients at a glance (11)
- 6 flour tortillas (8-inch)
- 1 lb ground beef
- 1/2 cup finely chopped onion
- 2 cloves garlic, minced
- 2 tbsp tomato paste
- 1 tsp smoked paprika
- 1 tsp ground cumin
- 1/2 tsp chili flakes
- 1/2 cup diced bell peppers
- 1 1/2 cups shredded mozzarella cheese
- toothpicks, for securing cones, to taste
Instructions
Crisp the shells
- Shape and bake the tortilla conesHeat the oven to 400°F (200°C). Cut each tortilla in half. Roll one half into a cone shape, overlapping the edges slightly, and secure with a toothpick. Place the cones upright on a baking sheet lined with parchment paper, spacing them apart. Bake for 8 minutes until they hold their shape and begin to crisp. Remove from the oven and let cool slightly on the sheet.Look for The cones should be firm enough to hold their shape when touched.Tip Press the overlapping edge firmly so the cone doesn't unroll during baking.
- Brown the beef fillingWhile the cones bake, heat a large skillet over medium-high heat. Add the ground beef and cook, breaking it up with a spoon, until browned and no longer pink, about 5 minutes. Add the onion and garlic and cook until softened, about 2 minutes. Stir in the tomato paste, smoked paprika, cumin, chili flakes, and bell peppers. Cook until the mixture is thick and the peppers are tender, about 2 minutes more.Look for The beef is browned and the vegetables are soft; the mixture should be thick, not watery.Safe temperature 160°F (71°C) internal temperature (ground meat)Tip Drain excess fat if desired after browning for a leaner filling.
After baking the empty cones, they should be lightly golden and firm to the touch. They will continue to crisp as they cool. Check that they hold their shape without collapsing. If they seem soft, return them to the oven for 2 more minutes. The edges should be dry and slightly browned.
Fill and melt
- Stuff the conesOnce the cones are cool enough to handle, carefully remove the toothpicks. Spoon the beef mixture into each cone, filling them generously. Top with shredded mozzarella, pressing lightly to pack the filling.Look for The cones are filled to the top with beef and cheese.Tip Use a small spoon or your fingers to push the filling down into the cone.
- Bake until bubblyReturn the stuffed cones to the baking sheet, upright. Bake at 400°F (200°C) for 8 minutes, until the mozzarella is melted, bubbling, and golden brown at the tips.Look for The cheese is bubbly and browned in spots; the edges of the cones are deeply golden.Tip If the cones wobble, lean them against each other or use a muffin tin for support.
The filled cones should look full and inviting, with cheese mounded on top. During baking, the cheese will melt and bubble, and the tips of the cones will turn a deeper golden brown.
The kitchen will smell of toasted tortillas and savory beef. Be careful not to overbake, or the cheese may become rubbery.
Serve and enjoy
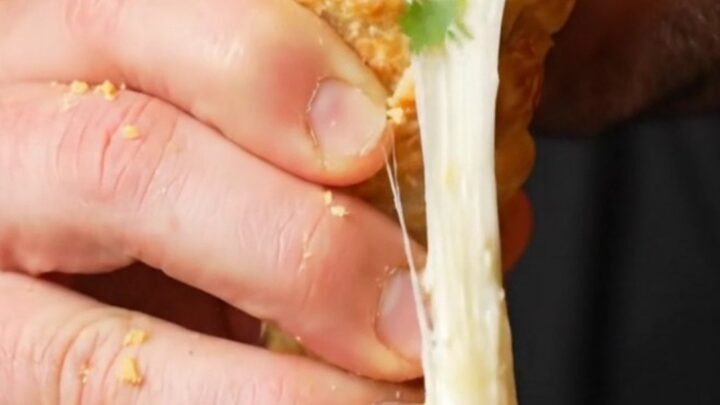
- Cool and serveRemove the cones from the oven and let them cool for 2 minutes on the baking sheet. Serve warm, with the cheese pulling as you bite into the crunchy shell.Look for The cones are crisp and the cheese is stretchy.Tip Letting them rest briefly prevents the filling from sliding out.
The cones should be crisp, with the cheese melted and slightly browned. When you take a bite, you should hear a satisfying crunch, followed by the creamy, stretchy cheese. The filling should be hot and flavorful. Let them cool just enough to handle, then serve immediately.
Common mistakes
A common mistake is overfilling the cones, which can cause them to burst open during baking. Fill them about three-quarters full and press the filling down gently. Another issue is soggy cones—this happens if the beef mixture is too wet.
Cook the beef until the liquid has evaporated and the mixture is thick. Also, ensure the cones are baked until fully crisp before filling; underbaked tortillas will soften quickly.
How to tell it’s done
The beef filling is done when it is browned and cooked through, reaching an internal temperature of 160°F (71°C). The cones are done when the tortillas are deeply golden and crisp, and the cheese is melted, bubbling, and browned at the tips.
The shells should sound hollow when tapped. Let them cool for 2 minutes before serving to allow the cheese to set slightly, but serve warm for the best cheese pull.
- Ground meat: 160°F (71°C) in the thickest part
Up next · Part 3 of 3
4 variations · storage & make-ahead · 5 answers · printable card
Tips, FAQ & printable recipe (Part 3)← Back to the ingredients (Part 1)