Dinner · Part 1 of 3: Ingredients
Crispy Beer-Battered Baja Fish Tacos with Garlic-Lime Sauce
- Prep
- Cook
- Total
- Serves
- 4
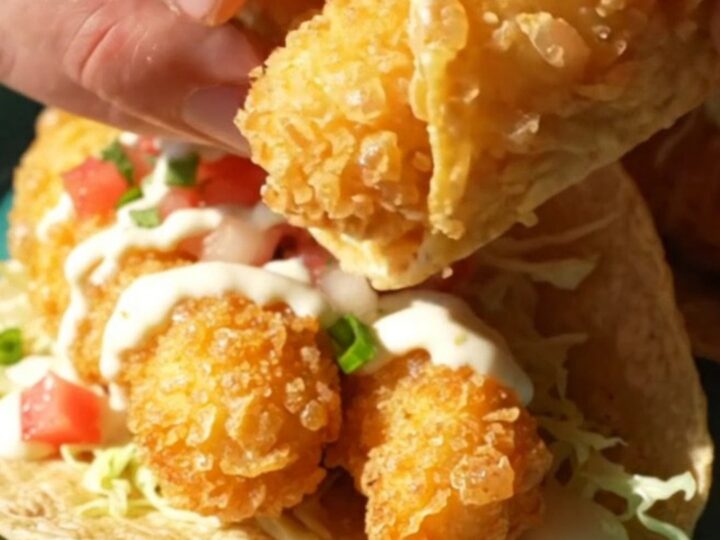
Crispy beer-battered Baja fish tacos with the ultimate crunch come together in one bowl of batter and one pot of oil. Ice-cold Mexican lager makes the coating puff and shatter while the cod inside stays snowy and flaky. Stack the golden fillets on warm corn tortillas with shredded cabbage, pico de gallo, and a creamy garlic-lime sauce. Fried in small batches at 375°F, each taco crackles from the first bite to the last.
Baja fish tacos were born on a peninsula where fried fish meets corn tortilla and cold sauce, and the formula has barely changed since. This version keeps it honest: a thin, seasoned batter built on flour, cornstarch, baking powder, and Mexican oregano, loosened with a full cup of ice-cold Mexican lager.
Strips of Atlantic cod take a quick dip, then 3 1/2 minutes in 375°F oil turns them into blistered, golden shells around moist, flaky fish. From there it is assembly only: warm tortillas, crunchy cabbage, bright pico de gallo, and a creamy white garlic-lime sauce that cools every bite. The whole thing runs about 50 minutes, and most of that is hands-off frying time in calm, small batches.
Ingredients
- 1 cup all-purpose flour
- 2 tbsp cornstarch
- 1 tsp baking powder
- 1 tsp Mexican oregano
- 1 cup ice-cold Mexican lager
- 1 lb Atlantic cod, cut into 1-inch strips
- 6 cups vegetable oil, for frying
- 8 corn tortillas, warmed, for serving
- 2 cups shredded cabbage
- 1 cup pico de gallo
- 1 cup creamy white garlic-lime sauce, store-bought or made ahead
Why this recipe works
The batter works because of temperature and restraint. Cold lager slows gluten development and keeps the mixture thin, while baking powder releases gas the instant it hits hot oil, inflating the coating into that blistered, glassy shell.
Cornstarch does quiet work too: it weakens the flour's structure, so the crust fries brittle instead of bready. Whisking only until combined leaves a few lumps, which is exactly right, since overworked batter turns chewy and clings in thick, heavy ropes.
Frying at a true 375°F is the other half of the equation. Oil at that temperature flashes the surface moisture into steam, which pushes outward and prevents the shell from absorbing fat. Thin cod strips cook through in 3 1/2 minutes, long before the batter can darken past golden. Draining on a wire rack instead of paper towels keeps the underside dry and audible, so the last taco crunches as loudly as the first.
Notes and substitutions
Choose a light, clean Mexican lager rather than anything hoppy or dark; bitterness fights the sweet cod, and dark malts muddy the golden color. Atlantic cod is the classic, but any firm white fish with thick flakes holds up here.
The creamy white garlic-lime sauce can be store-bought or made ahead, and it should be thick enough to drape over the fish without running. Mexican oregano is worth seeking out for its citrusy edge, though regular oregano works in a pinch.
Equipment matters more than usual for frying. A heavy Dutch oven holds heat evenly, a clip-on deep-fry thermometer removes all guesswork, and a wire rack over a sheet pan is essential for draining.
Have tongs, a wide mixing bowl for dipping, and an instant-read thermometer for checking the fish. Fry in batches of four or five; the oil temperature is the recipe, and crowding the pot is the one mistake that cannot be corrected later.
- Mexican lager: Any light lager or pilsner works; for a non-alcoholic version, use cold club soda and whisk just before frying so the bubbles stay active.
- Atlantic cod: Other firm white fish such as haddock, pollock, or mahi-mahi fry beautifully with the same batter and timing.
- Mexican oregano: Regular Mediterranean oregano is fine; add 1/4 tsp ground cumin for a warmer, more Baja-style flavor.
Equipment
- Heavy Dutch oven
- Deep-fry thermometer
- Wire rack set over a sheet pan
- Whisk
- Mixing bowls
- Tongs
Up next · Part 2 of 3
8 steps · 25 min of cooking · what to look for at each stage
Step-by-step instructions (Part 2)