Appetizers · Part 2 of 3: Instructions
Crispy Baked Mini Taco Cups for Game Day Step-by-step instructions
- Prep
- Cook
- Total
- Serves
- 12
Before you start
Before anything touches the heat, set up the whole line. Preheat the oven to 400°F (200°C) with a rack in the center, and grease the muffin tin thoroughly. Brown and season the beef, confirm 160°F (71°C) on an instant-read thermometer, and drain it well.
Trim the twelve tortillas into 4-inch rounds and stack them. Drain the pico de gallo through a sieve so it does not wet the filling, shred the Colby Jack if it is not already shredded, and measure the refried beans.
Ingredients at a glance (10)
- Cooking spray, to taste, for greasing the muffin tin
- 3/4 lb ground beef, 85% lean
- 1 tbsp taco seasoning
- 12 small flour tortillas (8-inch), trimmed into 4-inch rounds
- 3/4 cup refried beans (1 tablespoon per cup)
- 1/2 cup pico de gallo, drained, plus more for serving
- 3 cups shredded Colby Jack cheese (1/4 cup per cup)
- 1/2 cup sour cream, for dolloping
- 1/2 cup guacamole, for dolloping
- 1/4 cup pickled jalapeño slices
Instructions
Get the tin and the beef ready
- Heat the oven and grease the tinPosition a rack in the center of the oven and heat to 400°F (200°C). Coat a 12-cup muffin tin evenly with cooking spray, covering the rims as well as the bottoms, since the tortilla edges crisp directly against the metal. A well-greased tin is what lets each baked cup release cleanly, with no torn edges and no scraping.Look for The oven should be fully preheated before the tin goes in, and every cup coated in a thin, even sheen of oil.Tip Spray the tin over the sink to catch overspray, then wipe pooled oil from the flat surface between cups so it does not smoke.
- Brown and season the beefBrown the ground beef in a skillet over medium-high heat, breaking it into small crumbles as it cooks. When no pink remains, stir in the taco seasoning and cook for one more minute so the spices bloom in the fat, then drain the excess grease. For safety, the beef is done at an internal temperature of 160°F (71°C).Look for The crumbles should be deeply browned and dry, with no pink spots and no liquid pooling in the pan.Safe temperature 160°F (71°C) internal temperature (ground meat)Tip A potato masher breaks the crumbles smaller than a spatula, which helps the beef sit neatly in each cup.
- Trim the tortilla roundsTrim each flour tortilla into a 4-inch round. Set an upside-down 4-inch bowl or a wide-mouth cutter on the tortilla and cut around it with kitchen scissors or a small knife, working stack by stack. Save the trimmings for snacking or crisping. The rounds should be even, since uniform edges brown at the same rate in the oven.Look for Each round should measure 4 inches across and sit flat, with smooth, even edges all the way around.Tip Chilling the tortillas for ten minutes firms them up and makes the rounds easier to cut cleanly.
By the end of this phase the groundwork is done. The oven is holding steady at 400°F (200°C), the greased tin waits on the counter, and the beef is cooked through to 160°F (71°C), drained and seasoned, with no pink anywhere. The twelve tortilla rounds sit in a neat stack, all cut to 4 inches so they brown evenly. Check three things before moving on: the tin is greased in every cup, the beef crumbles are dry rather than wet, and the rounds are uniform.
Fill and bake the cups
- Press the rounds into the cupsPress one tortilla round into each greased muffin cup, pleating the edges where the tortilla folds so the round sits snugly against the bottom and sides. The pleats give the cups their signature ruffled rim. Press gently but firmly; the tortilla should hold its cup shape on its own before any filling goes in.Look for The rounds should line the cups without springing back, with ruffled edges rising just above the rim.Tip Dust fingertips lightly with flour if the tortillas feel tacky, and press the deepest fold in first.
- Spread the bean layerSpoon 1 tablespoon of refried beans into the bottom of each tortilla cup and spread it into a thin, even layer with the back of a small spoon. The beans act as a moisture barrier between the tortilla and the beef, keeping the bottoms from turning soggy as the cups bake.Look for The bean layer should cover the base of each cup in a thin film, leaving the pleated sides bare.Tip Cold refried beans spread more easily after a quick stir; a few drops of warm water loosen them without thinning the flavor.
- Add the beef and pico de galloDivide the seasoned beef evenly among the cups, about 2 tablespoons each, pressing it gently into the bean layer. Top each with a small spoonful of pico de gallo, letting the juices drain back through a fork so the cups do not take on extra liquid. Keep the filling level with the rim.Look for Each cup should look comfortably full but not mounded; no filling should rise above the tortilla rim.Tip Pressing the beef into a flat layer rather than a dome helps the cheese melt over the whole surface.
- Cap with Colby Jack and bakeTop each cup with 1/4 cup of shredded Colby Jack, mounding it gently so it covers the filling edge to edge, then bake for 10 minutes, rotating the tin once halfway through. Watch the last two minutes closely; the line between golden and too dark is short at this temperature.Look for The rims should be deeply toasted and the cheese centers bubbling into golden brown crusts.Tip If the rims color faster than the cheese, tent the tin loosely with foil for the final minutes.
This phase ends when the tin comes out of the oven smelling like toasted tortillas and bubbling cheese. The rims should be deeply golden, the cheese melted into browned, bubbly crusts, and the shells firm enough to hold their shape when nudged.
Give one cup a gentle press: the sides should feel crisp, not soft. If the rims are pale, return the tin for one or two more minutes rather than risking a pale shell. Let the tin rest on a rack for two minutes so the cheese sets just enough to lift cleanly.
Top and serve warm
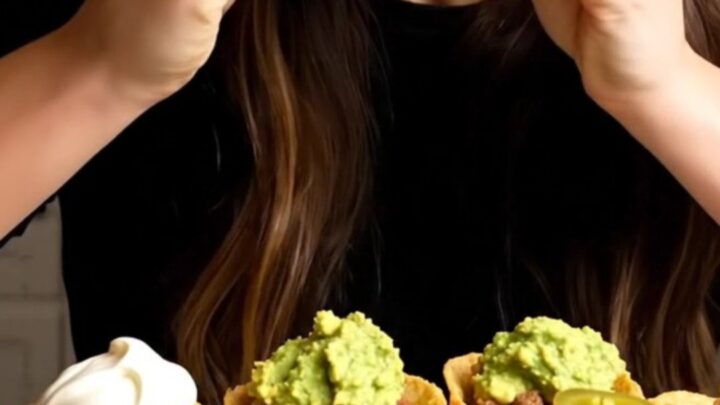
- Lift, top and serve warmLet the tin rest on a rack for 2 minutes, then lift each cup with a small offset spatula, working around the edges so the shells stay whole. Dollop each one with sour cream and guacamole, then finish with a pickled jalapeño slice. Serve the taco cups warm, while the cheese still pulls, with extra pico de gallo alongside.Look for The cheese should stretch in long strands as the first cup is lifted; the shells should feel crisp, not bendy.Tip Top the cups just before serving so the dollops stay cool and distinct against the hot, melty centers.
The finishing phase is quick, but the details matter. Each cup should lift from the tin whole, with crisp ruffled edges and no shell left behind. The cheese should stretch in long strands as it is lifted — that pull is the sign the bake was timed right.
The sour cream and guacamole go on cool, so they contrast with the hot centers, and the pickled jalapeño adds a bright, vinegary snap. If a shell tears, press it back together while warm; the melted cheese will hold it. Serve immediately.
Common mistakes
The most common failure is overfilling. A mounded cup steams from the inside, softens the shell and spills over the rim, so keep every layer level with the edge. Wet pico de gallo is the second culprit; drain it, always.
Underbaking is third: pale rims mean a bendy shell, and the difference between golden and deeply golden is the difference between crisp and chewy, so trust the color over the clock. Using pre-shredded cheese can leave the tops waxy instead of stretchy.
How to tell it’s done
The cups are done when the tortilla rims are deeply toasted — golden brown, not pale tan — and the cheese centers have bubbled into crusts freckled with brown. A shell should feel crisp to a gentle press and sound dry when tapped, and it should lift from the tin whole. The beef inside finished at 160°F (71°C) in the skillet, so the bake is purely about color and texture, not further cooking.
- Ground meat: 160°F (71°C) in the thickest part
Up next · Part 3 of 3
4 variations · storage & make-ahead · 5 answers · printable card
Tips, FAQ & printable recipe (Part 3)← Back to the ingredients (Part 1)