Desserts · Part 2 of 3: Instructions
Creamy Strawberry Banana Pudding Dessert Step-by-step instructions
- Prep
- Cook
- Total
- Serves
- 6
Before you start
Before beginning the assembly of the dessert, ensure the workspace is clean and organized. Have all ingredients measured and prepared, specifically the fruit, which should be washed, dried, and sliced just before use to prevent browning or excess moisture.
Arrange the glass dish and serving utensils nearby to streamline the layering process. If the pudding was kept in the refrigerator, take it out about ten minutes before starting so it is easier to spread smoothly across the layers without tearing the cookies or fruit slices.
Ingredients at a glance (4)
- 3 cups vanilla pudding, chilled
- 3 bananas, sliced into coins
- 1 lb strawberries, hulled and sliced
- 2 cups vanilla wafers, crushed
Instructions
Base layer preparation
- Prepare the base layersSpread a thin layer of vanilla pudding on the bottom of a 9x9 inch glass dish to ensure the wafers do not slide. Arrange a layer of crushed vanilla wafers over the pudding, pressing them down gently to create a solid foundation for the fruit and cream layers.Look for pudding covers the bottom of the dishTip Using a glass dish allows for a beautiful presentation of the layers.
The bottom of the glass dish should be evenly coated with a thin layer of pudding. This creates a non-slip surface for the wafers. Ensure the crushed wafers are spread in an even, single layer to provide a stable foundation for the fruit. The assembly should look deliberate and tidy, with no large gaps between the cookie pieces.
Building the fruit layers
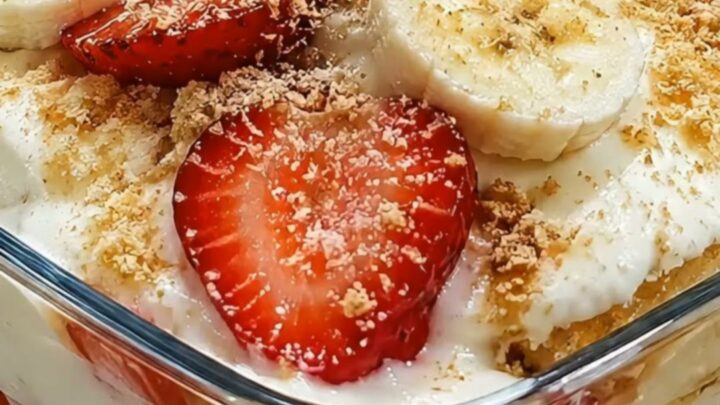
- Layer the fruit and creamPlace a layer of sliced bananas and strawberries over the wafers. Cover the fruit with a generous portion of the remaining vanilla pudding, smoothing it out with the back of a spoon. Repeat the layering process until all ingredients are used, finishing with a final layer of pudding topped with extra fruit slices for a decorative finish.Look for pudding is smooth and fruit is evenly distributedTip Keep the fruit slices uniform in size to ensure even texture in every bite.
The fruit should be arranged in a single layer to ensure every scoop contains a balanced ratio of banana, strawberry, and pudding.
The pudding should be spread gently, taking care not to displace the fruit slices underneath. The dish will start to look full, with the vibrant colors of the fruit clearly visible against the white pudding.
Setting and final presentation
- Chill and serveCover the glass dish with plastic wrap and refrigerate for at least one hour before serving. This resting period allows the pudding to set properly and the wafers to soften slightly from the moisture of the fruit and pudding. Scoop into individual serving bowls using a large spoon.Look for pudding is set and chilled throughTip Chilling overnight makes the texture even more cohesive and flavorful.
After chilling, the pudding will have thickened significantly. The wafers will have softened but still retain some structure, and the fruit will be well-integrated into the creamy base. The entire dish should feel cool and firm, ready to be scooped into individual portions without collapsing or separating into liquid.
Common mistakes
A common mistake is using overripe bananas that turn into mush, which can make the dessert look messy and compromise the texture. Ensure the banana slices are substantial enough to provide a clean bite.
Another error is neglecting to cover the dish during the chilling process, which can lead to the pudding forming a skin or absorbing odors from other items in the refrigerator. Finally, avoid over-mixing the layers once they are in the dish, as this will destroy the visual appeal of the distinct strata.
How to tell it’s done
The dessert is done when the pudding has firmed up enough to hold its shape when scooped. Because this is a chilled dessert with no raw ingredients requiring high-temperature cooking, doneness is determined by the set texture and the chilling time.
The dish should feel cold to the touch and the pudding should look glossy and smooth. If the layers appear to slide or the pudding is too runny, simply return it to the refrigerator for an additional thirty minutes to firm up further.
Up next · Part 3 of 3
2 variations · storage & make-ahead · 3 answers · printable card
Tips, FAQ & printable recipe (Part 3)← Back to the ingredients (Part 1)