Dinner · Part 2 of 3: Instructions
Creamy Smoked Turkey Corn Chowder Step-by-step instructions
- Prep
- Cook
- Total
- Serves
- 6
Before you start
Before you begin, ensure all your vegetables are washed thoroughly and chopped into uniform, bite-sized pieces. Having your ingredients prepped and ready on the counter will make the assembly process seamless. Verify that your slow cooker insert is clean and positioned on a level, heat-resistant surface.
Check that you have your whisk and a clean glass pitcher ready for mixing the liquid base. Once everything is staged, the actual assembly takes only a few minutes, allowing you to set it and forget it for the remainder of the afternoon.
Ingredients at a glance (6)
- 2 cups smoked turkey breast, cubed
- 2 cups sweet corn
- 2 cups potatoes, cubed
- 1 tsp smoked paprika
- 2 cups chicken broth
- 1 can condensed cream of potato soup
Instructions
Preparation and layering
- Assemble the basePlace the cubed smoked turkey breast into the bottom of the slow cooker, ensuring an even layer across the ceramic insert.Look for Turkey cubes should be spread evenly to provide a consistent base for the other ingredients.Tip Using bite-sized cubes ensures every spoonful of the final chowder contains a bit of meat.
- Add vegetablesScatter the sweet corn kernels and the small potato cubes over the turkey layer in the slow cooker.Look for Distribute the vegetables uniformly so they cook consistently throughout the simmering process.Tip Keep the potato cubes small and uniform in size so they soften at the same rate.
The ingredients are properly layered in the slow cooker. The turkey, corn, and potatoes are distributed evenly, creating a solid foundation for the liquid base to penetrate during the slow cooking process.
Seasoning and broth addition
- Season and combineSprinkle the smoked paprika over the ingredients. In a separate glass pitcher, whisk together the chicken broth and the condensed cream of potato soup until smooth, then pour the mixture over the contents of the slow cooker.Look for The broth mixture should be completely smooth and free of large lumps before pouring.Tip Whisking the condensed soup with the broth first prevents uneven clumps of thick soup in the final chowder.
The broth and condensed soup are whisked into a uniform, smooth mixture. When poured over the ingredients, the liquid should just begin to submerge the solid components, ensuring everything is ready to simmer.
Slow cooking to completion
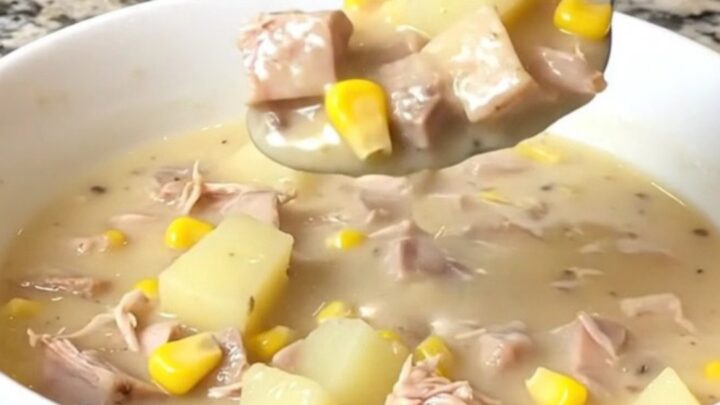
- Cook and serveCover and cook on low for 4 hours until the potatoes are tender and the chowder has thickened. Serve hot in a shallow bowl.Look for The chowder is ready when the potatoes are fork-tender and the liquid has reached a creamy, thick consistency.Tip If the chowder is too thick, add a small splash of additional broth before serving.
The chowder has simmered until the potatoes are soft and the soup is thick and creamy. The aroma should be savory and smoky, signaling that the ingredients have fully melded together.
Common mistakes
A common mistake is cutting the potatoes into pieces that are too large, which prevents them from cooking through at the same rate as the corn and turkey.
Another error is failing to whisk the condensed soup thoroughly with the broth; this can lead to pockets of concentrated, unmixed soup that ruin the texture.
Finally, avoid lifting the lid too frequently during the cooking process, as this releases heat and moisture, significantly extending the overall cooking time required for the potatoes to become tender.
How to tell it’s done
The chowder is finished when the potatoes are tender enough to be pierced easily with a fork and the liquid has thickened into a creamy, cohesive soup. The smoked turkey should be heated through and tender.
If you prefer a thicker consistency, you can gently mash a few of the potatoes against the side of the slow cooker insert to release more starch into the broth, which will further bind and thicken the soup before serving.
Up next · Part 3 of 3
2 variations · storage & make-ahead · 3 answers · printable card
Tips, FAQ & printable recipe (Part 3)← Back to the ingredients (Part 1)