Desserts · Part 2 of 3: Instructions
Creamy Slow Cooker Vanilla Egg Custard Step-by-step instructions
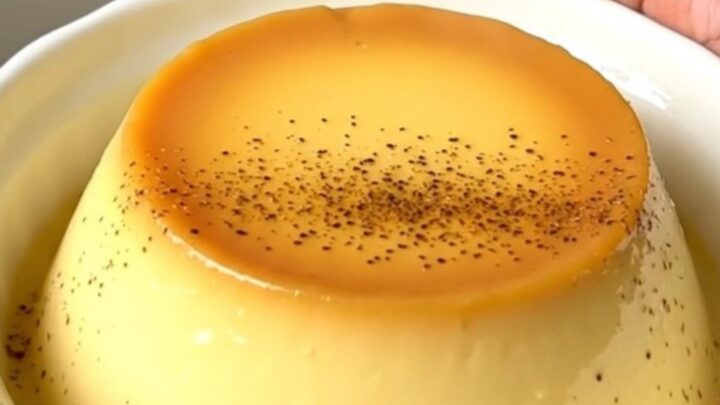
- Prep
- Cook
- Total
- Serves
- 4
Before you start
Before starting, ensure that all ingredients are measured and ready. If using cold eggs directly from the refrigerator, let them sit at room temperature for about 15 minutes to take the chill off, which helps with a more uniform cooking process.
Check that your slow cooker is positioned on a flat, stable surface away from any water sources or flammable items. Have your whisk and serving dishes clean and accessible nearby, as the preparation phase is very quick and requires no special equipment or complex techniques.
Ingredients at a glance (4)
- 4 eggs
- 1/2 cup granulated sugar
- 1/4 tsp ground nutmeg
- 2 cups whole milk
Instructions
Initial Preparation
- Prepare the baseCrack the eggs directly into the bottom of the slow cooker ceramic insert. Add the granulated sugar, ground nutmeg, and the whole milk into the cooker.Look for Ensure the ingredients are combined gently without creating too much foam.Tip Use room temperature eggs to help the custard set more evenly during the cooking process.
The eggs, sugar, nutmeg, and milk are combined in the slow cooker insert. The mixture should appear uniform, with the sugar dissolved into the milk and the nutmeg evenly distributed throughout the liquid. Ensure there are no large clumps of egg white remaining before you begin the cooking process.
Gentle Cooking
- Cook the custardCover the slow cooker and cook on low heat. To cook the eggs through to a safe internal temperature of 160°F (71°C), continue cooking until the center is firm. The soft, traditional version is achieved before this point.Look for The edges should be firm while the center remains soft and delicate.Safe temperature 160°F (71°C) internal temperature (egg dishes)Tip Avoid lifting the lid frequently to maintain a consistent temperature inside the slow cooker.
During the cooking process, the mixture will slowly thicken into a custard. You should see the edges begin to set and pull slightly away from the sides of the ceramic insert. The aroma of warm milk and nutmeg will become more pronounced as the custard reaches its final stage of cooking.
Final Setting
- Cool and setCarefully remove the ceramic insert from the base and allow the custard to rest at room temperature for at least 30 minutes before serving. This cooling time allows the structure of the custard to stabilize properly for the best texture.Look for The custard should look glossy and smooth on the surface.Tip If not serving immediately, transfer to a serving dish and refrigerate once the custard has reached room temperature.
Once the cooking is finished, the custard will have a delicate, wobbly texture. After the resting period, the surface should look glossy and smooth. The custard will have firmed up sufficiently to hold its shape when scooped, indicating that it is ready to be served or moved to the refrigerator for chilling.
Common mistakes
A common mistake is cooking the custard at too high a temperature or for too long, which causes the eggs to curdle and the texture to become grainy or rubbery.
Avoid opening the slow cooker lid too often, as this releases steam and heat, significantly increasing the cooking time and potentially leading to uneven results.
Additionally, ensure the custard cools adequately; serving it too hot will prevent it from having its signature smooth, sliceable consistency, while cooling it too quickly in the freezer can alter the texture.
How to tell it’s done
The custard is done when the edges are set and the center wobbles like gelatin when the dish is gently nudged. Use a digital thermometer to check the center, which must reach at least 160°F (71°C) to ensure the eggs are fully cooked and safe to consume.
The surface should appear smooth and glossy, without any signs of curdling or separation. If the custard still looks liquid in the middle, continue cooking for another 15 minutes and check again.
- Egg dishes: 160°F (71°C) in the thickest part
Up next · Part 3 of 3
2 variations · storage & make-ahead · 3 answers · printable card
Tips, FAQ & printable recipe (Part 3)← Back to the ingredients (Part 1)