Appetizers · Part 2 of 3: Instructions
Creamy Slow-Cooker Garlic Parmesan Buffalo Chicken Dip Step-by-step instructions
- Prep
- Cook
- Total
- Serves
- 8
Before you start
Before beginning, ensure the chicken is shredded into bite-sized pieces to ensure consistent texture throughout the dip. If the cream cheese is cold, leave it out for about 20 minutes to soften, which will help it meld more quickly with the other ingredients.
Prepare the roasted garlic by squeezing the cloves from their skins, ensuring no papery husks remain. Have all other ingredients measured and ready to go to ensure the assembly process is smooth and efficient.
Ingredients at a glance (7)
- 3.5 cups shredded chicken
- 16 oz cream cheese
- 1 cup garlic Parmesan wing sauce
- 2 heads roasted garlic, squeezed
- 1.5 cups mozzarella cheese
- 1 cup grated Parmigiano-Reggiano
- toasted garlic baguette slices, for serving
Instructions
Assembly
- Combine ingredients in the slow cookerPlace the shredded chicken, cream cheese, garlic Parmesan wing sauce, squeezed roasted garlic, mozzarella cheese, and grated Parmigiano-Reggiano into the ceramic insert of the slow cooker. Keep raw poultry refrigerated until ready to use, leaving it at room temperature for at most 30 minutes before cooking to maintain food safety.Look for Ensure all ingredients are evenly distributed within the crockpot insert.Tip Use room temperature cream cheese to help it melt faster and more evenly.
The ingredients should be layered neatly in the slow cooker insert, with the cheese and shredded chicken distributed evenly to prevent hot spots. Everything should be ready for the long, slow melt.
Slow Cooking
- Slow cook until moltenCover the slow cooker and set it to cook on LOW for 2 hours. Once the time is up, stir the mixture thoroughly until it reaches a smooth, rich, and creamy consistency, ensuring the internal temperature of the chicken reaches 165°F (74°C).Look for The dip should be bubbling, fragrant, and completely melted together.Safe temperature 165°F (74°C) internal temperature (poultry)Tip If the dip seems too thick, stir in an extra splash of wing sauce or a tablespoon of cream.
At the end of the two-hour cook, the dip should be bubbling gently and smell intensely of roasted garlic and Parmesan. The texture should be thick, creamy, and completely uniform after a final stir.
Serving
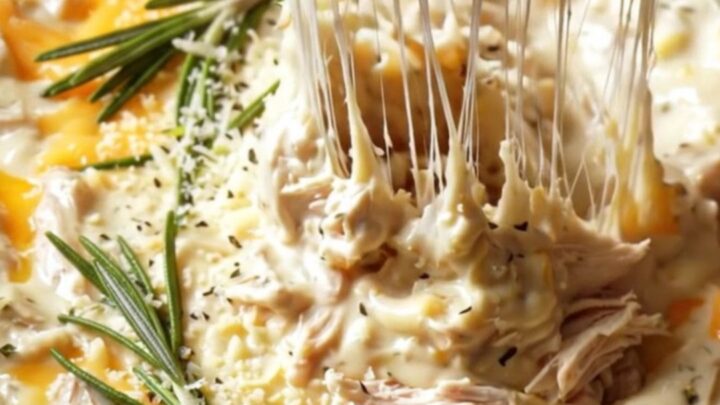
- Serve warmCarefully scoop the hot dip directly from the ceramic insert into a serving bowl or serve straight from the crockpot while keeping it on the warm setting. Accompany with toasted garlic baguette slices.Look for The dip should maintain a molten, stretchy texture when scooped.Tip Keep the crockpot on the warm setting to ensure the dip stays at the ideal serving temperature throughout the party.
The final dip should be hot, molten, and easy to scoop. It should hold its structure on a toasted baguette slice without being overly runny or excessively oily, ready for immediate enjoyment.
Common mistakes
A common mistake is using cream cheese with a different fat percentage, which can lead to a grainy texture due to its inconsistent fat content; always use standard full-fat cream cheese for the best results.
Another potential issue is adding the cheese while it is still cold, which can result in uneven melting.
Always ensure the chicken is properly shredded; large chunks can make the dip difficult to scoop and result in uneven distribution of the sauce. Finally, never skip the stirring step after cooking.
How to tell it’s done
The dip is done when it is bubbling, fragrant, and the cheese has completely melted into a smooth, thick, and uniform sauce. The chicken should be heated through to an internal temperature of 165°F (74°C).
The consistency should be molten and creamy, with a noticeable cheese pull when scooped with a baguette slice. Avoid overcooking, as this can cause the oils in the cheese to separate from the sauce base.
- Poultry: 165°F (74°C) in the thickest part
Up next · Part 3 of 3
2 variations · storage & make-ahead · 3 answers · printable card
Tips, FAQ & printable recipe (Part 3)← Back to the ingredients (Part 1)