Dinner · Part 2 of 3: Instructions
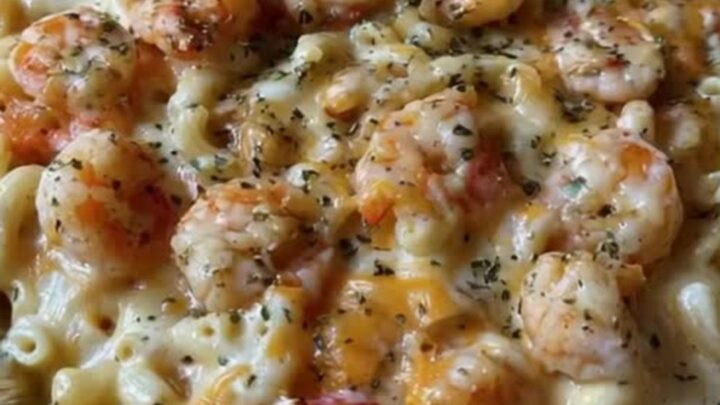
Creamy Seafood Mac and Cheese Bake Step-by-step instructions
- Prep
- Cook
- Total
- Serves
- 4
Before you start
Before beginning, ensure all ingredients are measured and ready. Preheat your oven to 375°F (190°C) to ensure it reaches the proper temperature before the dish goes in.
Pat the shrimp dry and prepare your baking dish by lightly greasing it if necessary. Having everything organized allows the assembly to proceed smoothly, ensuring the pasta remains warm while the topping is applied.
Ingredients at a glance (4)
- 1 lb pasta
- 3 cups cheese sauce, store-bought or made ahead
- 1 lb shrimp, peeled and deveined
- 1 tbsp seafood seasoning
Instructions
Pasta Preparation
- Prepare the pasta baseBring a large pot of salted water to a boil. Add the pasta and cook until al dente according to package instructions. Drain the pasta thoroughly using a colander and return it to the pot or a large mixing bowl.Look for Pasta is tender but firm to the bite.Tip Do not overcook the pasta as it will continue to soften in the oven.
The pasta should be cooked until it reaches an al dente state, meaning it is tender but still offers a slight resistance when bitten.
Once drained, ensure there is no excess water clinging to the noodles, as this will prevent the cheese sauce from properly adhering. The pasta should look matte and be ready to receive the sauce immediately while still warm.
Assembly and Seasoning
- Combine and seasonPour the cheese sauce over the cooked pasta and mix until every noodle is evenly coated. Toss the raw shrimp with the seafood seasoning in a separate bowl to ensure they are well coated. Transfer the coated pasta mixture into a foil pan, spreading it out into an even layer.Look for Pasta is fully covered in a thick, creamy layer of cheese sauce.Tip Ensure the shrimp are evenly distributed on top for balanced flavor.
The pasta should be thoroughly coated in the cheese sauce, appearing glossy and uniform. When the seasoned shrimp are placed on top, they should be distributed in a single layer to ensure even cooking. The entire surface should look appealing and ready for the oven, with the aroma of the seafood seasoning becoming prominent once it hits the warm pasta.
Final Bake
- Bake to perfectionArrange the seasoned shrimp on top of the pasta mixture. Place the foil pan in a preheated oven at 375°F (190°C) and bake for 20 minutes, or until the shrimp are opaque and reach an internal temperature of 145°F (63°C). Remove from the oven and let rest for 5 minutes before serving.Look for Shrimp turn pink and opaque, and the cheese sauce is bubbling at the edges.Safe temperature 145°F (63°C) internal temperature (shellfish)Tip Watch the shrimp closely to prevent them from becoming rubbery through overcooking.
The dish is finished when the top is slightly golden and the shrimp are cooked through. The cheese sauce will be bubbling at the edges of the pan, and the overall dish will be steaming and fragrant. The appearance should be cohesive, with the shrimp nestled into the creamy pasta, ready for a short rest before being portioned and served.
Common mistakes
A common mistake is overcooking the pasta before it even hits the oven, which leads to mushy noodles after baking. Always stop boiling when the pasta is slightly firm.
Another error is neglecting to dry the shrimp, which can introduce too much water into the cheese sauce, causing it to become thin or soupy. Finally, avoid crowding the shrimp on top of the pasta, as they need space to roast evenly and develop their flavor.
How to tell it’s done
The dish is considered done when the cheese sauce is bubbling vigorously around the edges of the pan and the shrimp have turned a vibrant pink color, appearing opaque throughout.
Using a meat thermometer, ensure the thickest part of the shrimp reaches an internal temperature of 145°F (63°C). Allow the dish to rest for 5 minutes after removing from the oven to let the sauce set slightly, which makes serving much easier.
- Shellfish: 145°F (63°C) in the thickest part
Up next · Part 3 of 3
2 variations · storage & make-ahead · 3 answers · printable card
Tips, FAQ & printable recipe (Part 3)← Back to the ingredients (Part 1)