Dinner · Part 2 of 3: Instructions
Creamy Queso Chicken and Rice Casserole for Comfort Food Night Step-by-step instructions
- Prep
- Cook
- Total
- Serves
- 6
Before you start
Before beginning the cooking process, measure out the long-grain white rice and chicken broth accurately to ensure perfect rice texture. Pat the raw chicken breasts dry with paper towels to help the seasoning adhere evenly.
Have the taco seasoning blend measured and ready. Ensure the glass baking dish is clean and lightly greased, and clear a heatproof space on the counter for the hot dish to rest after baking.
Ingredients at a glance (5)
- 1 1/2 lb boneless skinless chicken breasts
- 2 tbsp taco seasoning blend
- 1 1/2 cups long-grain white rice
- 3 cups chicken broth
- 2 cups white queso dip
Instructions
Cooking the Chicken and Rice
- Season and Cook the ChickenSeason the boneless skinless chicken breasts evenly on both sides with the taco seasoning blend. Heat a skillet over medium heat, add the chicken, and cook for 6 to 8 minutes per side until the internal temperature reaches 165°F (74°C). Remove from heat and set aside to rest.Look for The chicken is cooked through when it is golden brown on the outside and no longer pink in the center.Safe temperature 165°F (74°C) internal temperature (poultry)Tip Letting the chicken rest for 5 minutes before shredding keeps the juices locked inside the meat.
- Cook the Seasoned RiceIn a medium saucepan, combine the long-grain white rice and chicken broth. Bring the mixture to a boil over high heat, then reduce the heat to low, cover with a tight-fitting lid, and simmer for 15 to 18 minutes until the liquid is fully absorbed.Look for The rice should be tender and fluffy, with no remaining liquid at the bottom of the saucepan.Tip Avoid lifting the lid while the rice simmers to prevent steam from escaping, which causes uneven cooking.
At the end of this phase, the chicken breasts should be deeply golden brown on the outside and cooked to a safe internal temperature of 165°F (74°C).
The seasoned rice should be completely tender, fluffy, and fragrant, having absorbed all of the savory chicken broth in the saucepan.
Assembling and Baking
- Shred Chicken and CombineUse two forks to shred the cooked chicken breasts into bite-sized pieces. Preheat the oven to 375°F (190°C). In a 9x13-inch glass baking dish, combine the cooked seasoned rice and the shredded chicken, spreading them into an even layer.Look for The chicken and rice should be thoroughly mixed so every bite contains both ingredients.Tip Greasing the baking dish lightly with nonstick spray helps prevent the rice from sticking to the edges.
- Bake the Chicken and RicePlace the glass baking dish in the preheated oven. Bake for 15 to 20 minutes until the chicken and rice are heated completely through and the rice on the top layer begins to turn slightly golden and toasted.Look for Look for a slightly crispy texture on the top rice grains and steam rising from the dish.Tip Keep an eye on the oven to ensure the top rice grains do not dry out excessively or burn.
Before proceeding, check that the shredded chicken and seasoned rice are thoroughly integrated in the baking dish. After baking, the top layer of rice grains should appear slightly dry, golden, and toasted, while steam rises steadily from the hot casserole.
Adding the Queso and Serving
- Warm the White QuesoWhile the casserole is baking, place the white queso dip in a microwave-safe bowl or small saucepan. Heat gently, stirring occasionally, until the queso is warm, fluid, and completely smooth.Look for The queso should run easily off a spoon without any thick clumps or separation.Tip Warm the queso slowly to prevent the cheese from breaking or becoming oily.
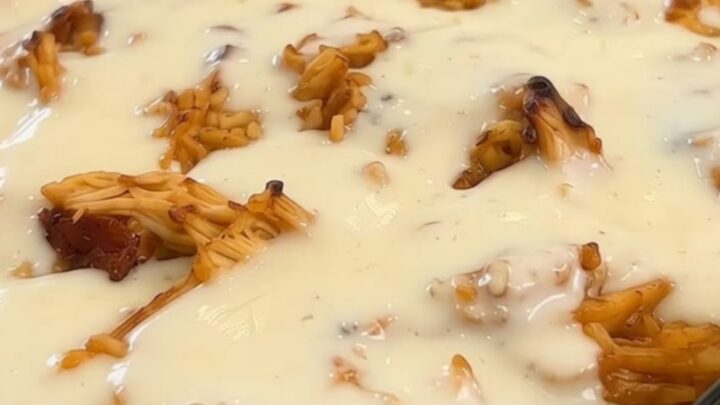
- Pour Queso and Serve HotRemove the baking dish from the oven. Pour the warm white queso evenly over the baked rice and chicken. Let the casserole sit for 2 minutes as the bubbling cheese sauce settles over the toasted rice grains before scooping and serving.Look for The silky cheese sauce should coat the entire surface and seep slightly into the rice layers.Tip Serve immediately while the cheese is hot and dripping for the best texture and flavor experience.
The final checkpoint is reached when the warm, silky white queso is poured over the hot casserole. The cheese sauce should bubble gently as it settles over the toasted rice grains, creating a glistening, creamy blanket that remains smooth and fluid.
Common mistakes
One common mistake is pouring cold or room-temperature queso over the baked casserole, which cools the dish down instantly and prevents the cheese from flowing smoothly.
Another error is baking the queso itself for too long, which can cause the cheese sauce to split, become grainy, or lose its silky texture. Always warm the queso separately and pour it over the hot, freshly baked chicken and rice just before serving.
How to tell it’s done
The casserole is fully done when the chicken has reached a safe internal temperature of 165°F (74°C) during the initial cooking step, and the assembled casserole is heated thoroughly to the center.
The top layer of rice should be golden and toasted, and the poured queso should be hot, bubbling, and completely melted over the top.
- Poultry: 165°F (74°C) in the thickest part
Up next · Part 3 of 3
2 variations · storage & make-ahead · 4 answers · printable card
Tips, FAQ & printable recipe (Part 3)← Back to the ingredients (Part 1)