Desserts · Part 3 of 3: Tips & recipe card
Creamy No-Bake Peanut Butter Pie Tips, FAQ & printable recipe

- Prep
- Cook
- Total
- Serves
- 8
Tips for success
To achieve perfectly clean slices every time, run a thin-bladed knife under hot water and wipe it dry before making each cut. This technique melts the fat slightly upon contact, allowing the knife to glide through the filling without dragging or tearing the delicate layers of the pie, ensuring a professional look.
If you prefer a more intense chocolate flavor, consider adding a thin layer of melted chocolate to the bottom of the crust before adding the peanut butter filling.
Allow this chocolate layer to harden in the refrigerator for a few minutes. This hidden layer adds a satisfying snap and acts as a moisture barrier to keep the crust crisp for longer.
Variations
- Chocolate Peanut Butter: Replace the graham crust with crushed chocolate cookies for a richer, more intense cocoa flavor that pairs perfectly with the creamy peanut butter filling.
- Salted Pretzel Crust: Substitute the graham crust with crushed salted pretzels to add a savory contrast that balances the sweetness of the filling and enhances the peanut butter profile.
Storage and make-ahead
- Fridge
- Keep refrigerated at all times when not serving. Store covered for up to 3 days for the best quality and texture.
- Freezer
- The pie can be frozen for up to 2 weeks. Thaw in the refrigerator for several hours before serving to allow the filling to soften slightly.
- Reheat
- This dish is intended to be served cold and does not require any reheating.
Store any leftovers in the refrigerator, covered tightly with plastic wrap or in an airtight container to prevent the pie from absorbing other odors. Because of the dairy content in the whipped topping, it should not be left out at room temperature for more than two hours. Proper storage will keep the pie fresh for up to three days.
This recipe is an excellent candidate for making ahead of time. You can assemble the entire pie and store it in the refrigerator for up to 24 hours before serving, which often improves the texture as the flavors meld together.
Add the final chocolate drizzle and candy toppings just before serving to ensure they remain fresh and visually appealing.
Serving ideas
Serve the pie chilled directly from the refrigerator for the best texture. The contrast between the cold, creamy filling and the crisp graham crust is part of the appeal.
Present the pie in the dish or slice it beforehand and plate individual portions on chilled dessert plates to maintain the temperature of the filling for as long as possible.
For a more elaborate presentation, serve each slice with a dollop of freshly whipped cream on the side. The light, neutral flavor of the cream complements the richness of the peanut butter without overpowering it.
A light dusting of cocoa powder or a few crushed peanuts can also be added as a final touch to enhance the visual appeal of the plate.
Frequently asked questions
Can this pie be made ahead of time?
Why is the filling lumpy?
Can this be frozen?
Creamy No-Bake Peanut Butter Pie
Ingredients
- 1 1/2 cups graham cracker crumbs
- 6 tbsp unsalted butter, melted
- 1 cup creamy peanut butter
- 8 oz whipped topping, thawed
- 2 tbsp chocolate drizzle
- 1/4 cup chopped candy pieces
Instructions
- Combine the graham cracker crumbs and melted butter in a mixing bowl. Stir until the mixture resembles wet sand. Press the mixture firmly into the bottom and up the sides of a 9-inch pie dish. Place the dish in the refrigerator to chill while preparing the filling.
- In a large bowl, combine the peanut butter and whipped topping. Gently fold the ingredients together until the mixture is uniform, light, and creamy.
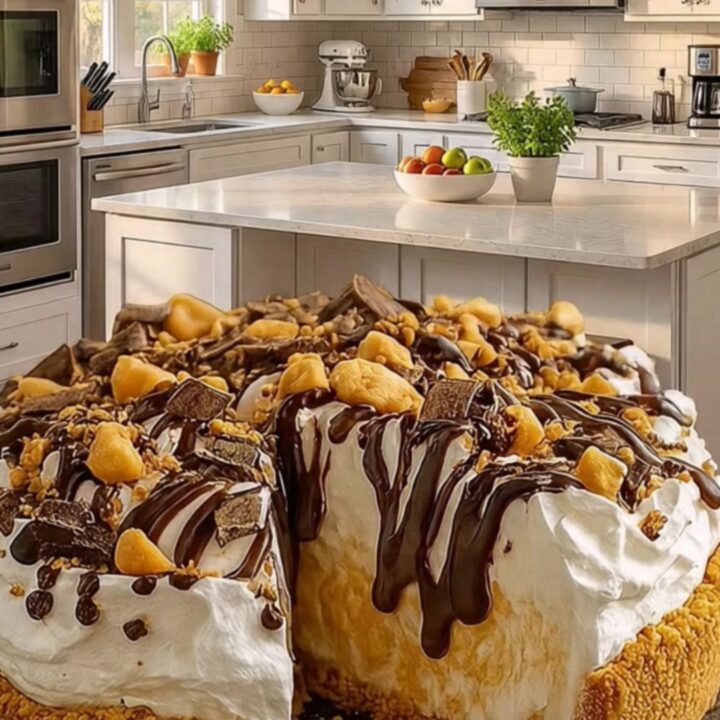
- Spread the peanut butter filling evenly into the chilled graham crust. Smooth the top with a spatula. Drizzle the chocolate over the surface and sprinkle with the chopped candy pieces. Cover and refrigerate for at least 4 hours, or until firm, before slicing and serving.
Estimated nutrition per serving
- Calories
- 420
- Protein
- 8 g
- Carbohydrates
- 35 g
- Fat
- 28 g
- Fiber
- 1.5 g
- Sugar
- 22 g
- Sodium
- 280 mg
Next recipe
Rich and Moist Black Sheet Cake for Any Occasion
See the recipe → →This recipe is based on a short cooking video and is published under the pen name Clara Weller. It was checked before publication, but errors can slip through. Nutrition, when shown, is an estimate. Read more in our editorial policy and on our food safety page.
More recipes to try
Decadent Layered Chocolate Pudding Dessert
Total time: 1 h 20 min
Rich and Crunchy Chocolate Biscuit Cake
Total time: 2 h 30 min
Rich Three-Layer Chocolate Fudge Cake
Total time: 1 h 30 min
Easy No-Bake Oreo Icebox Cake
Total time: 4 h 15 min
Rich and Moist Matilda Chocolate Fudge Cake
Total time: 1 h 35 min