Breakfast · Part 3 of 3: Tips & recipe card
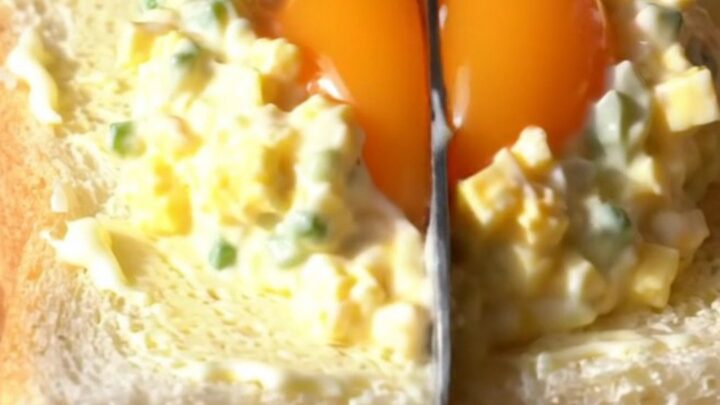
Cloud-Like Japanese Tamago Sando with Jammy Egg Center Tips, FAQ & printable recipe
- Prep
- Cook
- Total
- Serves
- 2
Tips for success
For the perfect jammy egg, use a timer and have an ice bath ready. After boiling, immediately transfer the egg to the ice bath for at least 5 minutes. This stops the cooking process and makes peeling easier.
When peeling, start at the wider end where the air pocket is, and peel under running water to help separate the shell. If the yolk is too soft and the egg breaks, you can still use it in the salad—just chop it and mix it in.
To slice the sandwich cleanly, use a serrated knife and saw gently back and forth. For the best presentation, cut the sandwich in half crosswise, not diagonally, to show the full cross-section.
You can also press down lightly on the sandwich before slicing to help the filling settle. If you're making this ahead, assemble the sandwich but don't slice until just before serving to prevent the bread from drying out.
Variations
- Spicy Tamago Sando: Add a teaspoon of sriracha or chili garlic sauce to the egg salad mixture for a spicy kick. The heat complements the creamy mayo and sweet bread. Adjust the amount to suit your preference.
- Herb-Infused Egg Salad: Stir in a tablespoon of chopped fresh chives or dill into the egg salad. The herbs add a fresh, bright note that pairs well with the rich eggs. Use any soft herb you like.
- Avocado Tamago Sando: Mash half a ripe avocado and mix it into the egg salad for extra creaminess and healthy fats. The avocado also adds a subtle green color that contrasts nicely with the yellow egg.
- Smoked Salmon Tamago Sando: Layer a few slices of smoked salmon on the buttered bread before adding the egg salad. The smoky, salty fish pairs beautifully with the creamy eggs and soft bread. Omit the jammy egg if you prefer a simpler version.
Storage and make-ahead
- Fridge
- Store the assembled sandwich in the refrigerator for up to 24 hours. Keep it wrapped in plastic wrap or in an airtight container to prevent drying.
- Freezer
- Freezing is not recommended, as the texture of the egg salad and bread will suffer.
- Reheat
- This sandwich is meant to be served cold or at room temperature. Do not reheat, as the mayonnaise and egg salad will separate.
Store any leftover sandwich in an airtight container in the refrigerator for up to 24 hours. The bread may soften slightly, but the flavor will remain. If you've already sliced the sandwich, cover the cut sides with plastic wrap to prevent drying. For best quality, consume within a day.
You can prepare the egg salad and the jammy egg up to 2 days in advance. Store the egg salad in an airtight container in the refrigerator, and keep the peeled jammy egg in a bowl of cold water in the fridge. Assemble the sandwich just before serving to keep the bread at its best. The butter can also be softened ahead and stored in the fridge.
Serving ideas
Serve the tamago sando as a delightful breakfast or brunch item, alongside a cup of hot green tea or coffee. The sandwich is also perfect for lunchboxes, picnics, or as a light snack.
For an elegant presentation, arrange the sliced sandwiches on a plate with a few pickles or a small side salad. The vibrant yellow yolk and creamy filling make it a visually appealing addition to any table.
This sandwich is best enjoyed fresh, within a few hours of assembly. The bread is at its softest, and the egg salad is creamy.
If you're serving a crowd, you can assemble the sandwich and slice it into smaller pieces, such as quarters, for easy sharing. The combination of textures and flavors is sure to impress, whether served at a casual gathering or a more formal tea.
Frequently asked questions
What is shokupan and where can it be found?
Can this sandwich be made gluten-free?
Why is the jammy egg in the center?
How long do the eggs need to boil for a jammy yolk?
Can the egg salad be made without Japanese mayonnaise?
Cloud-Like Japanese Tamago Sando with Jammy Egg Center

Ingredients
- 4 large eggs (hard-boiled)
- 1 large egg (6-minute jammy)
- 3 tbsp Japanese mayonnaise (Kewpie-style)
- 1 tsp heavy cream
- 1/2 tsp sugar
- White pepper, to taste
- 2 slices shokupan (Japanese milk bread), thick-cut
- 2 tbsp salted butter, softened
Instructions
- Place the 4 hard-boiled eggs in a small saucepan and cover with cold water. Bring to a boil, then remove from heat, cover, and let sit for 12 minutes. For the jammy egg, bring a separate small pot of water to a boil, gently lower the egg in, and cook for exactly 6 minutes. Transfer both batches to an ice bath and let cool completely.
- Peel the 4 hard-boiled eggs and place them in a mixing bowl. Using a potato masher or fork, mash them until they are finely crumbled but still have a little texture. You want a cohesive but not pasty mixture.
- Add the Japanese mayonnaise, heavy cream, sugar, and a pinch of white pepper to the mashed eggs. Stir gently until everything is well combined. The mixture should be creamy and spreadable but not runny. Taste and adjust seasoning with more white pepper if desired.
- Gently peel the 6-minute jammy egg under cold running water. Be careful—the yolk is still soft and delicate. Pat it dry with a paper towel and set it aside.
- Spread the softened salted butter evenly over one side of each slice of shokupan. Make sure to reach the edges, as this will create a barrier that keeps the bread from getting soggy.
- Place the jammy egg in the center of one buttered slice of bread. If the egg is too tall, gently press it down slightly. Spoon the egg salad around the egg, packing it firmly so it fills the space and creates an even layer. Top with the second slice of bread, buttered side down.
- Wrap the assembled sandwich tightly in plastic wrap. Place it in the refrigerator for 10 to 15 minutes. This helps the sandwich set and makes slicing cleaner.
- Unwrap the sandwich and place it on a cutting board. Using a sharp knife, trim off the crusts on all four sides. Then slice the sandwich in half crosswise to reveal the cross-section with the jammy egg yolk in the center.
Estimated nutrition per serving
- Calories
- 420
- Protein
- 14 g
- Carbohydrates
- 30 g
- Fat
- 28 g
Next recipe
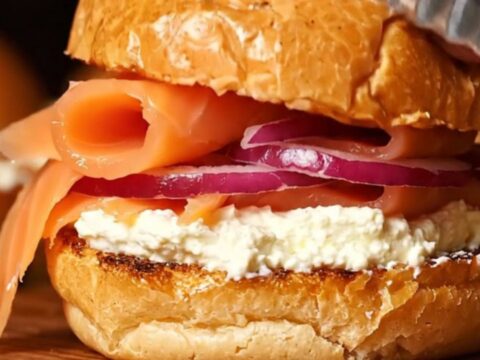
Everything Bagel Smoked Salmon Sliders for Effortless Brunch
See the recipe → →This recipe is based on a short cooking video and is published under the pen name Clara Weller. It was checked before publication, but errors can slip through. Nutrition, when shown, is an estimate. Read more in our editorial policy and on our food safety page.
More recipes to try

Maple-Glazed Bacon and Egg Breakfast Sliders
Total time: 25 min
Crispy Croissant Brie Prosciutto Blackberry Melt
Total time: 10 min
XXL Savory Turkish Breakfast Pancake with Sausage and Mozzarella
Total time: 30 min
Easy Stuffed Turkish Pumpkin Brioche Buns
Total time: 40 min
Viral Fluffy Japanese Soufflé Pancakes
Total time: 30 min