Breakfast · Part 1 of 3: Ingredients
Cloud-Like Japanese Tamago Sando with Jammy Egg Center
- Prep
- Cook
- Total
- Serves
- 2
This is the sandwich that made Japanese convenience stores famous. A cloud-soft milk bread cradles a creamy, tangy egg salad, with a jammy egg at its heart that bursts into a golden river when you slice it.
It's a study in texture and flavor: the bread is pillowy, the salad is velvety, the yolk is rich and slightly sweet. This recipe brings that iconic experience home with simple ingredients and a few key techniques.
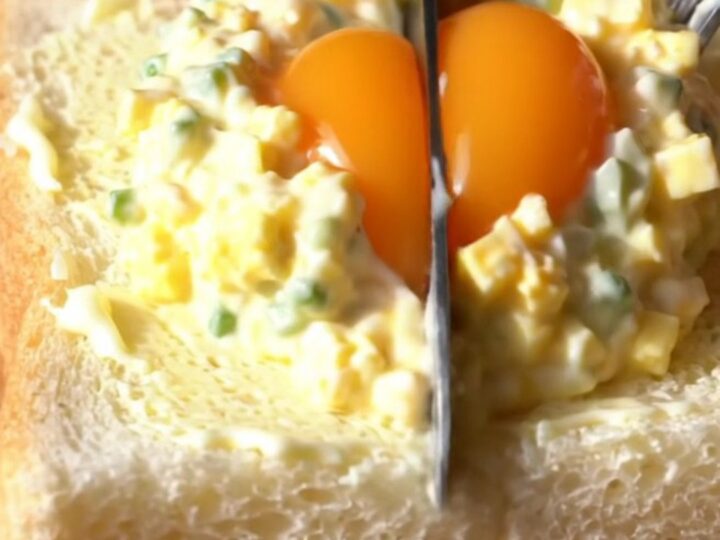
The Japanese egg sandwich, or tamago sando, is a beloved staple at konbini across Japan. Its appeal lies in the contrast between the impossibly soft shokupan and the creamy, flavorful egg salad. When you slice the sandwich, the yolk reveals a gorgeous orange cross-section that is as pleasing to the eye as it is to the palate.
The egg salad is seasoned with Japanese mayonnaise, which brings a unique umami and tang, plus a touch of cream for extra richness. This recipe is straightforward and delivers a truly special sandwich.
Ingredients
- 4 large eggs (hard-boiled)
- 1 large egg (6-minute jammy)
- 3 tbsp Japanese mayonnaise (Kewpie-style)
- 1 tsp heavy cream
- 1/2 tsp sugar
- White pepper, to taste
- 2 slices shokupan (Japanese milk bread), thick-cut
- 2 tbsp salted butter, softened
Why this recipe works
The method of mashing the hard-boiled eggs with mayonnaise and cream creates a smooth, luxurious filling that contrasts beautifully with the tender bread.
The addition of a jammy egg in the center adds a pop of color and a rich, velvety yolk that elevates the sandwich from simple to spectacular. The butter layer on the bread is not just for flavor—it acts as a moisture barrier, preventing the egg salad from making the bread soggy.
Using Japanese mayonnaise (Kewpie-style) is key to the authentic flavor. It contains more egg yolks and a hint of MSG, giving it a deeper, more savory taste than regular mayo. The sugar and white pepper round out the seasoning, balancing the tang and adding a subtle warmth. The brief chill in the refrigerator is essential for a clean slice, allowing the sandwich to set without compressing the bread.
Notes and substitutions
For the best texture, use large eggs and boil them exactly as directed: 12 minutes for the hard-boiled eggs and 6 minutes for the jammy egg. The timing is crucial for achieving the perfect jammy yolk—firm enough to hold its shape but soft enough to be spreadable. If you prefer a more set yolk, cook the jammy egg for 7 minutes, but note that the cross-section will be less dramatic.
Shokupan, or Japanese milk bread, is incredibly soft and slightly sweet, which is ideal for this sandwich. If you can't find it, a high-quality brioche or Texas toast works well.
The butter should be salted and softened for easy spreading. Japanese mayonnaise is available in most Asian grocery stores or online; if using regular mayo, add a pinch of sugar and a dash of rice vinegar to mimic the flavor.
- Japanese mayonnaise: Regular mayonnaise mixed with a pinch of sugar and rice vinegar
- Heavy cream: Whole milk or a splash of half-and-half
- Shokupan: Soft brioche or Texas toast
- Salted butter: Unsalted butter with a pinch of salt
Equipment
- Small saucepan
- Mixing bowl
- Potato masher or fork
- Butter knife
- Plastic wrap
- Sharp knife
Up next · Part 2 of 3
8 steps · 10 min of cooking · what to look for at each stage
Step-by-step instructions (Part 2)