Dinner · Part 2 of 3: Instructions
Creamy Garlic Butter Scallops with White Wine & Fresh Basil Step-by-step instructions
- Prep
- Cook
- Total
- Serves
- 4
Before you start
Before starting, ensure the scallops are fully thawed if frozen. Pat them dry with paper towels—this is the most important step. Have all ingredients measured and ready: minced garlic, wine, lemon juice, and cream.
Heat the skillet over high heat for a few minutes before adding the oil, so it is properly hot. Set a plate nearby to hold the seared scallops. Fresh basil should be washed and dried, with leaves picked from the stems.
Ingredients at a glance (10)
- 1 lb sea scallops (about 400g), patted dry
- 2 tbsp olive oil
- sea salt, to taste
- black pepper, to taste
- 3 tbsp butter
- 4 cloves garlic, minced
- 1/4 cup dry white wine
- 1 tbsp lemon juice
- 1/2 cup heavy cream
- fresh basil leaves, for garnish, to taste
Instructions
Searing the Scallops
- Dry and Season the ScallopsPat the sea scallops completely dry with paper towels. Season both sides generously with sea salt and black pepper.Look for The scallops should feel dry to the touch, not tacky.Tip The drier the scallops, the better the golden crust.
- Heat the SkilletPlace a cast iron skillet over high heat and add the olive oil. Heat until the oil shimmers and just begins to smoke.Look for The oil should ripple and lightly smoke.Tip A hot pan is essential for a good sear.
The scallops should have a deep golden-brown crust on the first side after 2 minutes, and the second side should be golden after 1 minute. The skillet should be hot enough that the oil shimmers.
The scallops should release easily from the pan when nudged with tongs. If they stick, they need more time. The kitchen will smell rich and nutty from the browning butter and seafood.
Building the Sauce
- Sear the ScallopsCarefully place the scallops in the skillet in a single layer, ensuring they are not touching. Sear undisturbed for 2 minutes until a dark golden crust forms. Flip and cook for 1 minute more. Transfer the scallops to a plate.Look for The underside should be deeply golden and release easily from the pan.Safe temperature 145°F (63°C) internal temperature (shellfish)Tip Do not move the scallops while searing; let the crust develop.
- Make the Garlic Butter SauceReduce the heat to medium. Add the butter to the skillet and let it melt, scraping up any browned bits. Add the minced garlic and sauté until fragrant, about 30 seconds.Look for The garlic should be aromatic but not browned.Tip Stir constantly to avoid burning the garlic.
- Deglaze with Wine and LemonPour in the white wine and lemon juice, scraping the bottom of the skillet to release the fond. Let the liquid bubble and reduce by half, about 1-2 minutes.Look for The wine should be slightly syrupy and the alcohol cooked off.Tip The wine adds brightness and depth to the sauce.
- Swirl in the CreamPour in the heavy cream and stir until the sauce is smooth and velvety. Let it simmer gently for 2-3 minutes to thicken slightly.Look for The sauce should coat the back of a spoon.Tip Do not boil vigorously; a gentle simmer keeps the sauce creamy.
The garlic should be fragrant but not browned. The wine should bubble and reduce, and the sauce should turn a pale golden color. When the cream is added, the sauce should become smooth and velvety, with a consistency that coats the back of a spoon. The aroma will be buttery, garlicky, and slightly tangy from the wine and lemon.
Finishing and Serving
- Return Scallops to the SauceNestle the seared scallops back into the skillet, spooning the creamy sauce over the top. Cook for 1-2 minutes until the scallops are heated through and the sauce is bubbling gently.Look for The scallops should be warmed through and the sauce bubbling around them.Safe temperature 145°F (63°C) internal temperature (shellfish)Tip Be gentle to keep the crust intact.
- Garnish and ServeRemove the skillet from the heat. Scatter fresh basil leaves over the top and serve immediately.Look for The basil should be fresh and bright green.Tip Serve with crusty bread or over pasta to soak up the sauce.
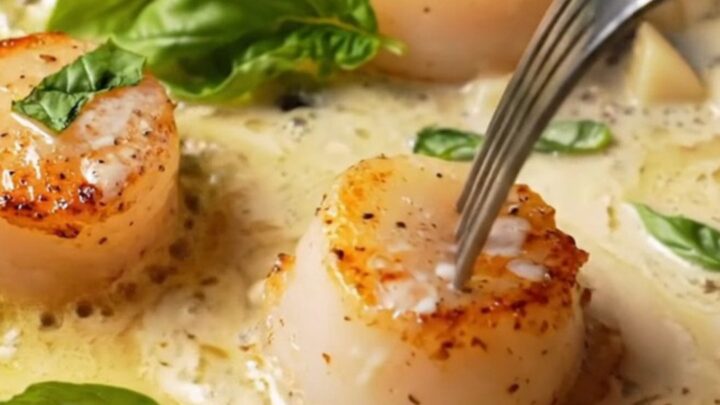
The scallops should be heated through and the sauce bubbling gently around them. The basil should be bright green and fragrant. The dish should look glossy and inviting, with the cream sauce clinging to the scallops. Serve immediately while hot, with extra sauce spooned over the top.
Common mistakes
Common mistakes include overcrowding the skillet, which lowers the temperature and causes the scallops to steam rather than sear. Another is moving the scallops too soon; they will release naturally when the crust is formed.
Using wet scallops or skipping the drying step leads to a pale, rubbery texture. Overcooking scallops makes them tough and chewy—keep the heat high and the cooking time short.
How to tell it’s done
The scallops are done when they reach an internal temperature of 145°F (63°C) and the flesh is opaque and just firm to the touch. They should have a golden-brown crust on both sides.
The sauce should be thick enough to coat the back of a spoon. If the sauce seems too thin, let it simmer a little longer; if too thick, add a splash of cream or broth.
- Shellfish: 145°F (63°C) in the thickest part
Up next · Part 3 of 3
4 variations · storage & make-ahead · 5 answers · printable card
Tips, FAQ & printable recipe (Part 3)← Back to the ingredients (Part 1)