Dinner · Part 1 of 3: Ingredients
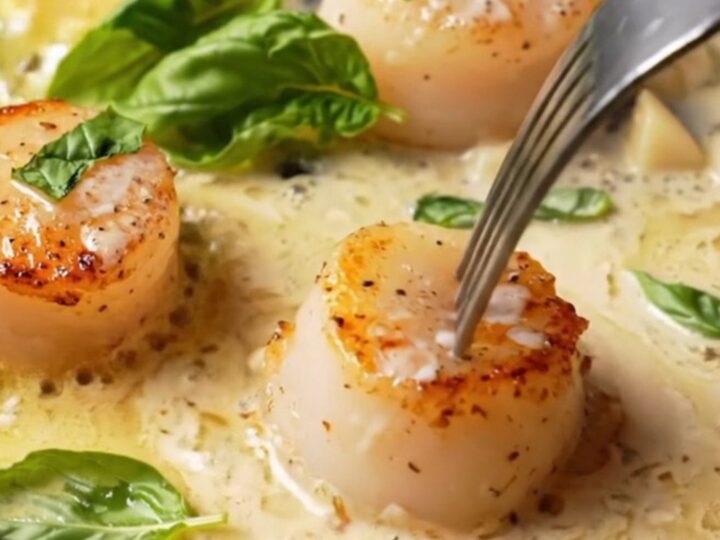
Creamy Garlic Butter Scallops with White Wine & Fresh Basil
- Prep
- Cook
- Total
- Serves
- 4
Imagine perfectly seared scallops with a deep golden crust, nestled in a velvety garlic butter cream sauce with white wine and fresh basil. This recipe delivers all the elegance of a fine-dining dish in under 20 minutes, using simple ingredients and one skillet.
The secret lies in the technique: thoroughly drying the scallops and searing them in a hot pan creates that coveted caramelized crust, while the sauce comes together in the same pan, capturing every bit of flavor.
Scallops are a quick-cooking seafood that can feel intimidating, but this recipe breaks it down into simple steps that anyone can master. The key is to pat the scallops completely dry before searing—this ensures a beautiful golden crust rather than steaming.
Then, the same skillet becomes the base for a luxurious sauce made with butter, garlic, white wine, lemon juice, and heavy cream. Fresh basil adds a fragrant finish. This dish is perfect for a special weeknight dinner or an impressive date-night meal.
Ingredients
- 1 lb sea scallops (about 400g), patted dry
- 2 tbsp olive oil
- sea salt, to taste
- black pepper, to taste
- 3 tbsp butter
- 4 cloves garlic, minced
- 1/4 cup dry white wine
- 1 tbsp lemon juice
- 1/2 cup heavy cream
- fresh basil leaves, for garnish, to taste
Why this recipe works
The method of searing scallops in a smoking-hot skillet with olive oil creates a deep caramelization that adds a rich, nutty flavor.
This crust is the hallmark of a well-cooked scallop and contrasts beautifully with the tender interior. By patting the scallops dry, you remove excess moisture that would otherwise prevent browning and create steam.
The sauce is built in the same pan, using the browned bits left from searing—known as the fond—which are packed with flavor. Deglazing with white wine lifts these bits into the sauce, while the cream adds richness and a silky texture. The result is a cohesive, balanced sauce that complements the sweet, briny scallops perfectly.
Notes and substitutions
For the best results, choose large sea scallops (U/10 or U/12 size) rather than bay scallops, which are smaller and cook too quickly.
Make sure they are dry-packed, not wet-packed, as wet scallops have been treated with a solution that affects browning. If using frozen scallops, thaw them in the refrigerator overnight and pat them dry thoroughly.
A cast iron skillet is ideal for searing because it retains heat well and creates an even crust. If you don't have one, a heavy stainless steel pan works well. Use a dry white wine like Sauvignon Blanc or Pinot Grigio—avoid sweet wines. If you prefer not to use wine, substitute with chicken or seafood broth plus a little extra lemon juice.
- sea scallops: bay scallops (reduce searing time to 1 minute per side) or large shrimp (cook until pink and opaque, about 2 minutes per side).
- dry white wine: chicken broth or seafood stock (use 1/4 cup, plus 1 teaspoon lemon juice to mimic the acidity).
- heavy cream: half-and-half or coconut cream for a lighter or dairy-free option (the sauce will be slightly thinner).
- fresh basil: fresh parsley or chives for a different herb note.
Equipment
- Cast iron skillet
- Paper towels
- Tongs
- Wooden spoon or spatula
- Cutting board
- Chef's knife
- Measuring spoons
- Measuring cups
Up next · Part 2 of 3
8 steps · 10 min of cooking · what to look for at each stage
Step-by-step instructions (Part 2)