Dinner · Part 2 of 3: Instructions
Creamy Baked Seafood Mac and Cheese with Seared Shrimp Step-by-step instructions
- Prep
- Cook
- Total
- Serves
- 6
Before you start
Before you begin cooking, measure out all your ingredients to keep the process moving smoothly. Have your rich cheddar sauce warmed and ready, and shred your cheddar cheese. Peel and devein the shrimp, then pat them thoroughly dry with paper towels and toss them with the seafood seasoning in a small bowl. Bring a large pot of salted water to a boil for the macaroni, and have your aluminum baking pan ready on the counter.
Ingredients at a glance (6)
- 16 oz elbow macaroni
- 1 lb raw shrimp, peeled and deveined
- 1 tbsp seafood seasoning
- 3 cups rich cheddar sauce
- 2 cups shredded cheddar cheese
- 2 tbsp chopped fresh herbs
Instructions
Prep Pasta and Sear Shrimp
- Cook the MacaroniBring a large pot of salted water to a boil. Add the elbow macaroni and cook according to the package instructions until it is just al dente, about 8 minutes. Drain the pasta thoroughly in a colander and set it aside. Do not rinse the macaroni, as the natural starches on the surface will help the rich cheddar sauce cling to the pasta later.Look for The pasta should be tender but still have a firm bite.Tip Slightly undercooking the pasta prevents it from turning mushy during the final bake.
- Season and Sear the ShrimpPat the raw shrimp completely dry with paper towels. Toss the shrimp with the seafood seasoning in a bowl until evenly coated. Heat a large skillet over medium-high heat. Add the seasoned shrimp to the skillet in a single layer and sear for 2 to 3 minutes per side until they are opaque, firm, and reach an internal temperature of 145°F (63°C). Transfer the cooked shrimp to a clean plate.Look for Shrimp should turn pink, opaque, and register 145°F (63°C) on a thermometer.Safe temperature 145°F (63°C) internal temperature (shellfish)Tip Avoid crowding the skillet so the shrimp sear beautifully instead of steaming.
At the end of this first phase, the kitchen will be filled with the savory aroma of toasted spices and seared seafood. The seasoned shrimp should have a beautifully caramelized, golden-brown exterior and a slightly firm texture, while still remaining juicy.
The macaroni should be cooked to a firm al dente, drained, and set aside, ready to absorb the rich cheese sauce without becoming soggy. Make sure the shrimp are transferred to a clean plate immediately after searing to prevent them from overcooking in the hot skillet.
Combine Pasta and Sauce
- Combine Pasta and SauceIn a large pot, combine the warm cooked elbow macaroni with the rich cheddar sauce. Fold the mixture gently using a spatula until every single noodle is completely coated in the velvety sauce.Look for The pasta should be evenly coated and look highly creamy.Tip Ensure the cheddar sauce is warm before folding to help it coat the pasta smoothly.
By the end of the second phase, the elbow macaroni will be completely enveloped in the rich cheddar sauce. The mixture should look incredibly creamy, glossy, and wet, with the sauce evenly distributed throughout the pasta. There should be no dry pockets of macaroni. This ensures that as the pasta sits and bakes under the broiler, it remains luscious and does not dry out, maintaining the perfect creamy consistency.
Assemble, Broil, and Garnish
- Assemble the Macaroni BakePour the cheesy macaroni mixture into an aluminum baking pan, spreading it into an even layer. Arrange the seared seasoned shrimp evenly over the top of the pasta, pressing them slightly into the macaroni. Sprinkle the shredded cheddar cheese uniformly over the shrimp and pasta layer, ensuring complete coverage for the ultimate cheese pull.Look for The pan should be filled with pasta, topped with shrimp and a generous layer of cheese.Tip Using an aluminum pan provides even heat distribution and makes cleanup incredibly easy.
- Broil and GarnishPreheat your oven's broiler to high. Place the assembled aluminum pan on the top rack under the broiler. Cook for 3 to 5 minutes, watching closely, until the cheese is completely melted, bubbling, and develops beautiful golden-brown spots. Carefully remove the hot pan from the oven, garnish with the fresh herbs, and let it rest for 5 minutes before serving.Look for The cheese topping should be bubbling intensely and golden brown.Tip Stay near the oven while broiling, as the cheese can go from golden to burnt quickly.
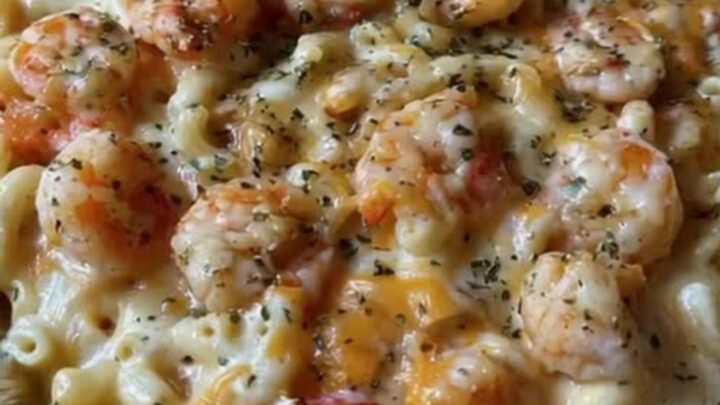
At the final checkpoint, the seafood mac and cheese will emerge from the oven looking incredibly appetizing. The top layer of cheddar cheese should be completely melted, with bubbling pockets of sauce and beautifully browned spots under the broiler.
The seasoned shrimp nestled on top should be opaque, pink, and perfectly tender, registering at least 145°F (63°C). A garnish of fresh herbs adds a vibrant green contrast to the golden bake, which is now ready to rest briefly before serving.
Common mistakes
One of the most common mistakes when making this dish is overcooking the macaroni during the initial boiling stage. Since the pasta will undergo a second round of cooking under the broiler, it should be boiled only until it is slightly underdone, or very firm al dente.
If the macaroni is fully soft before it enters the oven, it will absorb too much cheese sauce and become mushy. Another error is overcooking the shrimp during the searing phase; cook them just until they turn pink so they remain tender after baking.
How to tell it’s done
To ensure this seafood bake is perfectly cooked, the cheese sauce should be bubbling vigorously around the edges of the pan, and the top layer of cheddar should be melted and golden brown. Most importantly, the shrimp must be fully cooked and safe to consume.
To verify doneness, insert an instant-read thermometer into the thickest part of several shrimp; they are ready when they reach an internal temperature of 145°F (63°C). The shrimp should be opaque and firm to the touch, indicating they are succulent and safe.
- Shellfish: 145°F (63°C) in the thickest part
Up next · Part 3 of 3
2 variations · storage & make-ahead · 3 answers · printable card
Tips, FAQ & printable recipe (Part 3)← Back to the ingredients (Part 1)