Desserts · Part 2 of 3: Instructions
Classic Crème Brûlée with a Perfect Glassy Sugar Crust Step-by-step instructions
- Prep
- Cook
- Total
- Serves
- 4
Before you start
Before starting, measure all ingredients. Separate the egg yolks from the whites, reserving the whites for another use. Scrape the vanilla seeds from the pods. Set out four shallow ramekins and a large roasting pan.
Heat the oven to 325°F (165°C). Bring a kettle of water to a boil for the water bath. Make sure the kitchen torch is filled and ready. Have a fine-mesh strainer and a large measuring cup ready for straining the custard.
Ingredients at a glance (5)
- 6 large egg yolks
- 100 g granulated sugar (about 1/2 cup)
- 2 Madagascar vanilla pods, seeds scraped
- 500 ml heavy cream (about 2 cups)
- 20 g raw sugar per ramekin (about 1 1/2 tbsp)
Instructions
Phase 1: Mix the Custard
- Whisk the Custard BaseIn a large bowl, whisk the egg yolks with the granulated sugar until the mixture is pale and slightly thickened, about 2 minutes. Scrape the seeds from the vanilla pods into the yolk mixture and whisk to distribute the seeds evenly.Look for The yolk mixture should be thick, pale yellow, and the vanilla seeds evenly scattered.Tip Whisk gently to avoid incorporating too much air, which can create bubbles on the surface of the custard.
- Warm the Cream and TemperIn a saucepan, warm the heavy cream over medium heat until steaming and small bubbles appear around the edges, but do not let it boil. Slowly pour the warm cream into the yolk mixture in a thin stream, whisking constantly to temper the eggs and create a smooth custard base.Look for The mixture should be smooth and slightly thickened, with no scrambled egg bits.Tip Pouring slowly while whisking prevents the eggs from curdling.
- Strain the CustardSet a fine-mesh strainer over a large measuring cup or bowl. Pour the custard through the strainer to remove any cooked egg bits and the vanilla pod husks. This ensures a silky-smooth texture.Look for The strained custard should be perfectly smooth and glossy.Tip Press gently with a spatula to push the custard through; discard anything left in the strainer.
After whisking the yolks, sugar, and vanilla, the mixture should be pale and slightly thickened. Once the warm cream is incorporated, the custard should be smooth and glossy. Straining ensures a silky texture. The custard should be ready to pour into ramekins, with no lumps or bubbles.
Phase 2: Bake and Chill
- Fill the RamekinsDivide the custard evenly among four shallow ramekins, filling each about three-quarters full. Tap each ramekin gently on the counter to release any air bubbles that may have formed.Look for The custard should be evenly distributed among the ramekins, with no large bubbles on the surface.Tip Wipe any drips from the rim of the ramekins for a clean finished look.
- Bake in a Water BathPlace the ramekins in a large roasting pan. Carefully pour hot water into the pan until it reaches halfway up the sides of the ramekins. Transfer the pan to the oven and bake at 325°F (165°C) for 35 minutes, or until the custards are set around the edges but still slightly wobbly in the center.Look for The custard should be just set with a slight jiggle in the center when gently shaken.Safe temperature 160°F (71°C) internal temperature (egg dishes)Tip The water bath provides gentle, even heat to prevent curdling and ensures a creamy texture.
- Chill the CustardsRemove the ramekins from the water bath and let them cool to room temperature on a wire rack. Once cool, cover each ramekin with plastic wrap and refrigerate for at least 4 hours, or until thoroughly chilled and set.Look for The custards should be firm and cold to the touch, with no liquid remaining.Tip Chilling thoroughly is essential for the custard to set properly and for the sugar crust to crack.
After baking, the custards should be just set around the edges with a slight wobble in the center. They will firm up as they cool. After chilling for at least 4 hours, they should be completely firm and cold. The surface should be smooth and even, ready for the sugar topping.
Phase 3: Caramelize and Serve
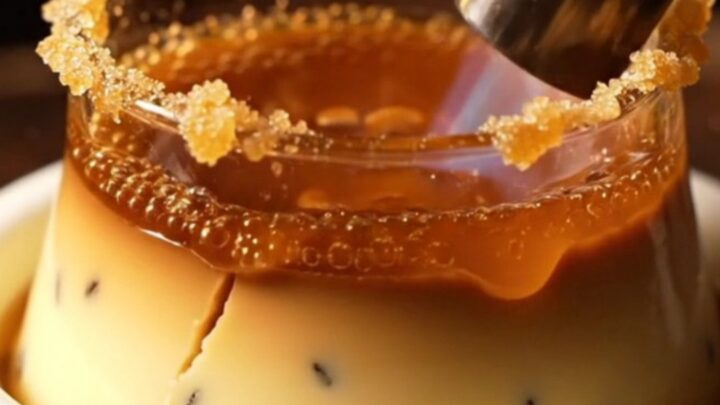
- Torch the Sugar CrustJust before serving, sprinkle about 20 g (1 1/2 tablespoons) of raw sugar evenly over the top of each chilled custard. Use a kitchen torch to caramelize the sugar, moving the flame in a circular motion until the sugar melts and turns deep amber and glassy.Look for The sugar should melt into a smooth, amber glass that hardens within seconds.Tip Keep the torch moving to avoid burning the sugar; aim for an even, deep caramel color.
- Crack and ServeLet the caramelized sugar cool for 1 minute to harden completely. Serve immediately, tapping the crust with the back of a heavy spoon to crack it open and reveal the cold, creamy custard beneath.Look for The sugar crust should be hard and glassy, cracking with a satisfying sound.Tip Serve right away so the crust stays crisp and the contrast between warm glass and cold custard is at its best.
The sugar should melt into a smooth, glassy amber layer that hardens within seconds. When tapped with the back of a spoon, it should crack with a satisfying sound.
The custard beneath should be cold, creamy, and speckled with vanilla seeds. Serve immediately for the best texture contrast.
Common mistakes
One common mistake is overbaking the custard, which causes it to become curdled or rubbery. Keep a close eye on the time and check for the slight jiggle. Another is not straining the custard, which leaves bits of cooked egg or vanilla husk, making the texture gritty.
Also, be careful not to over-torch the sugar — it can burn and taste bitter. Finally, make sure the custards are thoroughly chilled; otherwise, the sugar crust will melt into the custard instead of cracking.
How to tell it’s done
The custards are done when they are set around the edges but still slightly wobbly in the center — about 35 minutes. To check, gently shake the ramekin: the center should jiggle like jelly, not ripple like liquid.
If using a thermometer, the custard should reach 160°F (71°C) in the center. Remove from the oven immediately to prevent overcooking. The custards will continue to set as they cool and chill.
- Egg dishes: 160°F (71°C) in the thickest part
Up next · Part 3 of 3
4 variations · storage & make-ahead · 5 answers · printable card
Tips, FAQ & printable recipe (Part 3)← Back to the ingredients (Part 1)