Desserts · Part 2 of 3: Instructions
Classic Southern Banana Pudding Step-by-step instructions
- Prep
- Cook
- Total
- Serves
- 8
Before you start
Before beginning the assembly, ensure that you have all the necessary ingredients prepared and ready on your workspace. Slice the bananas into consistent rounds to ensure an even distribution throughout the pudding.
If you are using a homemade pudding base, make sure it has cooled completely to room temperature before starting the layering process, as warm pudding will cause the bananas to soften too quickly and the whipped topping to melt. Have your glass serving dish clean and dry, as any residue can affect the final set of the pudding layers. Gather your spatula and serving spoon to facilitate smooth layering.
Ingredients at a glance (4)
- 12 oz vanilla wafers
- 4 large bananas, sliced
- 3 cups vanilla pudding, prepared
- 8 oz whipped topping
Instructions
Establishing the foundation
- Prepare the base layerPlace a single layer of vanilla wafers across the bottom of the glass serving dish. Ensure the wafers cover the base evenly to provide a sturdy foundation for the layers of pudding and fruit.Look for Wafers should cover the entire bottom.Tip Use whole wafers for the base to provide structure.
At the end of this phase, you should have a solid, even layer of vanilla wafers covering the entire bottom of your glass dish. The wafers should be placed close together to ensure a uniform base. Check that the dish is clean and the wafers are dry before you begin adding the pudding, as any moisture on the glass could cause the bottom layer to slide. This foundation is critical for the stability of all the subsequent layers you will add.
Layering the components
- Add bananas and puddingArrange a layer of sliced bananas over the wafers. Spread a generous portion of vanilla pudding over the banana layer, smoothing it out with the back of a spoon to ensure an even distribution across the dish.Look for Pudding should completely cover the banana slices.Tip Slice bananas about a quarter-inch thick for the best texture.
- Repeat layeringContinue the process by repeating the layers of vanilla wafers, sliced bananas, and vanilla pudding until all ingredients are used, finishing with a final layer of pudding on top.Look for Repeat until the dish is filled.Tip Do not press down too hard on the layers to keep the pudding light.
By the end of this phase, the dish should be filled with alternating layers of bananas, pudding, and wafers. The layers should be visible through the sides of the glass, showcasing a clean, professional look. Ensure that the pudding is smoothed out to the edges of the dish, creating a level surface for the next layer. Check that no large air pockets have formed, as these can disrupt the final texture of the pudding when it is scooped for serving.
Final assembly and chilling
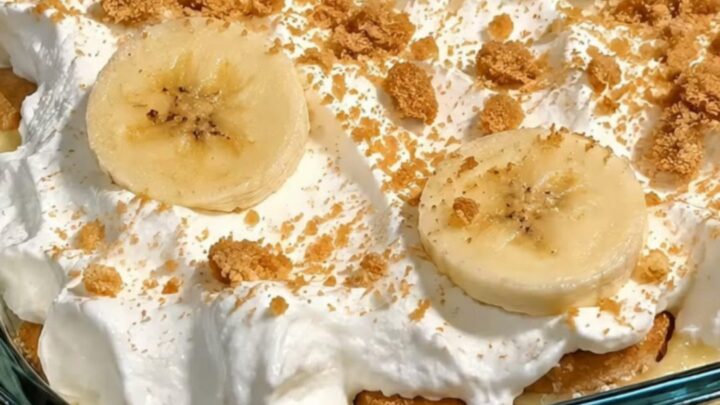
- Cook custard and finishIf preparing homemade custard, heat the egg-based mixture over medium heat, stirring constantly until it reaches 160°F (71°C) to ensure the eggs are fully cooked. Spread the whipped topping over the final layer of pudding. Place the finished dish in the refrigerator for at least two hours to allow the wafers to soften and the flavors to meld perfectly before serving.Look for Topping should be smooth and even.Safe temperature 160°F (71°C) internal temperature (egg dishes)Tip Cover the dish tightly with plastic wrap to prevent a skin from forming on the pudding.
The final phase concludes with the whipped topping spread evenly over the top layer of pudding. The surface should be smooth and consistent, with no pudding showing through. Once finished, the dish must be placed in the refrigerator.
Check that it is covered properly to maintain its texture. After the required chilling time, the dessert should look cohesive, with the layers distinct yet beautifully integrated, signaling it is ready for immediate service.
Common mistakes
A common mistake is using bananas that are too ripe, which can cause the pudding to become watery or mushy upon standing. Avoid over-mixing the layers during assembly, as this can break down the structure of the wafers and lead to a messy presentation.
Another error is failing to chill the pudding long enough; rushing this step results in a dish where the wafers remain hard and the flavors have not had sufficient time to develop. Always ensure the pudding is completely covered with the topping to prevent drying out.
How to tell it’s done
The banana pudding is ready to serve once it has been chilled for at least two hours in the refrigerator. You will know it is done when the pudding has firmed up slightly and the vanilla wafers have softened into a cake-like consistency.
When you insert a spoon, it should glide through the layers with ease, holding its shape as you lift it out of the dish. The top should appear set and cool to the touch, and the overall dish should feel heavy and solid rather than loose or runny when tilted.
- Egg dishes: 160°F (71°C) in the thickest part
Up next · Part 3 of 3
2 variations · storage & make-ahead · 3 answers · printable card
Tips, FAQ & printable recipe (Part 3)← Back to the ingredients (Part 1)