Dinner · Part 2 of 3: Instructions
Classic Greek Pastitsio with Creamy Bechamel Step-by-step instructions
- Prep
- Cook
- Total
- Serves
- 8
Before you start
Before starting the assembly process, organize all ingredients and equipment on the counter. Measure out the tubular pasta, spiced meat sauce, and bechamel. Ensure the baking dish is lightly greased and the oven is preheating to 375°F (190°C).
Having everything ready and within reach allows for a smooth, efficient assembly process, ensuring the layers are built cleanly and evenly without any unnecessary delays or cooling of ingredients.
Ingredients at a glance (3)
- 12 oz tubular pasta
- 3 cups spiced meat sauce, store-bought or made ahead
- 2 cups bechamel, store-bought or made ahead
Instructions
Pasta Base Preparation
- Boil the PastaCook the tubular pasta in a large pot of boiling salted water according to package directions until al dente. Drain the pasta thoroughly and arrange it in an even layer at the bottom of a baking dish.Look for The pasta should be tender but still hold its shape.Tip Do not overcook the pasta, as it will soften further during baking.
At the end of this phase, the tubular pasta should be cooked just to al dente and drained thoroughly. It should be arranged in an even, compact layer at the bottom of the greased baking dish, forming a solid and sturdy foundation that is ready to support the heavy toppings without collapsing. The pasta should look clean and neatly aligned.
Layering the Sauces
- Layer the Spiced Meat SauceSpread the rich spiced meat sauce evenly over the cooked tubular pasta in the baking dish, smoothing it with a spatula to cover the pasta completely.Look for The meat sauce should form a flat, uniform layer.Tip Press the pasta down gently before adding the sauce to help create clean layers.
- Smooth the BechamelPour the velvety bechamel over the spiced meat sauce layer. Use a spatula to smooth the surface into an even, flat layer that covers the meat entirely.Look for The bechamel should form a smooth, creamy top layer.Tip Spread the sauce gently to avoid mixing it with the meat layer below.
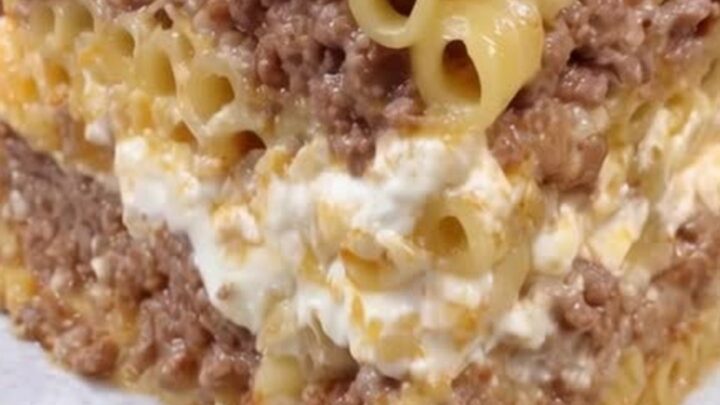
At the end of this phase, the spiced meat sauce and velvety bechamel should be layered cleanly over the pasta. The meat sauce must form a flat, even layer, and the bechamel should be smoothed completely over the top, creating a beautiful, distinct separation of layers visible from the side of the dish before it goes into the oven.
Baking and Resting
- Bake to Golden BrownBake the assembled pastitsio in a preheated oven at 375°F (190°C) for forty to forty-five minutes until the top is bubbly and golden brown. Let the casserole rest for thirty minutes before slicing.Look for The top should be deeply browned and bubbly around the edges.Tip Allowing the dish to rest is essential for achieving clean, stable slices.
After baking, the pastitsio should display a beautifully browned, slightly blistered top crust that crackles slightly when pressed with a fork.
Steam should gently escape from the edges, and the layers must remain distinct and stable when viewed from the side, showing a clear, clean separation of pasta, meat, and golden bechamel after resting.
Common mistakes
One common mistake is slicing the pastitsio immediately after removing it from the oven. Slicing it while piping hot will cause the layers to slide apart and collapse into a messy heap on the plate.
Always let the baked casserole rest for at least thirty minutes before cutting. This crucial cooling time allows the pasta, meat sauce, and bechamel to firm up, ensuring clean, stable, and beautiful square slices.
How to tell it’s done
The pastitsio is perfectly done when the top bechamel layer is puffed, deeply golden brown, and bubbling gently around the edges. A fork pressed into the crust should sink into a creamy, velvety bechamel layer while releasing steam.
Since the meat sauce and bechamel are already cooked, baking primarily serves to heat the casserole through, set the layers, and create that beautiful, crispy golden crust that defines this classic comfort food.
Up next · Part 3 of 3
2 variations · storage & make-ahead · 3 answers · printable card
Tips, FAQ & printable recipe (Part 3)← Back to the ingredients (Part 1)