Desserts · Part 1 of 3: Ingredients
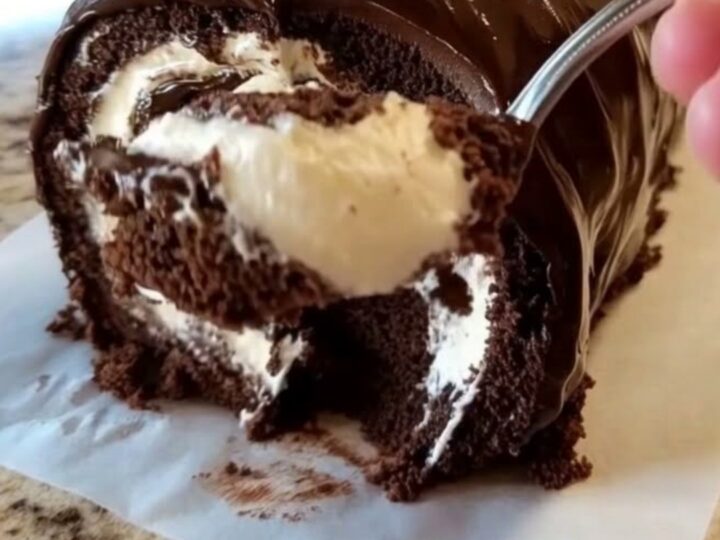
Classic Chocolate Swiss Roll with Whipped Cream
- Prep
- Cook
- Total
- Serves
- 8
Discover the art of creating a decadent chocolate Swiss roll at home. This classic dessert combines a delicate, airy sponge cake with a rich, silky whipped cream filling and a glossy chocolate ganache finish.
Whether you are hosting a dinner party or simply satisfying a sweet tooth, this recipe offers a sophisticated result that is surprisingly simple to assemble. Follow these steps to master the perfect roll and impress your guests with a professional-looking treat that tastes even better than it looks.
A chocolate Swiss roll is a timeless dessert that balances textures and flavors perfectly. The key to this dish is the contrast between the tender, light sponge and the creamy, rich filling. By using a pre-made or prepared sponge cake, you can focus on the technique of rolling and glazing, ensuring a beautiful presentation every time.
This recipe breaks down the process into manageable stages, guiding you through spreading, rolling, and finishing with a decadent chocolate glaze. It is an ideal project for those who enjoy precise, rewarding baking tasks that result in an elegant, crowd-pleasing dessert.
Ingredients
Sponge Cake
- 1 layer chocolate sponge cake, store-bought or made ahead
Filling
- 1 cup heavy cream, whipped
Glaze
- 1/2 cup chocolate ganache, warm
Why this recipe works
The method of rolling the cake tightly with parchment paper ensures a professional, spiral appearance that holds its structure. By applying the cream to a cooled sponge, the filling remains light and airy rather than melting, which is essential for achieving the perfect slice. The parchment also prevents the sponge from sticking to the counter, making the rolling process clean and efficient.
Pouring the ganache while it is still warm allows it to flow smoothly over the curves of the roll, creating a mirror-like finish that highlights the chocolate quality. This layering technique traps moisture inside the sponge, ensuring that every bite is soft and tender. The combination of these steps provides both visual appeal and a harmonious balance of flavors in every single serving of the finished cake.
Notes and substitutions
For the best results, use a high-quality cocoa powder in the sponge to ensure a deep chocolate flavor that complements the richness of the ganache. If making the sponge from scratch, ensure it is thin enough to roll without cracking, as thickness directly impacts the ease of assembly.
A serrated knife is highly recommended for slicing, as it allows you to cut through the delicate sponge and firm ganache without squishing the roll.
The choice of chocolate for the ganache significantly affects the final sweetness; using a semi-sweet or bittersweet variety is generally preferred to balance the sugar in the sponge and cream.
If you prefer a more stable filling, you can fold a small amount of gelatin into the whipped cream, though this is optional. Always keep your workspace clean and use fresh parchment paper for each stage to ensure the cake does not tear during the rolling process.
- Heavy cream: A stable whipped topping or thick coconut cream can be used for a different texture.
- Chocolate ganache: A simple chocolate fudge sauce or melted chocolate thinned with a little butter works well.
Equipment
- Parchment paper
- Offset spatula
- Mixing bowl
- Whisk
Up next · Part 2 of 3
3 steps · 15 min of cooking · what to look for at each stage
Step-by-step instructions (Part 2)