Appetizers · Part 2 of 3: Instructions
Cinnamon Sugar Roasted Pumpkin Seeds Step-by-step instructions
- Prep
- Cook
- Total
- Serves
- 4
Before you start
Before beginning, ensure the oven is fully preheated to the correct temperature. Gather all ingredients and equipment, such as the baking dish and measuring tools, to make the process seamless. If the pumpkin seeds have been harvested from a fresh pumpkin, ensure they have been cleaned of all stringy pulp and dried thoroughly with a clean towel.
Having everything ready to go before the oven reaches temperature allows for a smooth transition from preparation to roasting, which helps ensure the best possible texture for the finished snack.
Ingredients at a glance (3)
- 2 cups raw pumpkin seeds
- 2 tbsp melted butter
- 2 tbsp cinnamon sugar
Instructions
Preparation and spreading
- Prepare the seedsPreheat the oven to 325°F (165°C). Spread the raw pumpkin seeds in an even, thin layer across the bottom of a large rectangular baker. Ensure the seeds are not piled too high to allow for even roasting.Look for The seeds should be spread out in a single layer.Tip Using a wide, shallow dish helps the seeds crisp up faster.
At this phase, the seeds should be spread out in a thin, even layer across the surface of the baker. They should look clean and dry, ready for the butter and sugar application. Ensure there are no large clumps of seeds, as this will lead to uneven roasting. The oven should be fully preheated, creating a consistent environment for the roasting process to begin effectively once the dish is placed inside.
Seasoning and coating
- Add butter and seasoningDrizzle the melted butter evenly over the seeds. Sprinkle the cinnamon sugar mixture over the buttered seeds, covering them thoroughly to ensure each seed gets a coating of the sweet mixture.Look for The butter and sugar should be distributed across the top.Tip Use a spoon to toss the seeds if needed for better coverage.
After adding the butter and cinnamon sugar, the seeds should appear lightly coated and glossy. The sugar should be distributed as evenly as possible to avoid concentrated sweet spots.
Check that the butter has been drizzled across the entire surface area, as this will help the cinnamon sugar stick to the seeds during the roasting phase. The seeds are now ready to be moved into the oven for the transformation into a crispy, golden snack.
Roasting and finishing
- Roast until crunchyPlace the baker in the oven and roast for about 25 minutes. Check the seeds occasionally to ensure they are toasting golden brown without burning. Once toasted, remove from the oven and let them rest for 5 minutes before serving to ensure maximum crunch.Look for The seeds should be golden brown and smell fragrant.Tip Do not leave the oven unattended, as sugar can burn quickly.
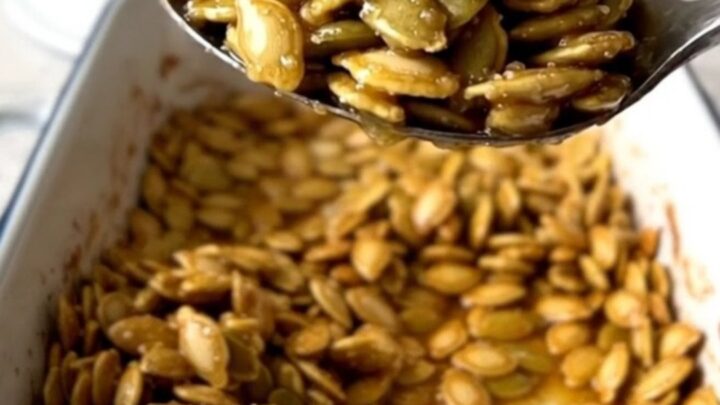
The seeds are finished when they have reached a deep golden hue and the kitchen smells fragrant with toasted cinnamon and butter. They should be uniformly toasted and feel dry to the touch. Once removed from the oven, they will look slightly darker than when they went in. Allow them to rest for the full duration to ensure they are perfectly crunchy and cooled enough to handle before serving or transferring to storage.
Common mistakes
A common mistake is overcrowding the baking dish, which prevents the seeds from roasting evenly and leads to soft spots. Another error is failing to watch the oven; because the seeds are coated in sugar, they can transition from perfectly toasted to burnt in just a minute or two.
Finally, rushing the cooling process can be a mistake, as the seeds need that short rest to firm up and reach their optimal level of crunchiness before being served or stored for later.
How to tell it’s done
The seeds are done when they have achieved a consistent golden-brown color throughout the batch. They should look slightly toasted and feel firm to the touch rather than soft or pliable.
When taken out of the oven, they might still be slightly warm, but the final crunch develops as they cool down during the resting period. Always look for that deep, rich color and listen for a crisp sound when a seed is pressed, indicating they are perfectly roasted and ready to eat.
Up next · Part 3 of 3
2 variations · storage & make-ahead · 3 answers · printable card
Tips, FAQ & printable recipe (Part 3)← Back to the ingredients (Part 1)