Desserts · Part 2 of 3: Instructions
Chocolate-Covered Stuffed Date Hearts Step-by-step instructions
- Prep
- Cook
- Total
- Serves
- 12
Before you start
Before starting, line a baking sheet with parchment paper and set aside. Pit the dates and open them like books. Prepare the pistachio cream or peanut butter by transferring it to a piping bag.
Melt the milk chocolate and white chocolate separately, either in a double boiler or in the microwave in 20-second bursts, stirring until smooth. Have a toothpick and skewers ready for dipping and marbling.
Ingredients at a glance (4)
- 12 large Medjool dates
- 1 tbsp pistachio cream or creamy peanut butter
- 1 1/2 cups melted milk chocolate
- melted white chocolate, for piping, to taste
Instructions
Fill and Shape
- Prepare the DatesSlit each date lengthwise down the center and remove the pit. Open the dates gently like butterfly wings, keeping the two halves attached at one side. Place the pitted dates on a clean work surface.Look for Each date should open like a book, with the two sides still connected at the base.Tip Choose plump, soft Medjool dates for easy pitting and shaping.
- Fill the CavitiesTransfer the pistachio cream or peanut butter to a piping bag. Pipe about 1 generous tablespoon of the cream into the cavity of each date, filling it evenly.Look for The filling should sit neatly inside the date without overflowing.Tip If the cream is too stiff, warm it slightly to make piping easier.
The dates should be neatly split, pitted, and filled with a generous spoonful of cream. When pinched, they hold a clear heart shape with the two top flaps curving inward. The filling should be visible but not overflowing. The dates should feel soft and pliable, ready for dipping.
Coat and Decorate
- Shape the HeartsPinch the base of each stuffed date and curve the two top flaps inward with your fingertips to form a heart silhouette. Press gently to hold the shape.Look for The date should resemble a small heart, with the pointed end at the bottom and two rounded lobes at the top.Tip Work gently so the date doesn't tear; the natural stickiness helps hold the shape.
- Dip in ChocolateInsert a skewer into the bottom of each heart date. Dip each heart completely into the melted milk chocolate, allowing any excess to drip off. Place the dipped hearts on a parchment-lined baking sheet.Look for The chocolate coating should be smooth and evenly cover the date, with no bare spots.Tip Tap the skewer gently against the bowl to remove excess chocolate for a neat finish.
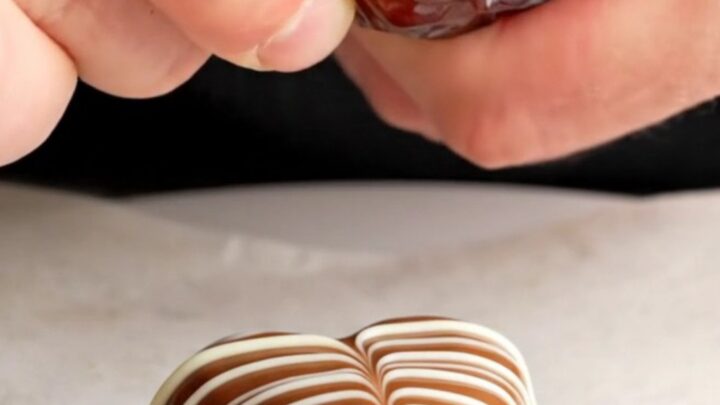
Each date is fully coated in milk chocolate, with a smooth, even layer. The white chocolate lines are piped across the top, and the toothpick drags create delicate feathered marbled hearts. The chocolate is still wet and glossy, so the pattern is visible and distinct.
Set and Serve
- Pipe White Chocolate LinesTransfer the melted white chocolate to a piping bag with a fine tip. Pipe delicate lines of white chocolate across the top of each chocolate-covered date, creating a striped pattern.Look for The white chocolate lines should be thin and evenly spaced across the surface.Tip Work quickly before the milk chocolate sets, so the lines can be feathered.
- Create the Marbled HeartWhile the white chocolate is still wet, drag a toothpick through the lines in a continuous motion to create a feathered marbled heart pattern. Repeat for each date.Look for The toothpick drags should create elegant, feathery curves that resemble a heart.Tip Work in one smooth stroke for the best marbled effect.
- Chill and SetPlace the baking sheet in the refrigerator and let the chocolate set for 15 minutes, until the coating is firm and crisp.Look for The chocolate should be firm to the touch and no longer shiny.Tip Chilling helps the chocolate shell snap cleanly when bitten.
After chilling, the chocolate is firm and crisp. The marbled hearts are clearly defined, and the dates are easy to handle without smudging. The aroma is rich with chocolate and nutty filling, and the shells make a satisfying sound when gently tapped.
Common mistakes
One common mistake is overfilling the dates, which makes shaping difficult and can cause the chocolate to crack. Use the recommended amount of filling and press the flaps together gently.
Another issue is dipping the dates when the chocolate is too hot, which can melt the filling and cause the chocolate to slide off.
Allow the melted chocolate to cool slightly before dipping. Finally, do not skip the chilling step, as it is essential for the chocolate to set properly.
How to tell it’s done
The stuffed dates are done when the chocolate coating is firm and crisp to the touch, and the white chocolate lines have set. To test, gently press the side of a date; the chocolate should not give.
If the chocolate is still soft, return the tray to the refrigerator for a few more minutes. The finished date hearts should have a shiny, smooth shell and a clean snap when bitten.
Up next · Part 3 of 3
4 variations · storage & make-ahead · 5 answers · printable card
Tips, FAQ & printable recipe (Part 3)← Back to the ingredients (Part 1)