Desserts · Part 2 of 3: Instructions
Chilled Oreo and Chocolate Ganache Layer Cake Step-by-step instructions
- Prep
- Cook
- Total
- Serves
- 8
Before you start
Before beginning assembly, measure all ingredients and ensure your workspace is prepared. Chill the mixing bowl and beaters in the freezer for ten minutes so the cream whips quickly and holds maximum volume.
Have the cake base trimmed to fit neatly inside the square glass dish. Chop the chocolate finely and place it into a heatproof bowl. Finally, verify that there is a flat, level shelf cleared in the refrigerator where the assembled dessert can chill undisturbed.
Ingredients at a glance (5)
- 1 layer chocolate cake, store-bought or made ahead
- 1 1/2 cups heavy cream, chilled
- 6 oz semisweet chocolate, finely chopped
- 1/2 cup heavy cream
- 6 whole chocolate sandwich cookies, crushed or whole
Instructions
Whipping the cream layer
- Prepare the cream layerPour the chilled heavy cream into a large, clean mixing bowl. Beat the heavy cream using an electric hand mixer on medium-high speed until stiff peaks form and the texture turns thick and billowy. Be careful not to overwhip the mixture, stopping as soon as the cream holds its shape firmly.Look for The cream stands upright on the beaters without slumping.Tip Chill the bowl and beaters in the freezer for ten minutes beforehand.
The whipped cream should form firm, defined peaks that stand straight up when the beaters are lifted from the bowl. The texture must appear satiny, uniform, and light without any curdling or graininess along the edges. Check that no liquid cream remains unwhipped at the bottom of the bowl before proceeding to the assembly step.
Layering the base and cream
- Assemble the cake base and creamFit the prepared chocolate cake layer snugly into the bottom of an eight-inch square glass dish. Spoon the whipped white cream over the top of the chocolate base and spread it into an even, level layer using an offset spatula, ensuring it completely seals against all four glass edges.Look for The cream surface is smooth, level, and reaches every corner.Tip Wipe the spatula clean with a warm cloth for an ultra-smooth finish.
The chocolate cake layer should sit flat and secure against the floor of the glass dish without large air pockets. The whipped cream must be spread in a continuous, level plane that seals tightly against all four glass walls. Look through the sides of the dish to confirm that the border between cake and cream is crisp, straight, and clean.
Pouring ganache and setting
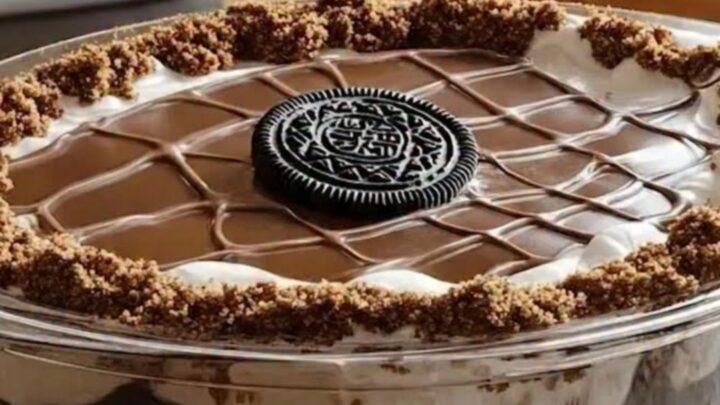
- Make ganache and garnishWarm the remaining heavy cream in a small saucepan until gently steaming. Pour it over the chopped semisweet chocolate, let sit for two minutes, and stir gently until glossy and smooth. Pour the ganache over the cream layer, reserving two tablespoons in a piping bag to pipe a delicate grid design across the surface. Scatter crushed cookie crumbs along the borders and place one whole sandwich cookie squarely in the center. Refrigerate for at least two hours before slicing.Look for The ganache is glossy, pourable, and sets firm upon chilling.Tip Ensure the ganache cools to lukewarm before pouring over the cream.
The chocolate ganache should coat the back of a spoon smoothly without streaks or oil droplets before it is poured. Once poured, it should level out naturally over the cream into an even sheet.
After piping the grid and applying the cookie garnish, the dish must sit completely flat in the refrigerator until the surface cools to a firm, matte finish.
Common mistakes
A frequent error is pouring the chocolate ganache while it is still hot from the stove. Excess heat instantly melts the whipped cream layer, causing the ganache to sink and creating a muddy, uneven surface.
Always allow the ganache to cool until barely warm to the touch before pouring. Another mistake is over-whipping the cream, which turns it grainy and dense rather than light and spreadable; stop mixing the moment stiff peaks hold their form.
How to tell it’s done
The dessert is fully ready when the chocolate ganache has set to a firm, smooth, non-sticky surface that yields softly to gentle pressure. The whipped cream underneath should remain stable, aerated, and completely white without weeping moisture into the cake layer.
When a spoon scoops into the dessert, it should cleanly cut through the set ganache and aerated cream, pulling up all three layers intact with distinct, sharp visual separation throughout.
Up next · Part 3 of 3
2 variations · storage & make-ahead · 3 answers · printable card
Tips, FAQ & printable recipe (Part 3)← Back to the ingredients (Part 1)